
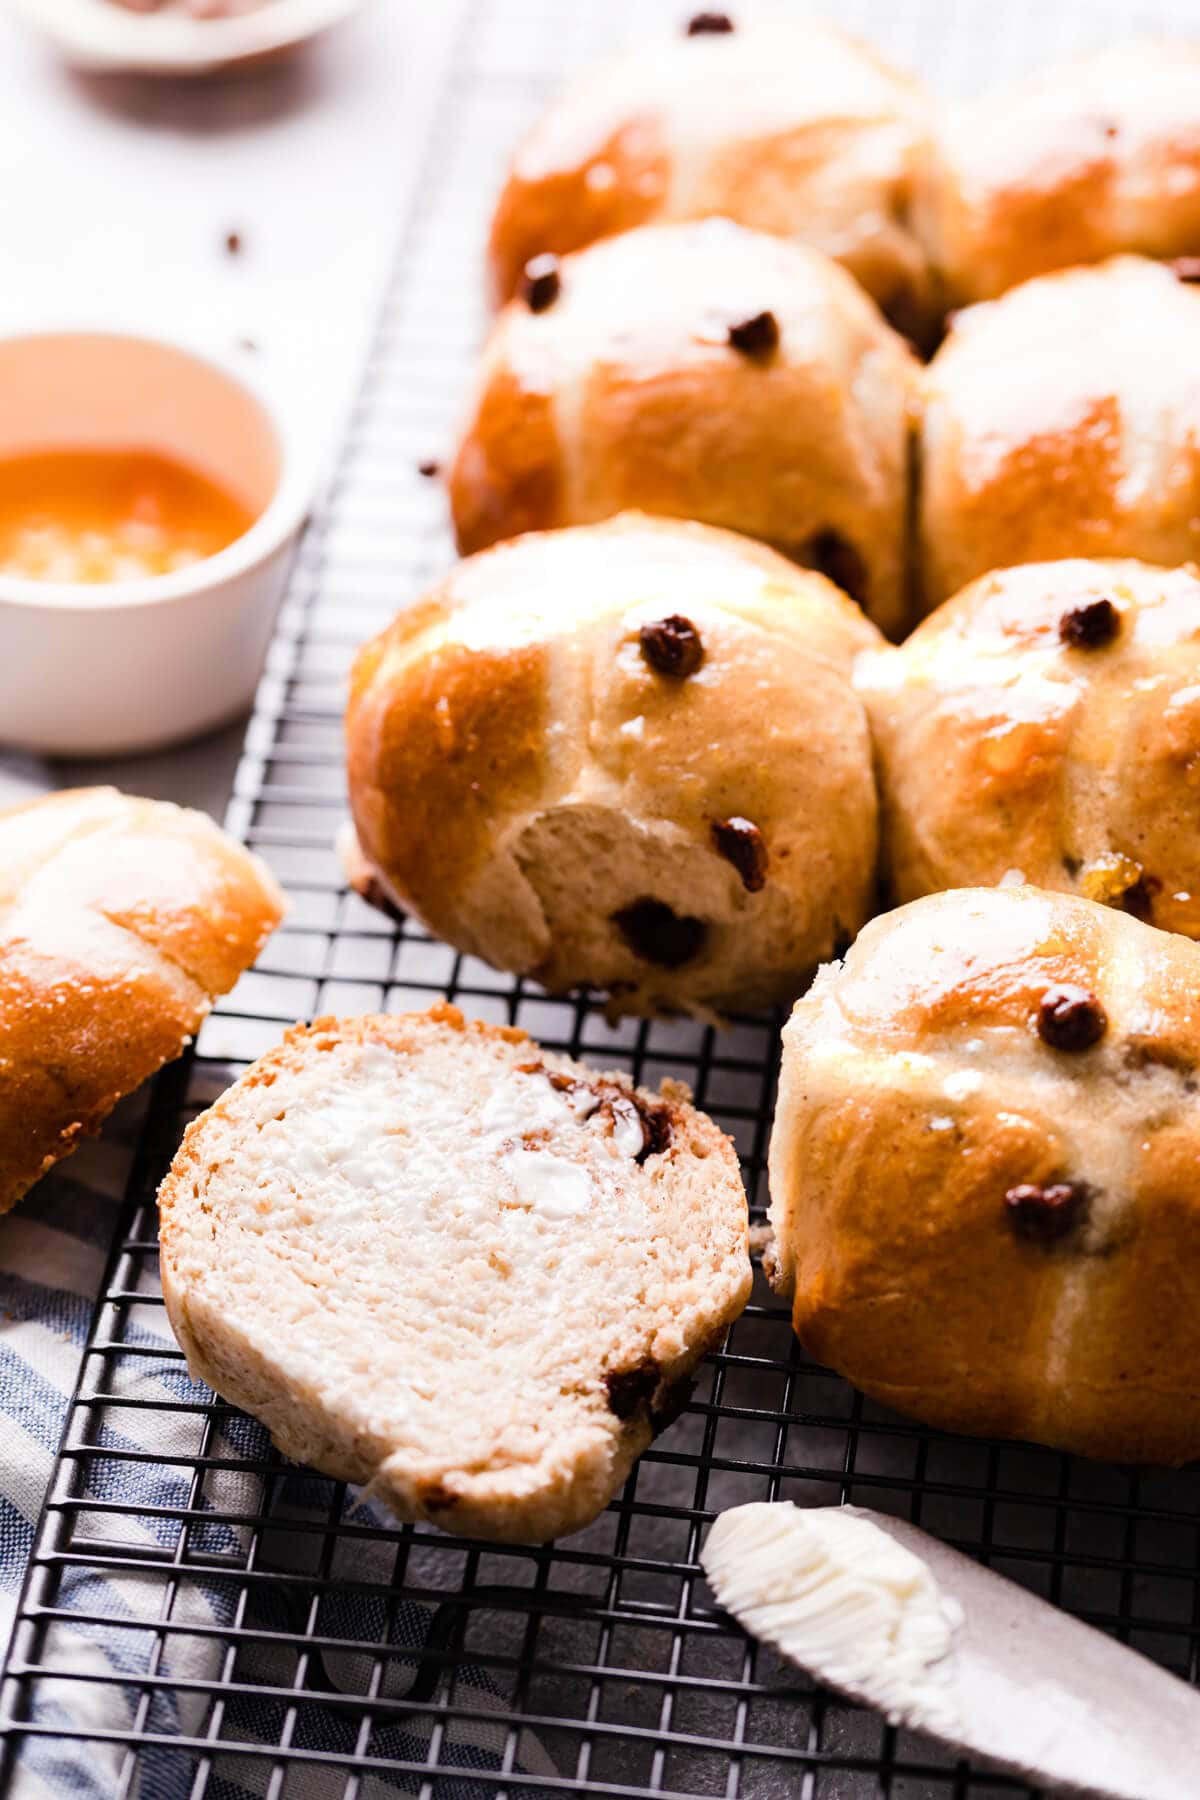
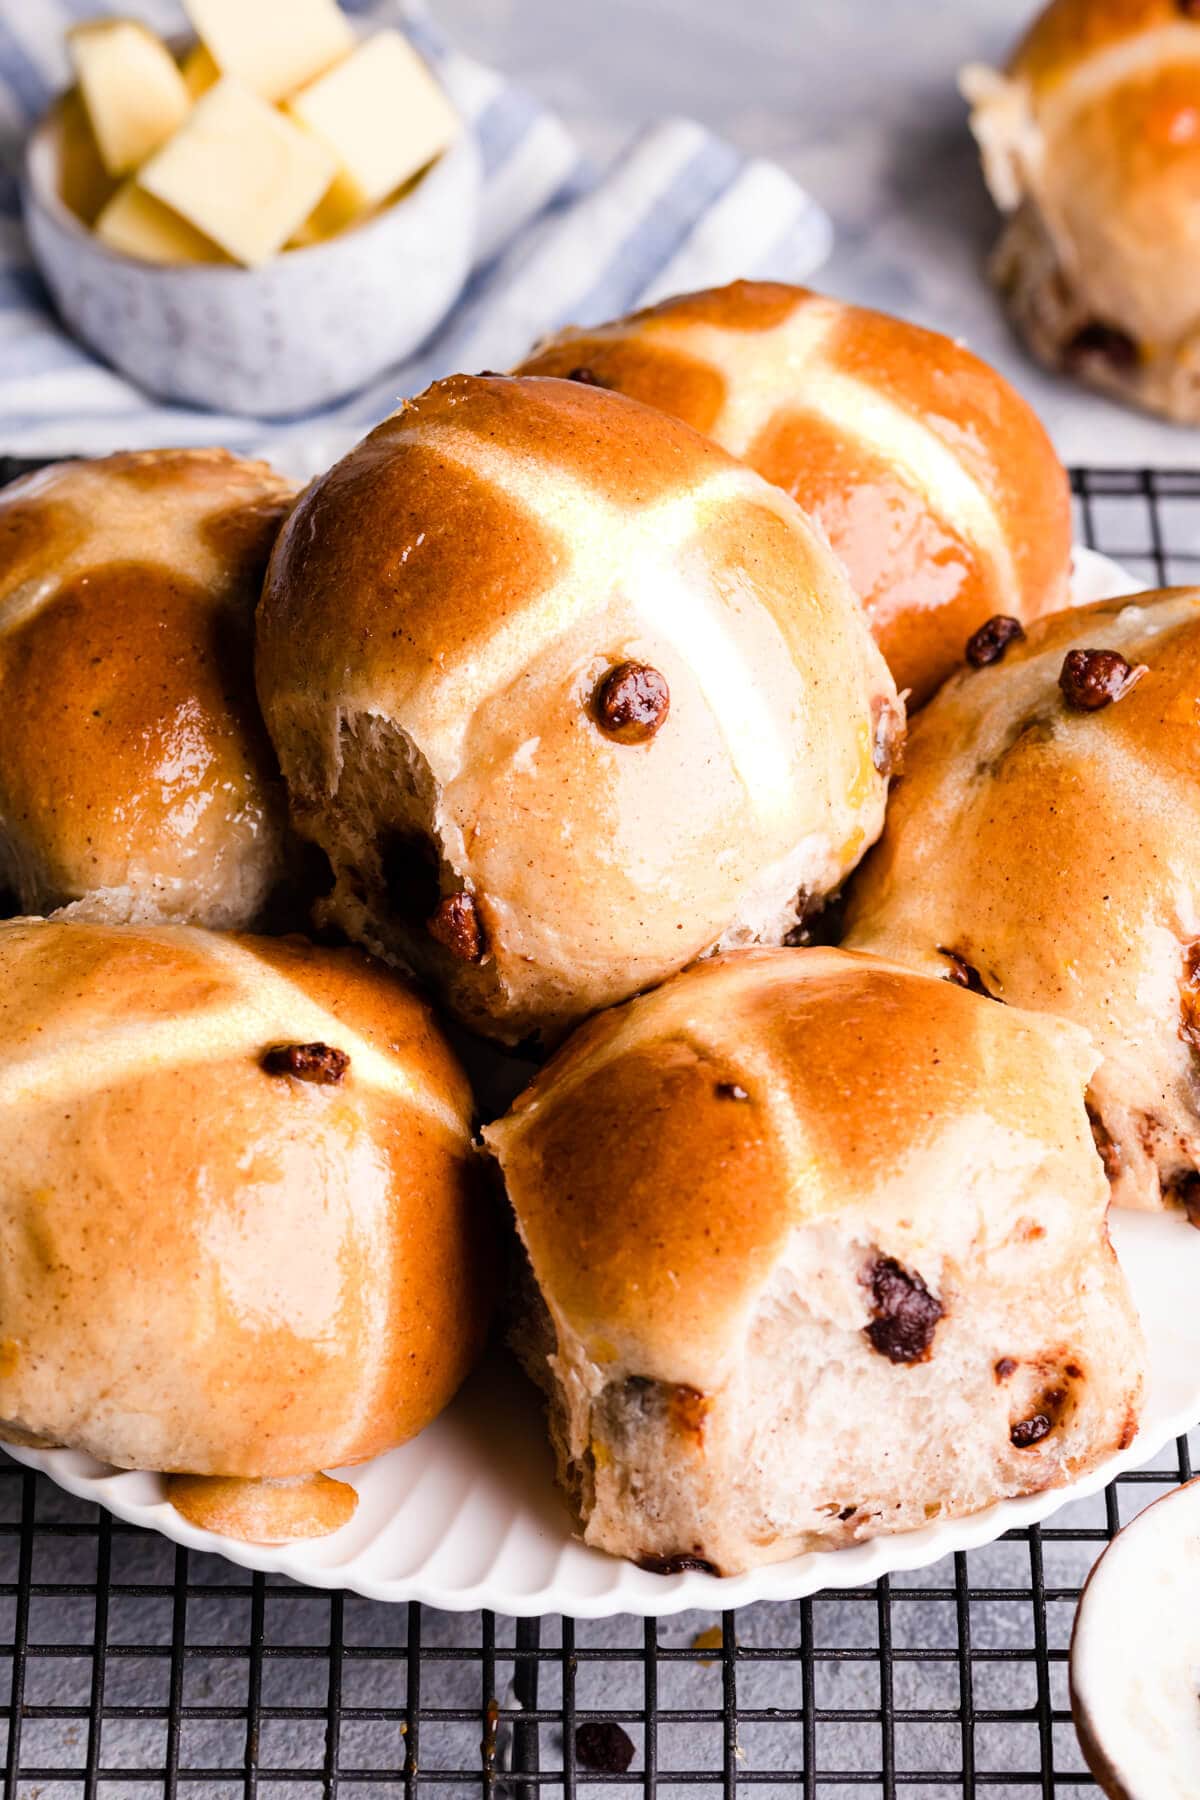
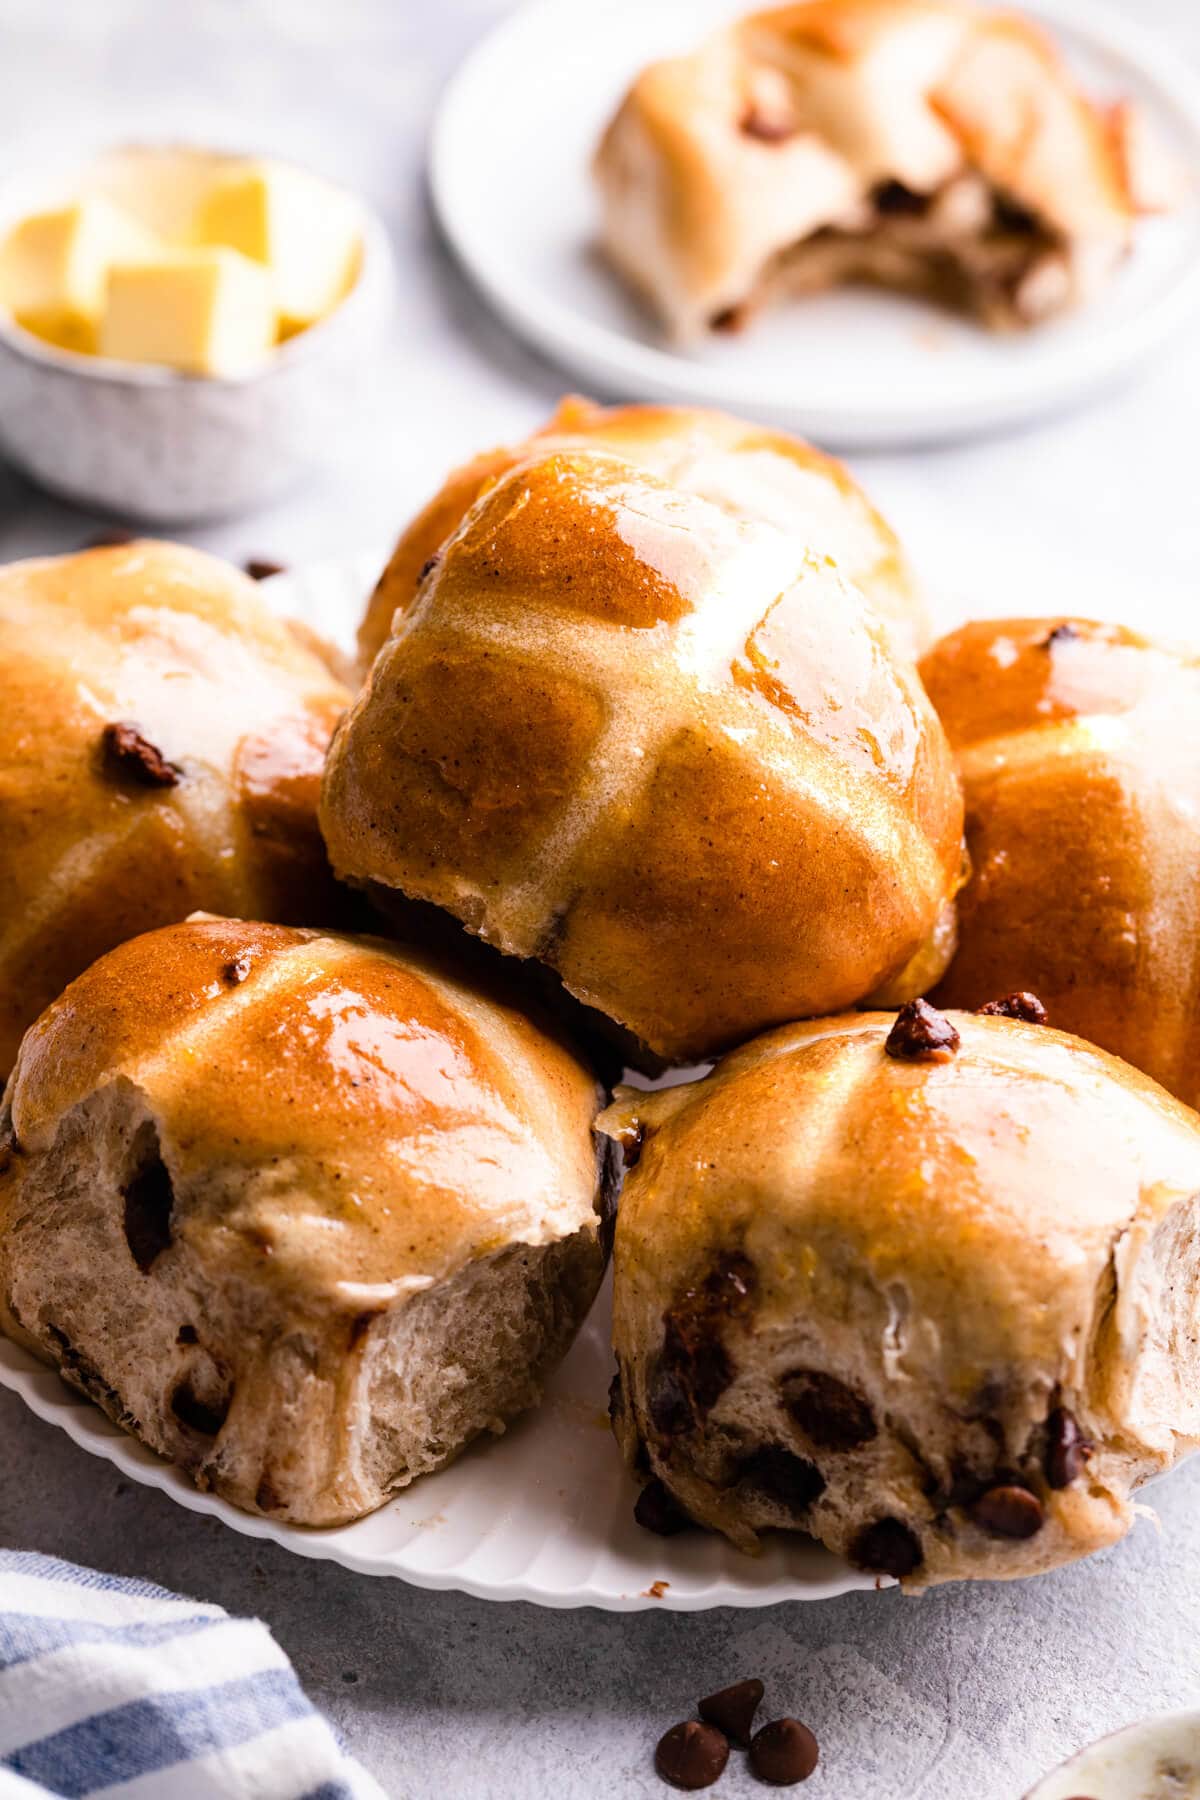
These are the BEST chocolate chip hot cross buns you will ever make! With super soft and fluffy texture, chunks of chocolate, sweet marzipan and beautiful, shiny and sticky glaze, they are impossible to resist, especially when still warm from the oven!
They will make a great addition to your Easter breakfast or brunch, and are perfect for sharing!

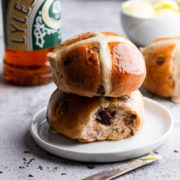
This recipe is similar to my Blueberry Hot Cross Buns, and both are absolutely perfect to enjoy with friends and family during the Easter holidays and beyond! If you are looking for some other Easter recipes, be sure to check out my Mini Egg Easter Blondies or these Chocolate Mini Cheesecakes too!
It is a traditional hot cross buns recipe, with all the iconic spices, but with chocolate chips instead of the raisins or dried fruit.
Ingredients
Only few simple ingredients are required for this choc chip hot cross buns recipe:
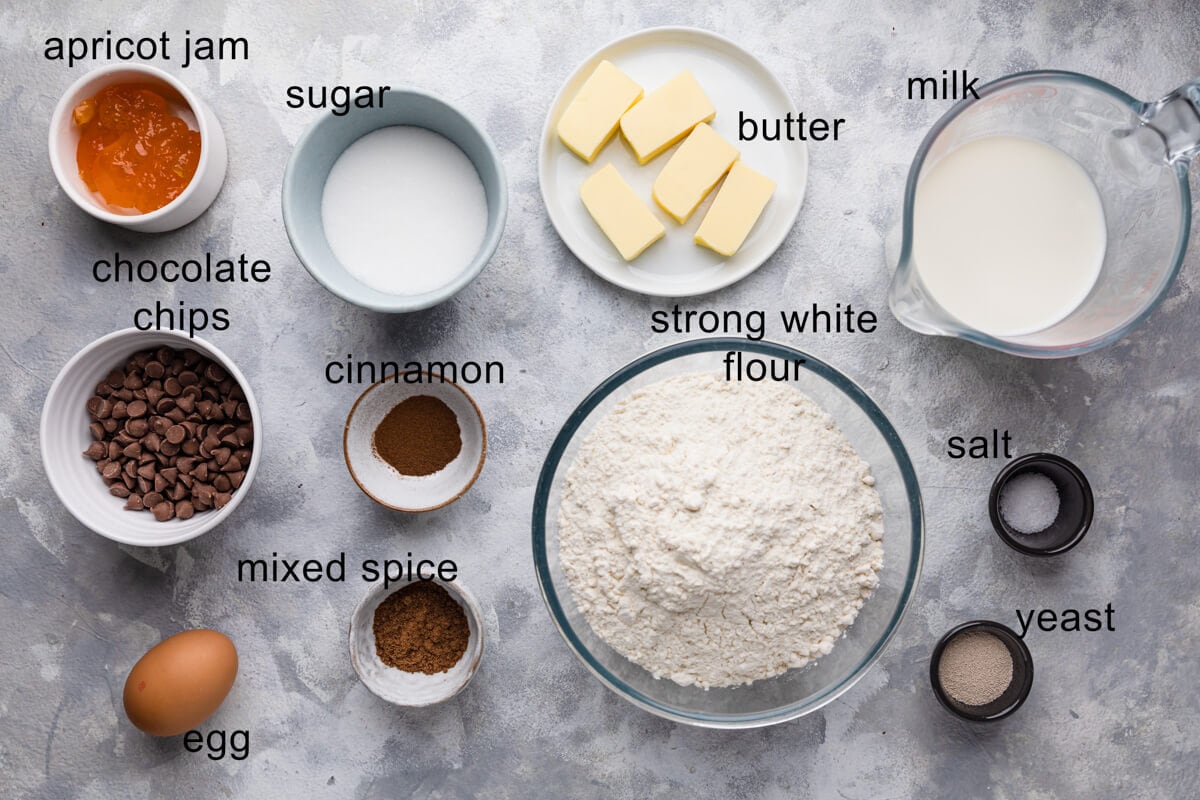
Dry ingredients: Strong white bread flour, sugar, yeast, ground mixed spice, ground cinnamon, salt and chocolate chips.
Wet ingredients: Milk, butter, egg, apricot jam.
Instructions
Watch the video in the recipe card to see how I made these buns!
Start this recipe by warming up the milk and the butter. Place them both in a small saucepan over the small heat, and allow the butter to melt. Remove the mixture from the heat, and set it aside to cool until lukewarm.
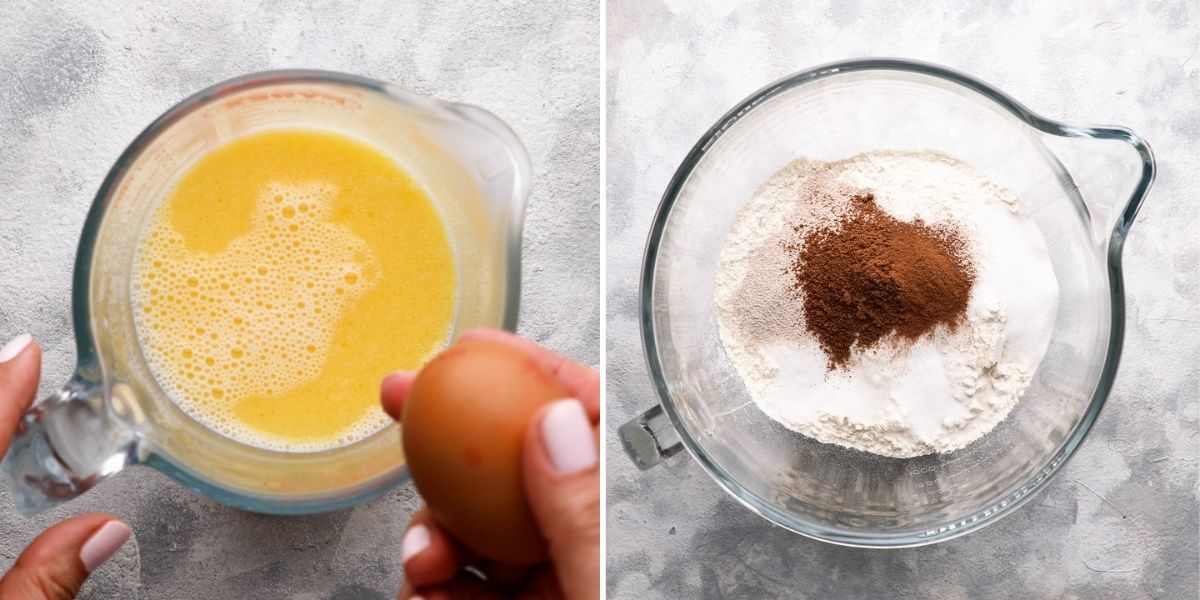
Once the milk and butter mixture has cooled, add one large egg into it and whisk it well. Next, combine all of the dry ingredients together in a bowl of a stand mixer. Pour the melted butter and milk mixture into the dry ingredients and mix it on low speed, until the dough comes together.
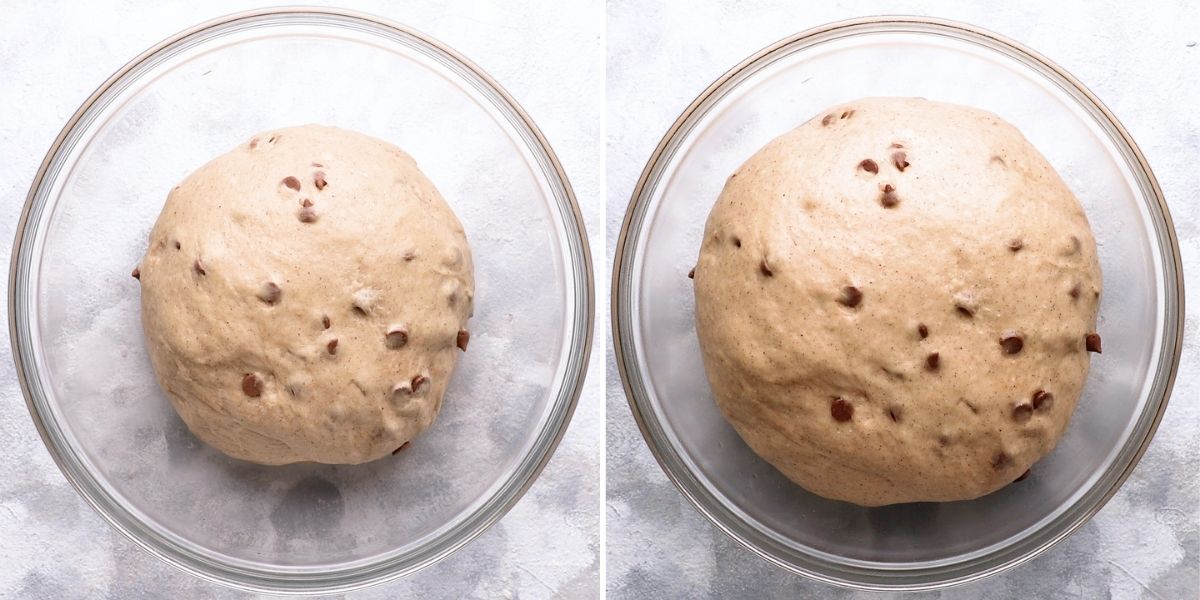
Remove the dough from the bowl and transfer it onto a floured surface. Add the chocolate chips and knead them by hand into the dough, until evenly combined. Shape the dough into a ball and place it into a bowl. Cover the dough and allow it to prove.
Hint: The tumble dryer is a perfect place to prove the dough in! Simply run it empty for 4-5 minutes, turn it off, place the dough inside, and let it sit there until it is ready. It's a perfect environment for proving the dough as it is warm and draft-free.
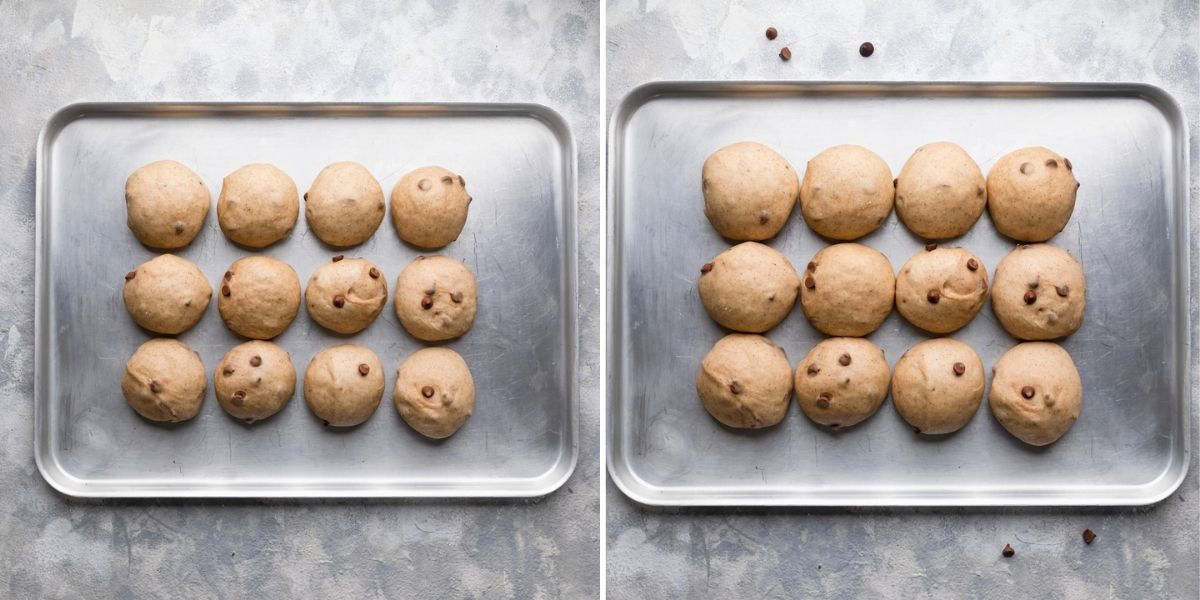
When the dough is ready, gently knock it down again and divide it into 12 parts (use digital kitchen scales if you want to be precise) and roll each part into a small bun.
Place the buns onto the baking sheet/ baking tray, and allow them to prove for about 20-30 minutes.
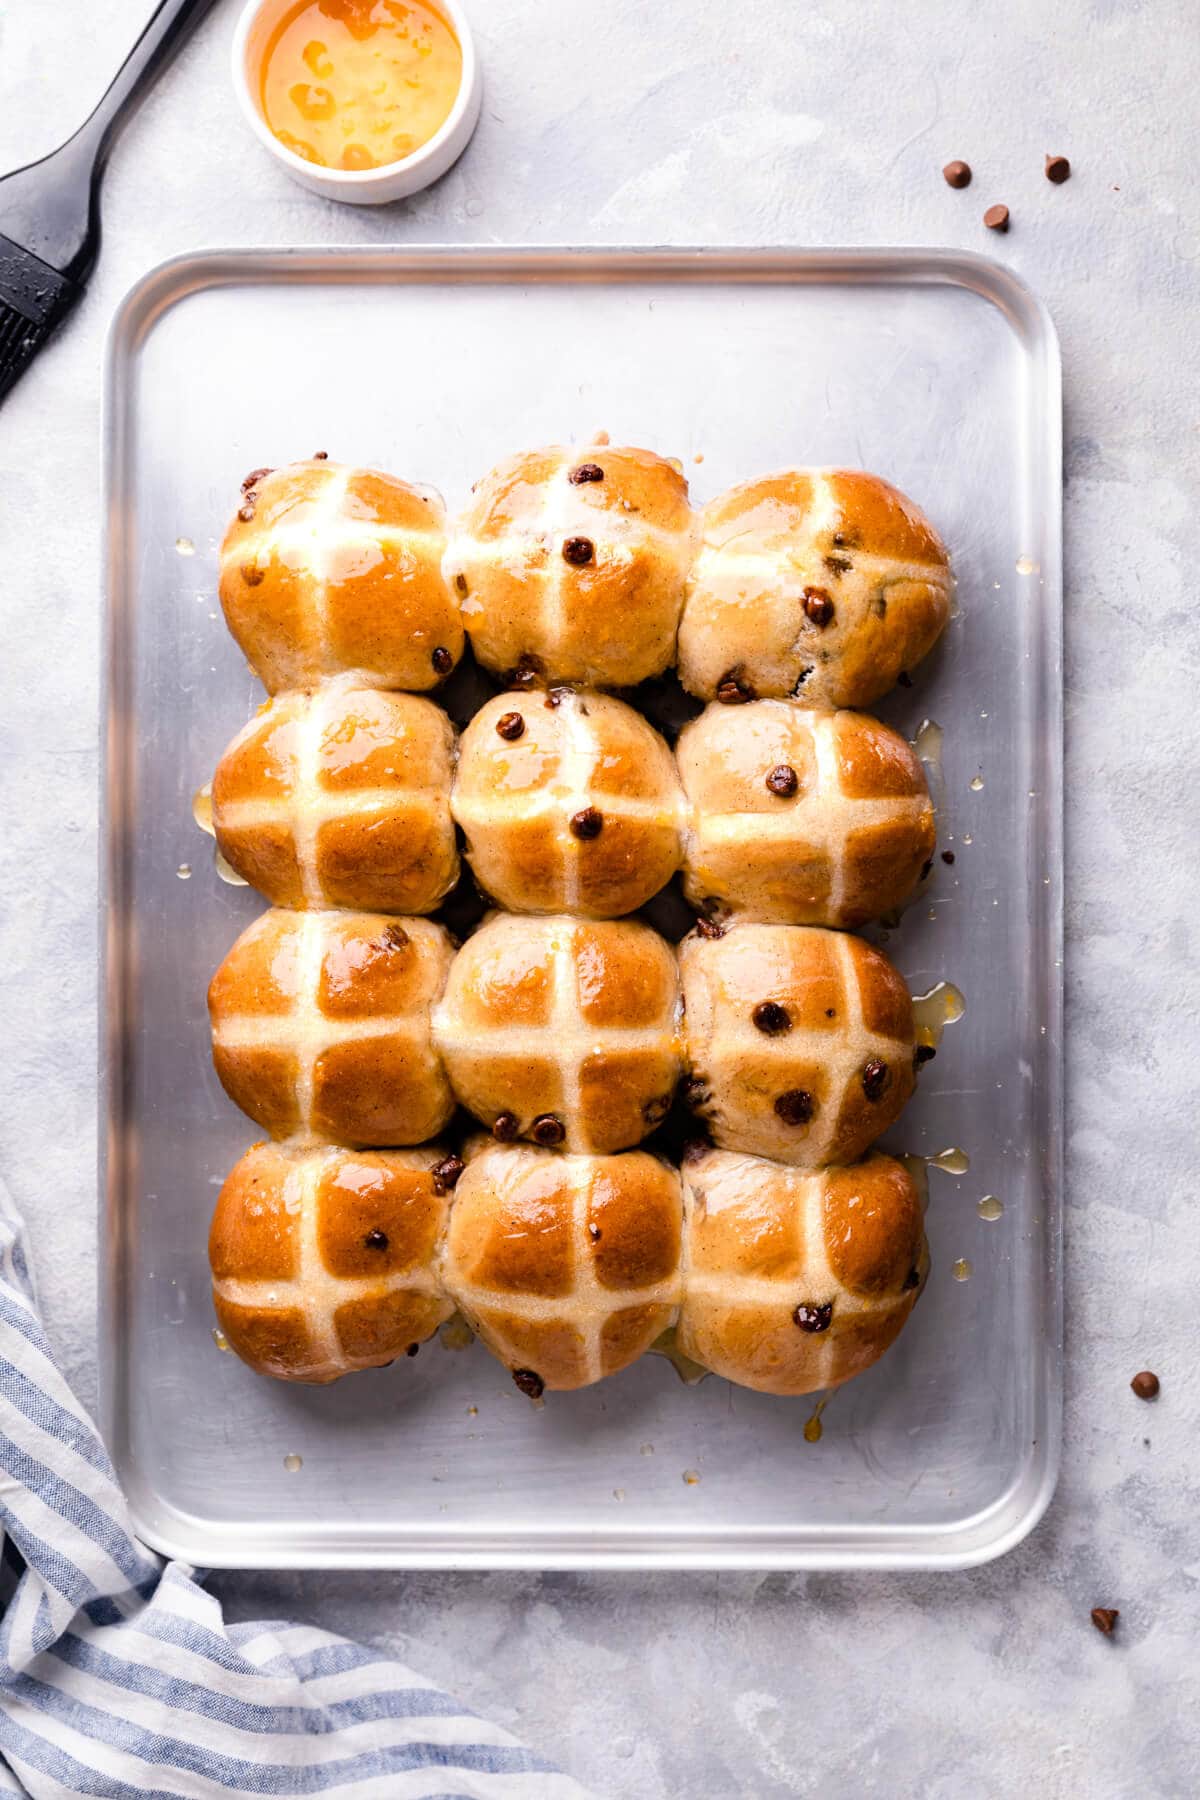
Pipe the cross pattern on top of the buns and bake them for 15 minutes, until golden brown. Brush the warm buns with some warm apricot jam to give them that beautiful, shiny glaze on top.
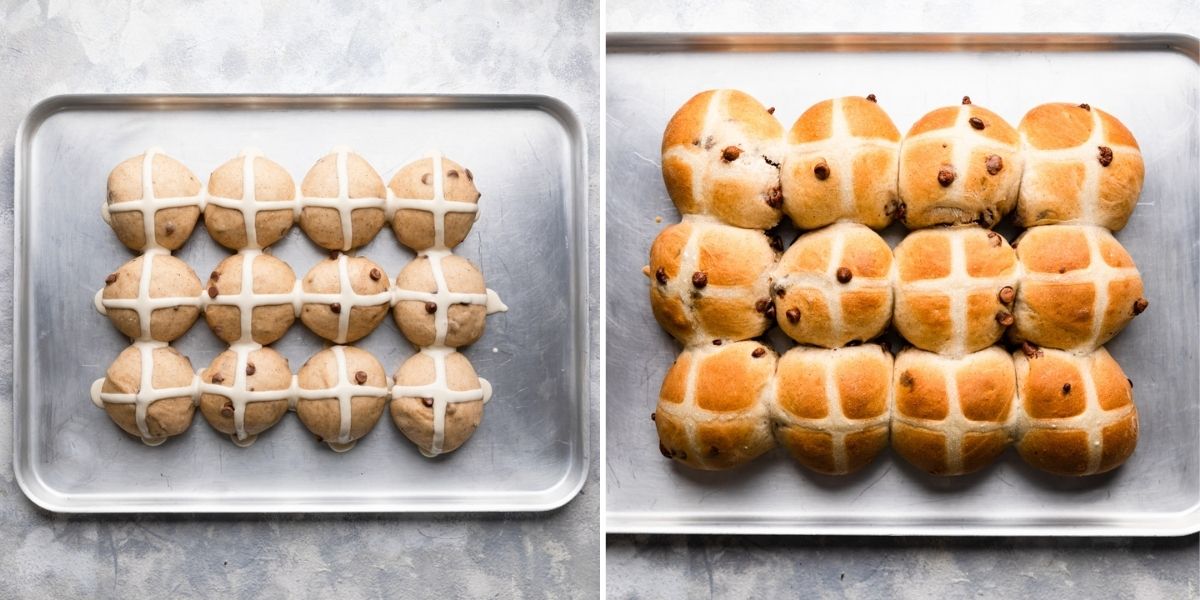
Hint: Pipe crosses slowly, ensuring that the paste wraps around each bun. It is easier to pipe the horizontal and vertical lines across the whole batch, rather than individual crosses on each bun.
Substitutions
See the suggestions below for some swaps and substitutions that you can make to this recipe:
Strong white bread flour - This type of flour produces chewier texture of the buns, but you can also use plain/ all purpose flour instead, in the exact same amount (500g).
Yeast - I used fast action dried yeast, as it can be added straight into the dry ingredients, without the need to 'activate' it first. Any type of active dry yeast can be used, like instant or easy bake for example.
Chocolate chips - You can use dark or milk chocolate chips or discs. You can also use chopped chocolate instead. Make sure to chop it finely, to make it easy to incorporate it into the dough.
Milk - Any type of milk will work, including the plant-based alternatives.
Apricot jam - Only a small amount is needed for the glaze (about 2-3 Tbsp), but you can also use golden syrup, honey, orange marmalade or jelly instead.
Variations
When it comes to these chocolate chip hot cross buns, you can add many other ingredients and flavours to them. Here are few ideas to get you strated:
Marzipan - I love adding some chopped marzipan to the dough. It adds lovely sweetness and fragrance of almonds to the buns. Simply chop 100g of marzipan and knead it into the dough along with the chocolate chips.
Dried fruit - You could use any dried fruit, just like in the more traditional HCB recipes. Raisins or sultanas, dried cranberries or mixed peel will work well.
Citrus - To enhance the flavour and add some aromatic fragrance to the buns, try adding some orange or lemon zest into the dough.
Gluten free hot cross buns - If you are looking for gluten free hot cross buns, you may want to check out this Gluten Free Hot Cross Buns recipe from The Loopy Whisk blog.
Vegan hot cross buns - This Vegan Hot Cross Buns recipe from Domestic Gothess is one of the best ones out there!
Equipment
- Freestanding mixer - It is much easier to make this recipe using stand mixer with the dough hook attachment. Not only it takes all the hard work away, but it also saves a lot of time. However, if you do not have one of those in your kitchen, you can also simply knead the dough by hand. Just bear in mind that it will take longer to knead, about 10- 15 minutes.
- Baking tray or baking sheet - As this recipe makes 12 buns, you will also need a large baking sheet. Alternatively, you can use two small baking sheets, placing 6 buns on each.
- Kitchen scales - Digital kitchen scales come very handy in this recipe, as they will allow you to precisely weigh each piece of dough. That way, all the buns will be equal in size.
- Piping bag - For piping the crosses. You can use it with or without the nozzle. If using a nozzle, I would recommend using a small, plain one (3mm one works best for me). You could also use a zip lock style bag instead, and just snip of one of the corners with the scissors to create an opening.
- Pastry brush - For brushing the glaze on top of the buns.
Storage
Choc chip hot cross buns are always best eaten fresh, on the day they were made. Store any leftovers in the airtight container at room temperature for up to 3 days.
Hot cross buns can be reheated in the oven or in the toaster. To reheat them in the oven, preheat the oven to 150°C (fan). Place the buns on baking tray and cover with some kitchen foil. Heat them for 5-10 minutes, remove from the oven and serve.
You can also simply slice the buns in half and place them in the toaster.
The buns are also suitable for freezing. You can do so before or after baking them. If you are freezing baked buns, then simply place them in the freezer-friendly bags or containers, then keep in the freezer for up to 2 months. Make sure the buns are completely cool before doing so.
Thaw them at room temperature for a couple of hours, then warm them in the oven, or toaster, as per the instructions above.
To freeze the unbaked dough, shape the buns as per the recipe instructions, and place them on the baking sheet lined with baking paper. Cover the buns loosely with clingfilm and place in the freezer. Once frozen, transfer them into bags or containers (freezer-friendly).
To use the frozen rolls, you will need to transfer them into greased baking sheet and cover loosely with damp tea towel or greased clingfilm. Leave them in a warm place to thaw and to prove (3-5 hours, depending on your room temperature). Bake the buns as per the recipe instructions below.
FAQ's
Can this recipe be made ahead?
Yes it can. For an overnight prove, prepare the recipe through step 3. Cover the buns and store in the fridge for up to 12-15 hours. At least hours before you want to serve them, remove the buns from the fridge and let them rise and come to the room temperature. Bake as per the recipe instructions.
Alternatively, you can also let the dough has it first rise in the fridge overnight. Remove it from the fridge and allow the dough to prove for 2 hours at room temperature, before continuing to step 4.
Why are my hot cross buns heavy?
Heavy or hard hot cross buns can be caused by few things like: over or under-kneading the dough, using the milk that was too hot (hot milk may kill the yeast, so it is important to use slightly warm/ lukewarm milk), or using the yeast that was out of date. Always check the date on your yeast!
Can the cross pattern be made with anything else than flour paste?
You can create the cross pattern on top of the buns using few different methods and ingredients. One is to simply use a knife to create an imprint that looks like cross. The other method is to pipe the cross made from icing sugar onto each bun. You could also use some melted chocolate or even some rolled marzipan to create the crosses on top!
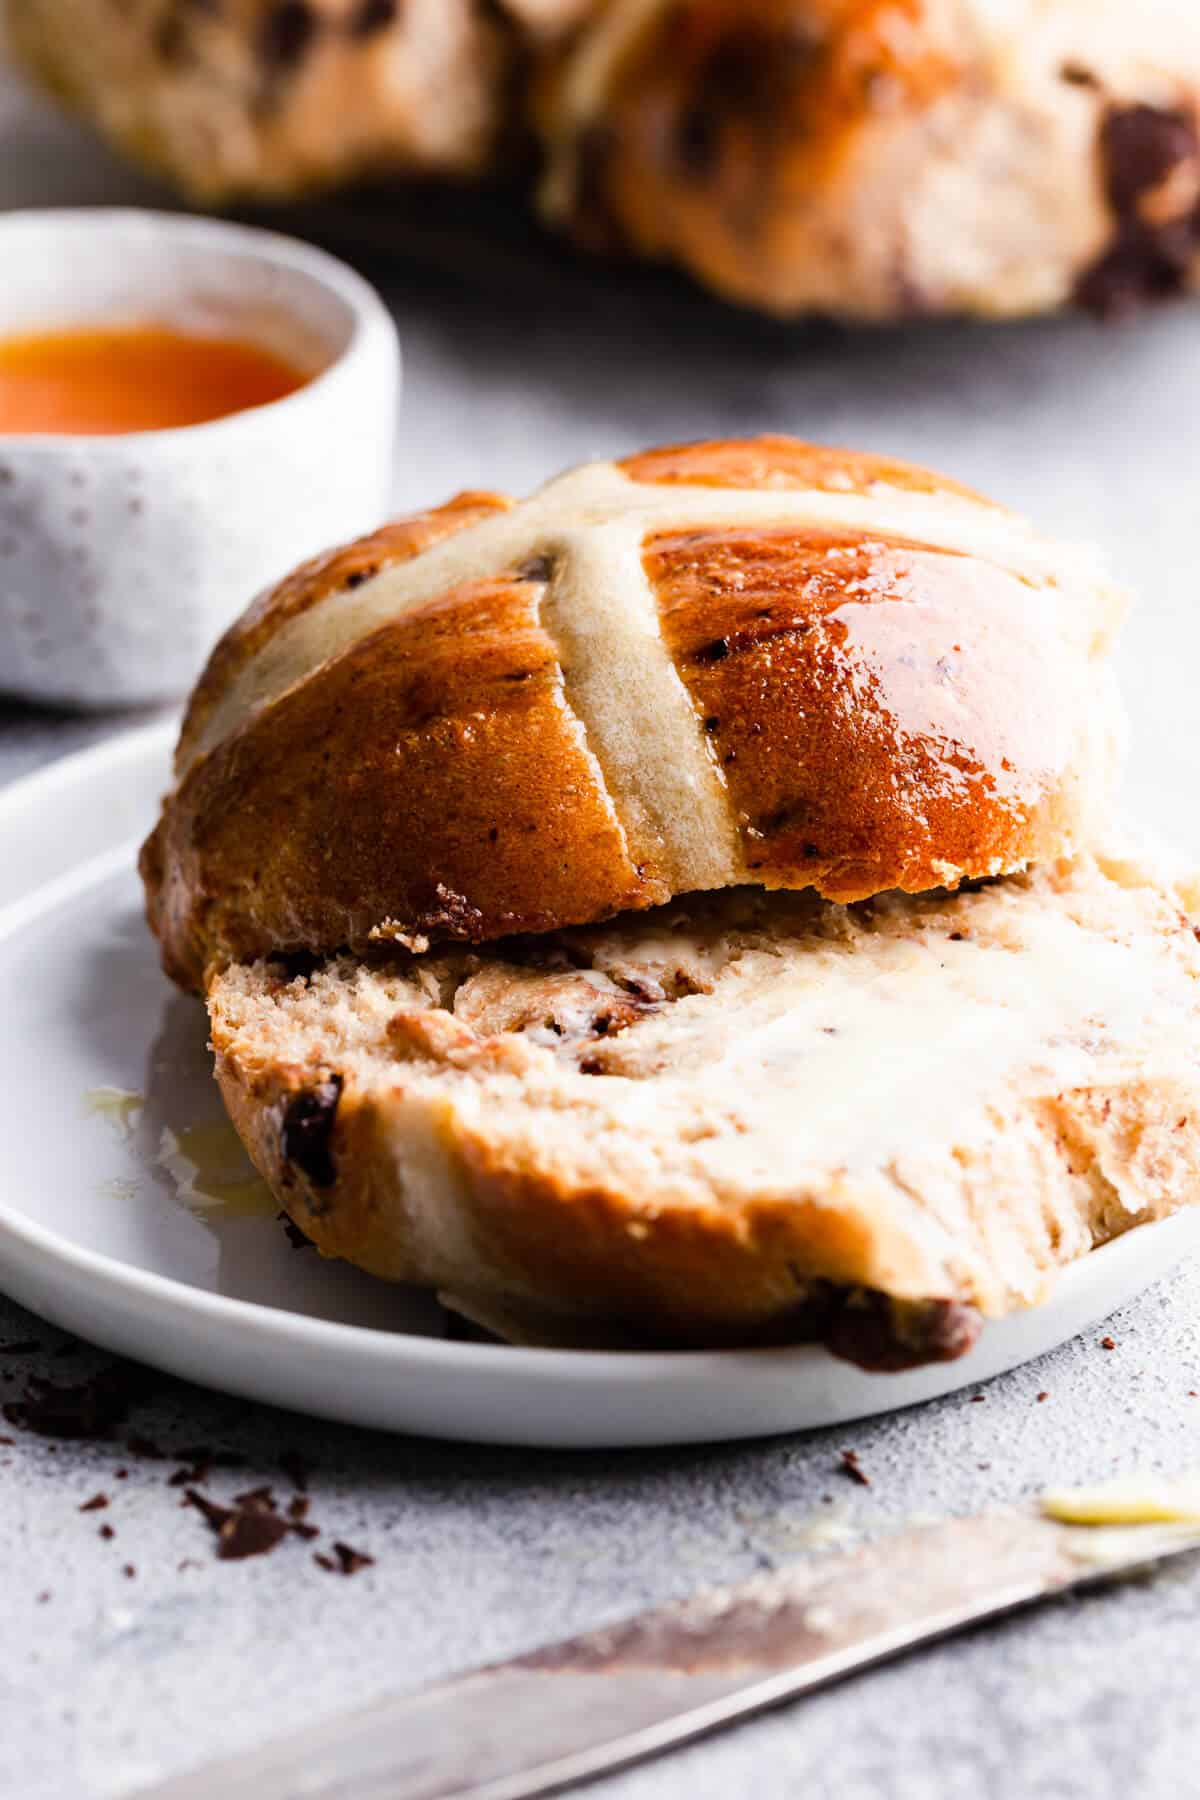
Top tip
It's always best to enjoy these buns fresh, on the day, while still warm from the oven. Try spreading some butter or even your favourite jam over them.
To pin this recipe and save it for later, use the button on the recipe card, or on any of the photos above.
If you try this recipe, or any other recipe on Anna Banana, please take a moment to rate the recipe and/ or leave me a comment. I love hearing from you , but it also helps the other readers who are thinking of making the recipe.
📖 Recipe
Chocolate Chip Hot Cross Buns
Equipment
- small saucepan
- Freestanding mixer with hook attachment
- large baking tray
- Digital kitchen scales optional
- Piping bag optional
- pastry brush
Ingredients
- 280 ml full-fat milk
- 40 g unsalted butter
- 1 large egg
- 500 g strong white bread flour
- 70 g caster sugar
- 7 g fast-action dried yeast
- 2 teaspoon ground mixed spice
- 1 teaspoon ground cinnamon
- ½ teaspoon salt
- 150 g chocolate chips
For the flour paste:
- 75 g plain flour
- 1 tablespoon sugar
- 3-4 tablespoon water
Instructions
- Place the milk and the butter into a small saucepan over a low heat. Allow the butter to melt completelly, then remove from the heat and set aside to cool down until lukewarm. Whisk in an egg into the milk and butter mixture.
- Place the strong bread flour, yeast, spices, salt and sugar in a bowl of a freestanding mixer with the hook dough attachment and mix briefly to combine.
- Pour the wet ingredients over the dry ingredients and mix on low speed to bring the dough together. Increase the speed to medium and continue to mix until you have smooth and elastic dough that no longer sticks to the sides of the bowl. Transfer the dough into a floured surface and knead in the chocolate chips until evenly combined. .
- Shape the dough into a large ball and transfer it to a large bowl. Cover with cling film (or shower cup) or clean tea towel, and set aside in a warm place until it has doubled in size (about 1- 2 hours).
- Once the dough has doubled in size, gently knock the air out of it, then transfer it onto a lightly floured surface. Divide it into 12 equal pieces (using kitchen scales will help), and using your hands, shape each piece into a tight ball (watch video to see how). Place each ball onto a baking tray, spacing them about 1cm apart. Cover with cling film or clean tea towel and prove for 20-30 minutes.
- Meanwhile, prepare the flour paste for the cross pattern. Mix the flour and the sugar together, then add about 4-5 tablespoons of water (adding only one tablespoon at a time), to create thick, but still slightly runny paste. Transfer the mixture into a piping bag (with or without the nozzle). Alternatively, use a plastic, zip-lock style bag and snip out the small corner of it. Preheat the oven to 170°C (fan).
- Once buns have risen, slowly pipe the cross pattern on top of them. Transfer the buns into the oven and bake for 15 minutes or until golden brown. Just a few minutes before the buns are ready, heat up 2-3 tablespoons of an apricot jam with 2 tablespoons of water in a small saucepan.
- Remove the bunsfrom the oven and glaze the buns with warm apricot jam. Enjoy!
Please note that all my recipes are developed and tested in metric grams. I recommend that you use digital scales for a more accurate results. I have provided a conversion to US customary in the recipe but please note that I haven’t tested using this method.
Video
Notes
- If no strong white bread flour is available, use the same amount of plain flour.
- Yeast - any type of dry active yeast can be used, but depending on the type, you may have to activate it in a liquid first. Proving times may also vary, depending on the type of yeast used.
Nutrition
This recipe was originally published in April 2021. It has been updated with the new photos, video, revised recipe and tips in April 2022.

Melinda
The chocolate adds a wonderful, sweet touch to these fluffy, soft buns. Great recipe and perfect for Easter!
Anna
Thanks Melinda, I'm glad to hear that you enjoyed it!
Maya
Love this take on hot cross buns. As a Brit I grew up eating these around Easter but ours were normally filled with raisins - I definitely prefer this chocolate chip version though !
Anna
Thanks so much Maya, I would take chocolate chip over raisins any time 😉
Kennie
Mine turned out quite dense. I dont know what I did wrong 😓 i hand kneaded for 5mins. Perhaps this is why?
M
I have a question on the baking temp & time. The blueberry version is set at 180 for 30 minutes and this recipe is at 170 for 15 minutes. I'm 15 minutes in at 170 and these are no where near done. Was this a typo? Thanks! M
Anna
Hi M, thanks so much for your comment. The blueberry buns may take longer, as the dough is slightly different to these. Also, different ovens will require slightly different baking times. I use fan-assisted oven, and these took 15-18 minutes max, with temperature of 170 C. If after 15 minutes they don't look ready, simply bake them for few minutes longer. As soon as the buns become golden brown on top, they should be ready.