
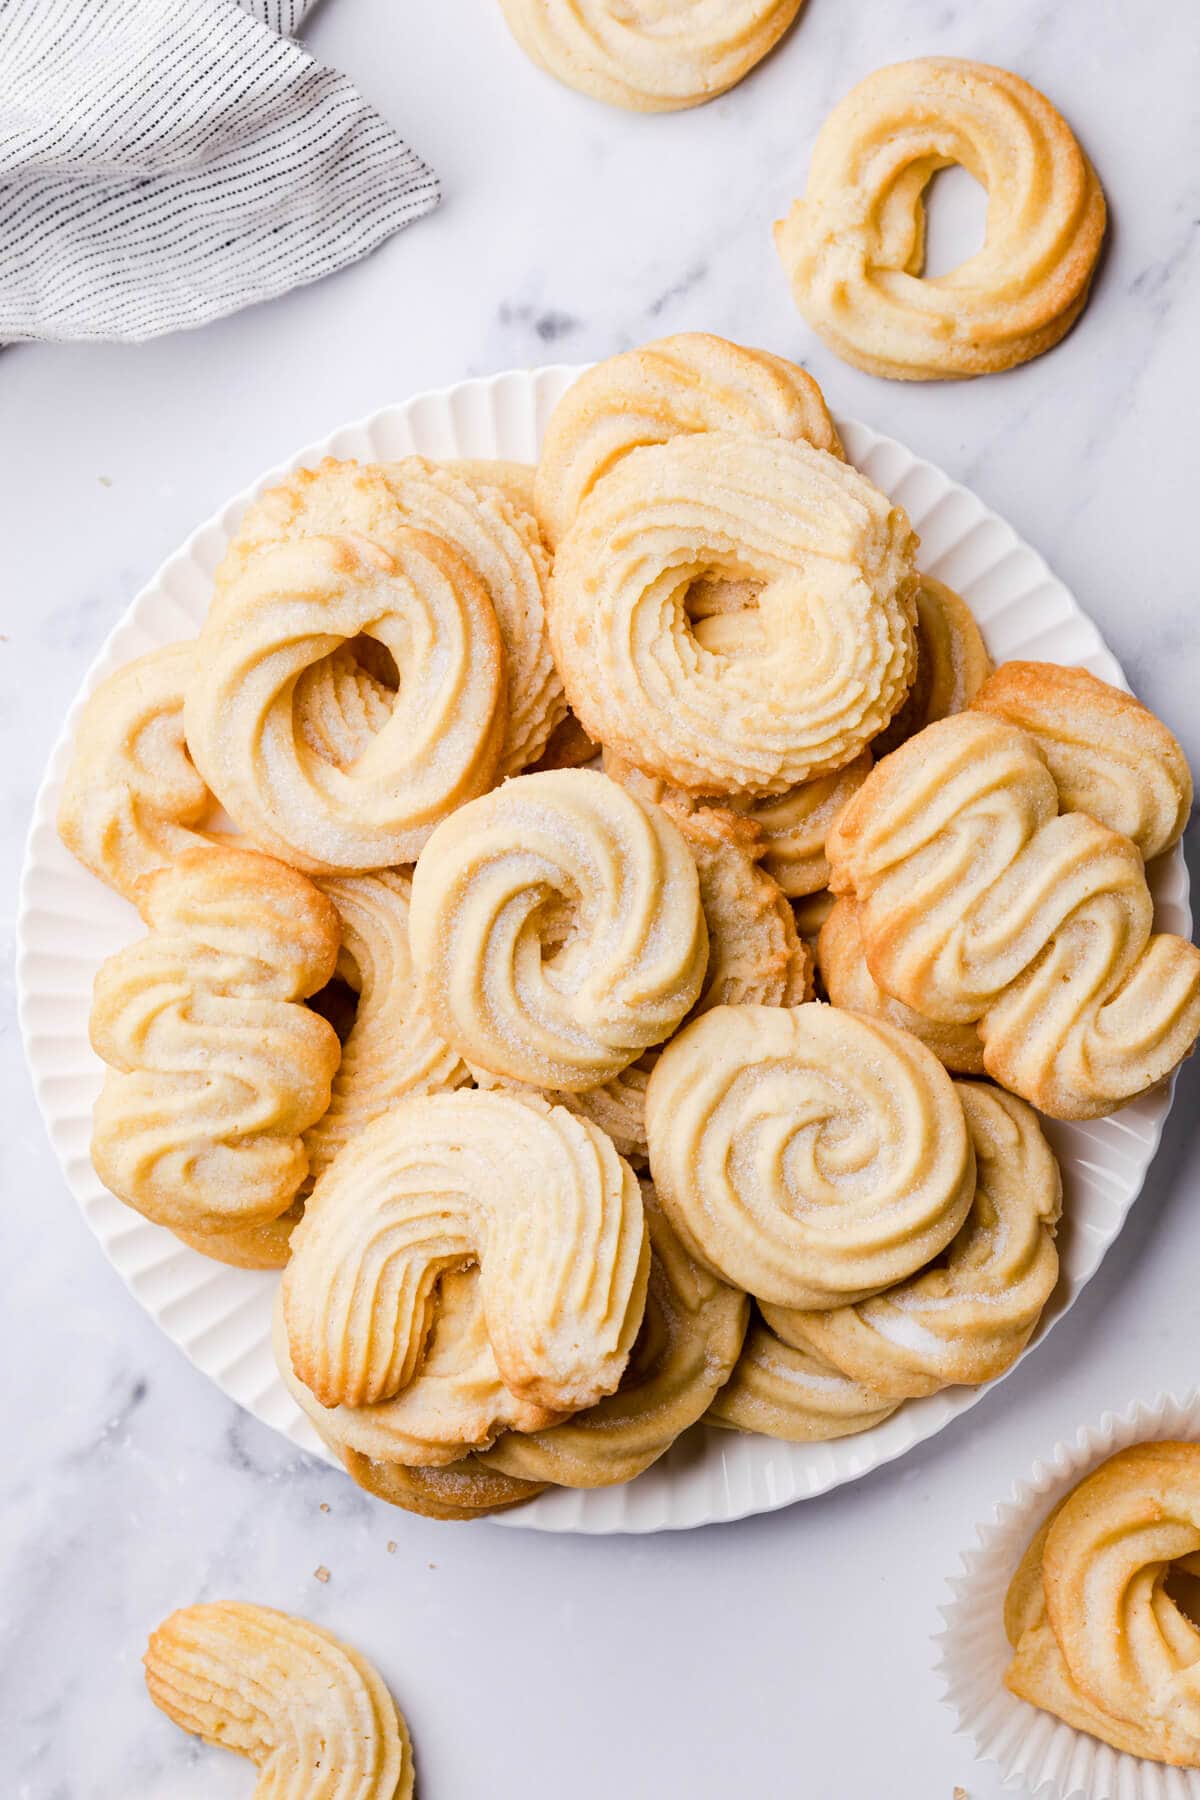
These elegant, light and crisp Danish butter cookies are quickly going to be your favourite! Easy to prepare, full of that delicious, buttery and vanilla flavour and melt-in-your-mouth, delicate texture.
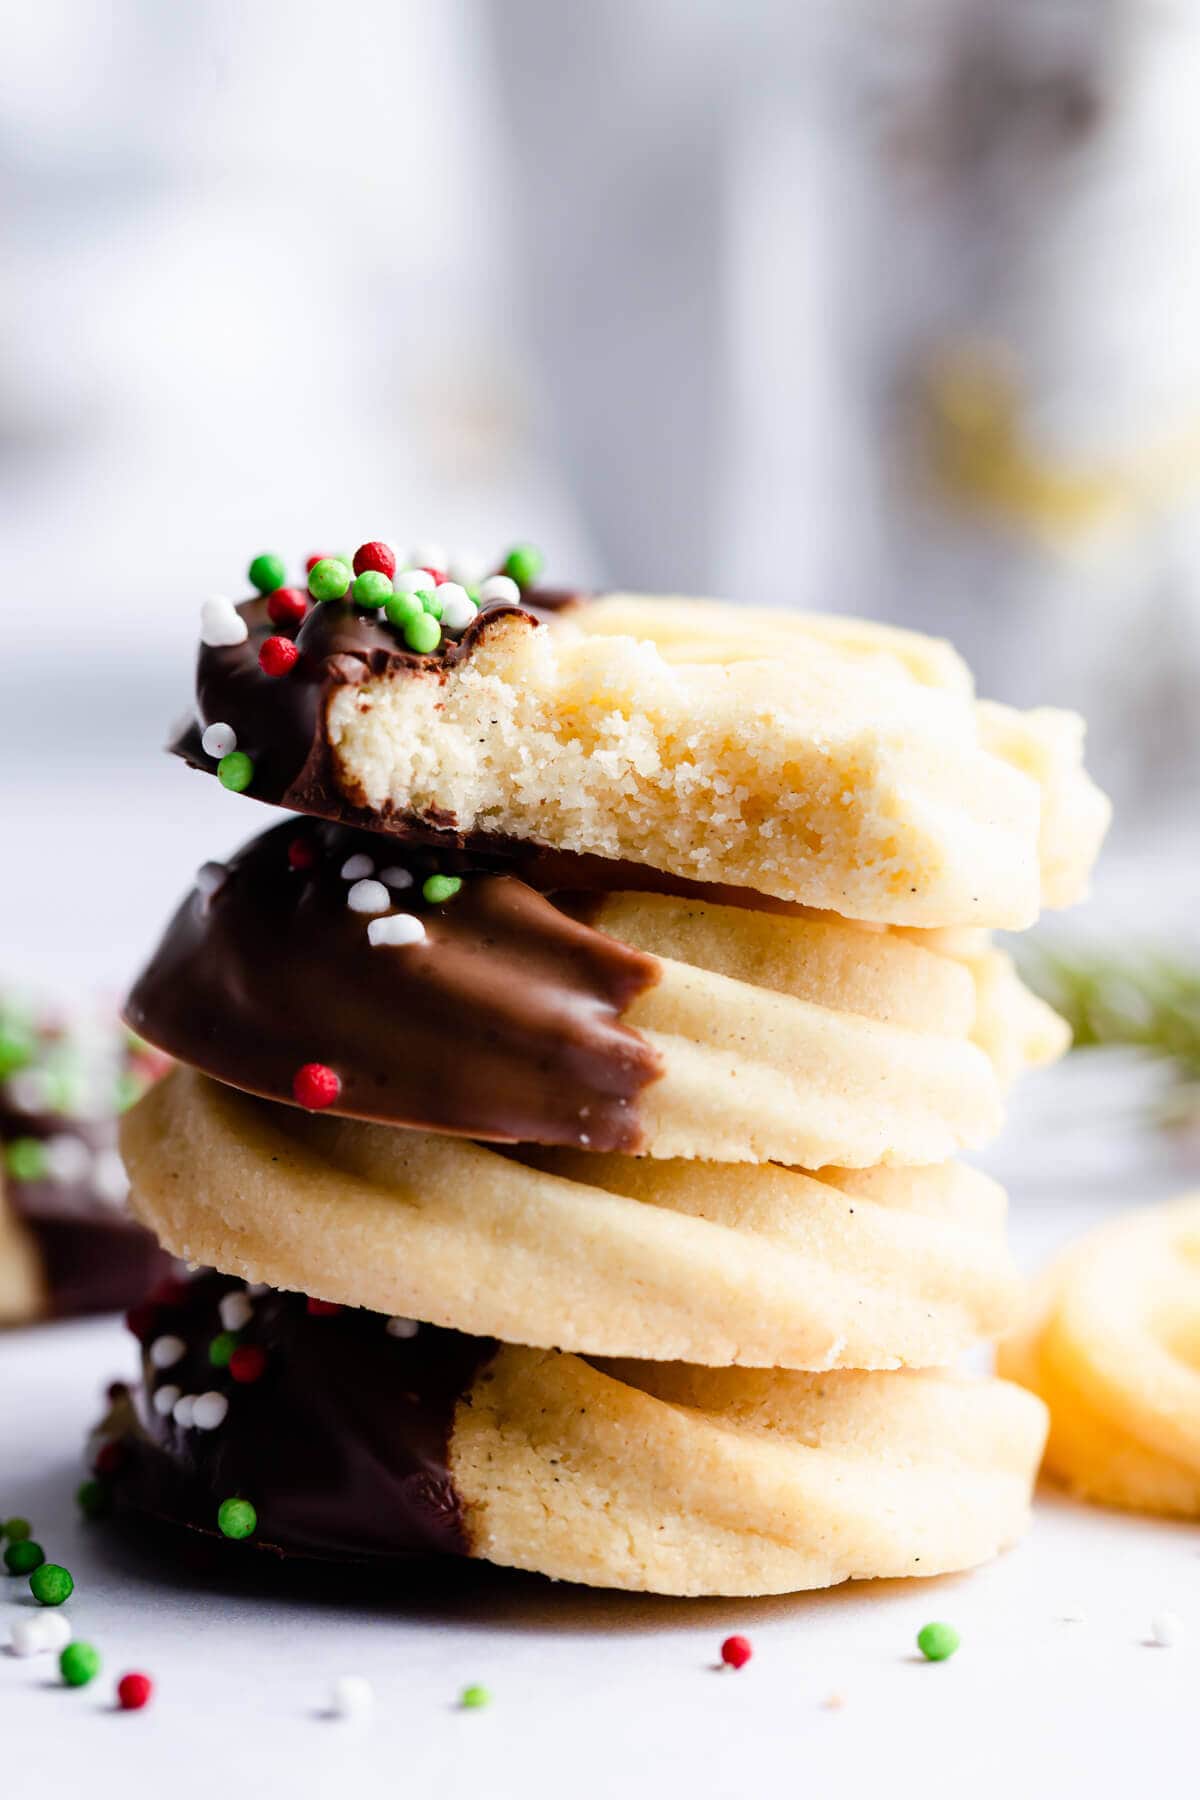
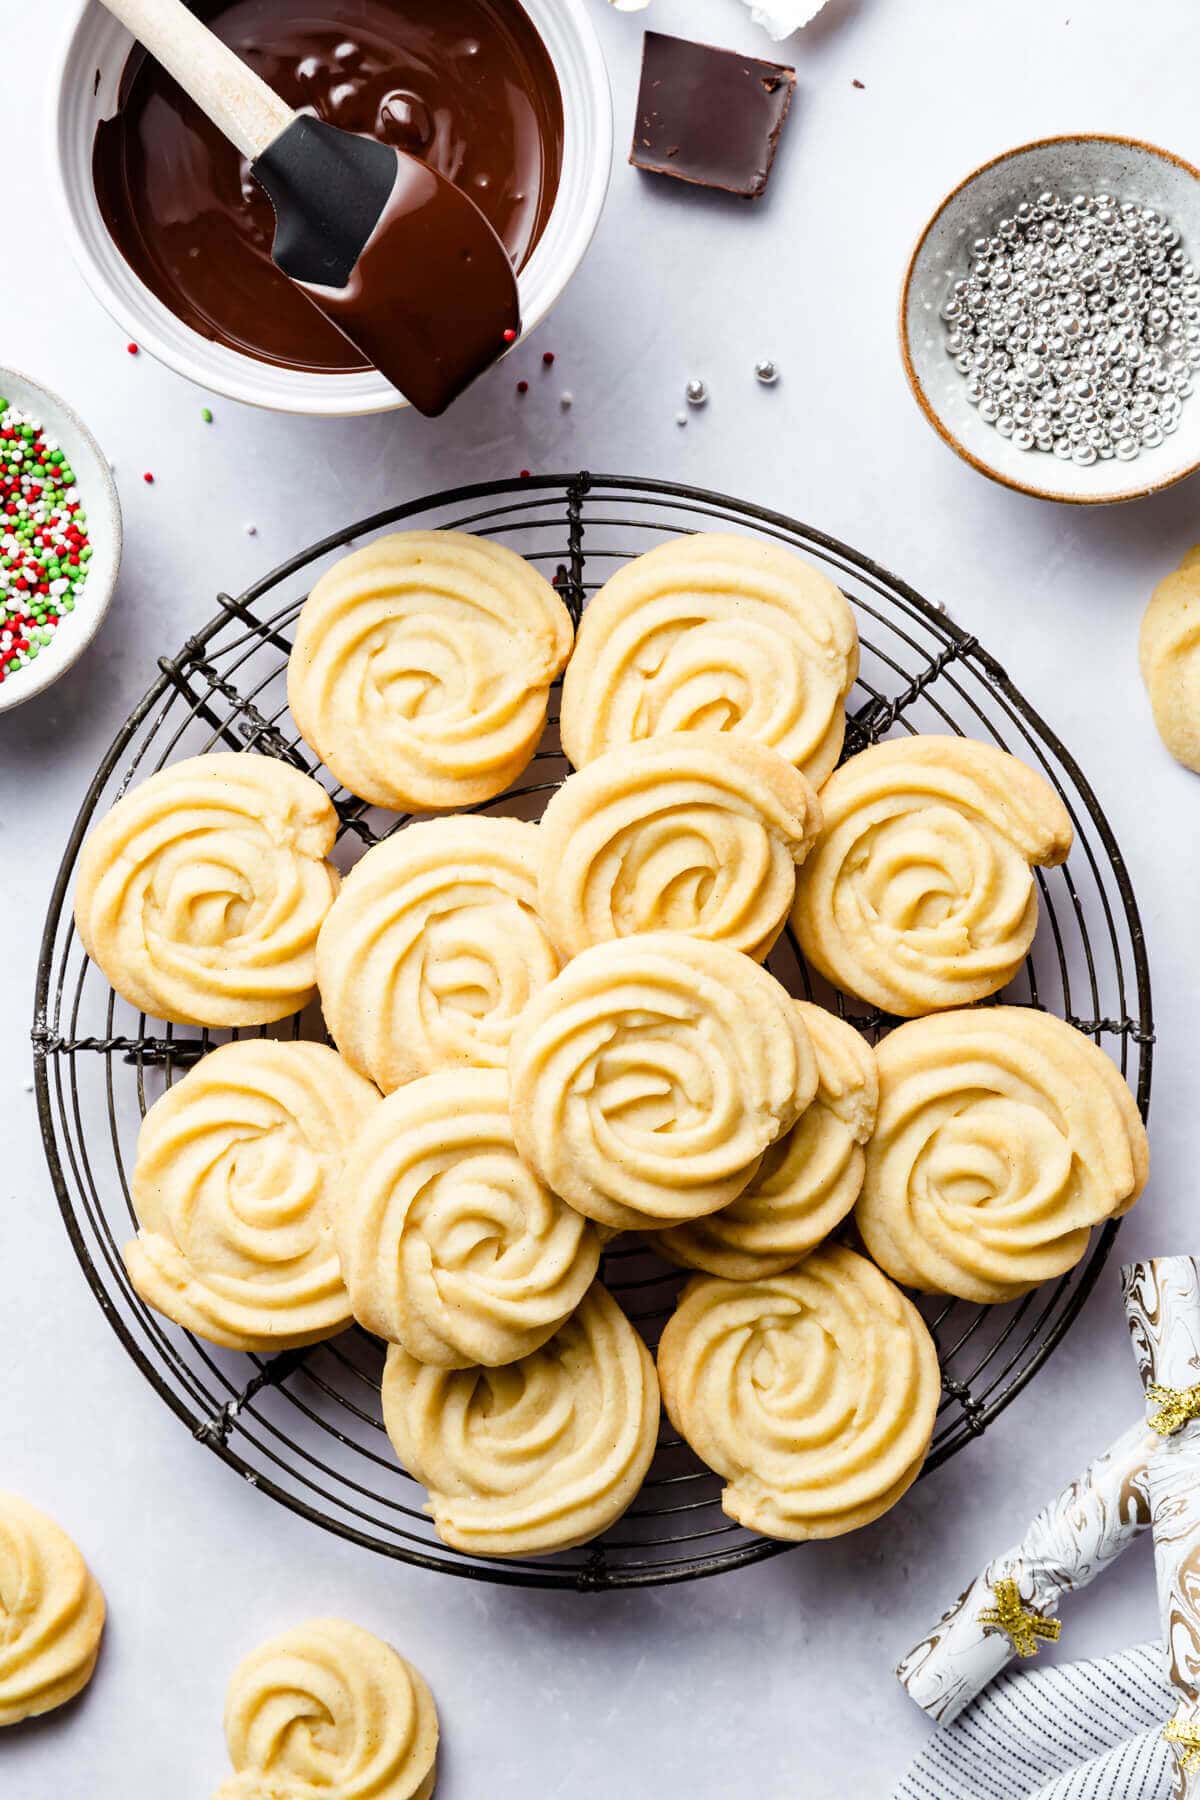
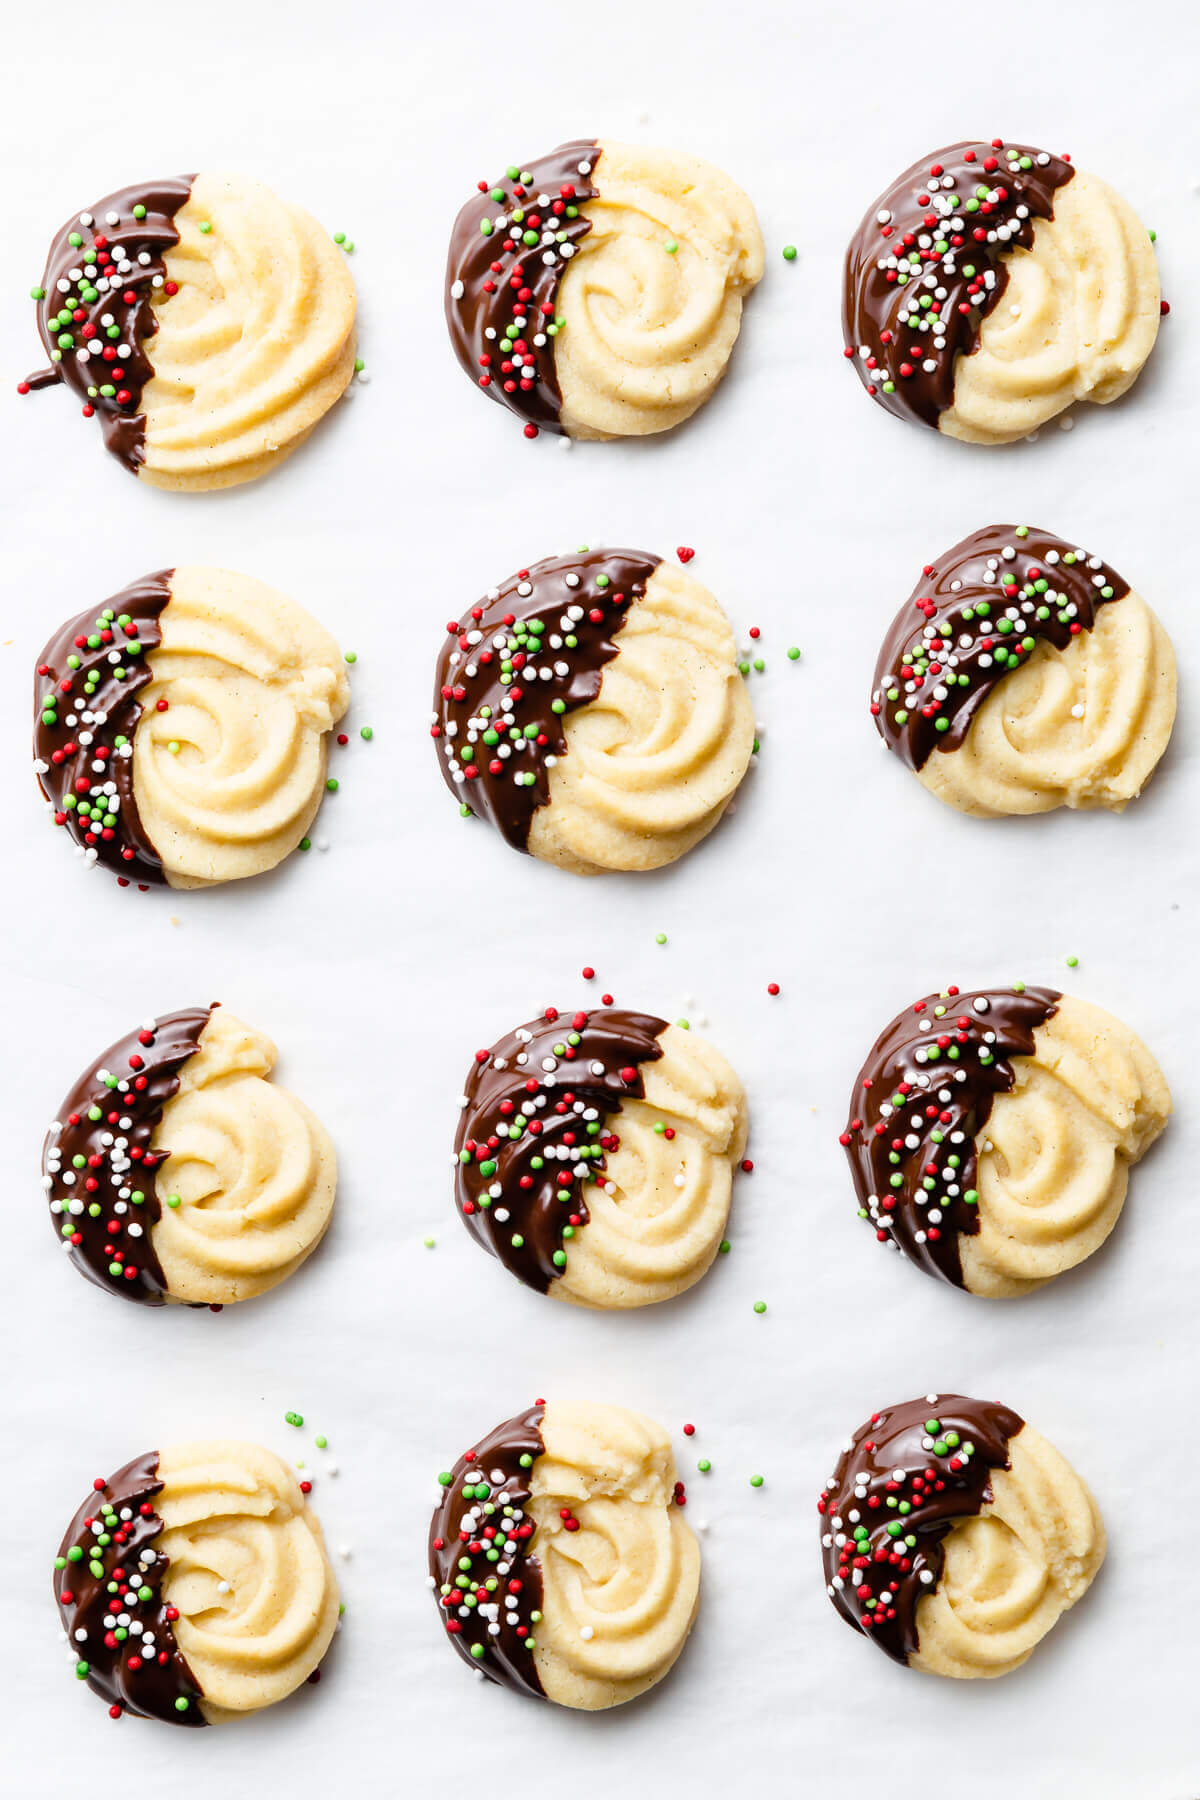
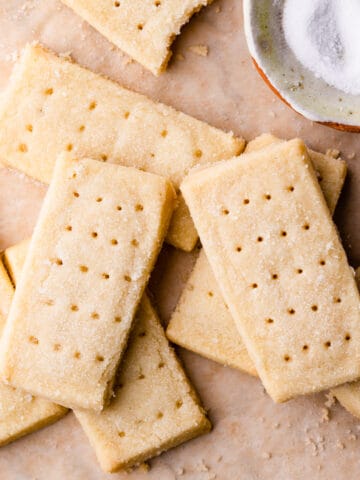
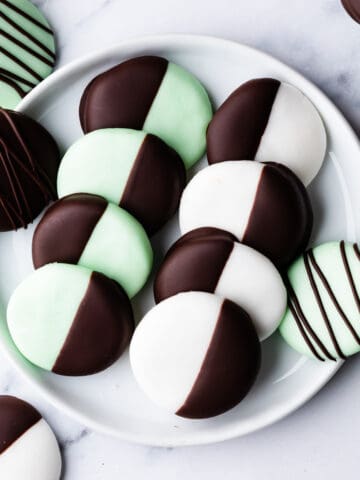
The butter cookie recipe is made with only few, very simple and basic ingredients and it's great to prepare in advance. You can dip them in some melted chocolate, and decorate with some festive sprinkles, but they are just as delicious plain, or with a little sprinkle of sugar on top.
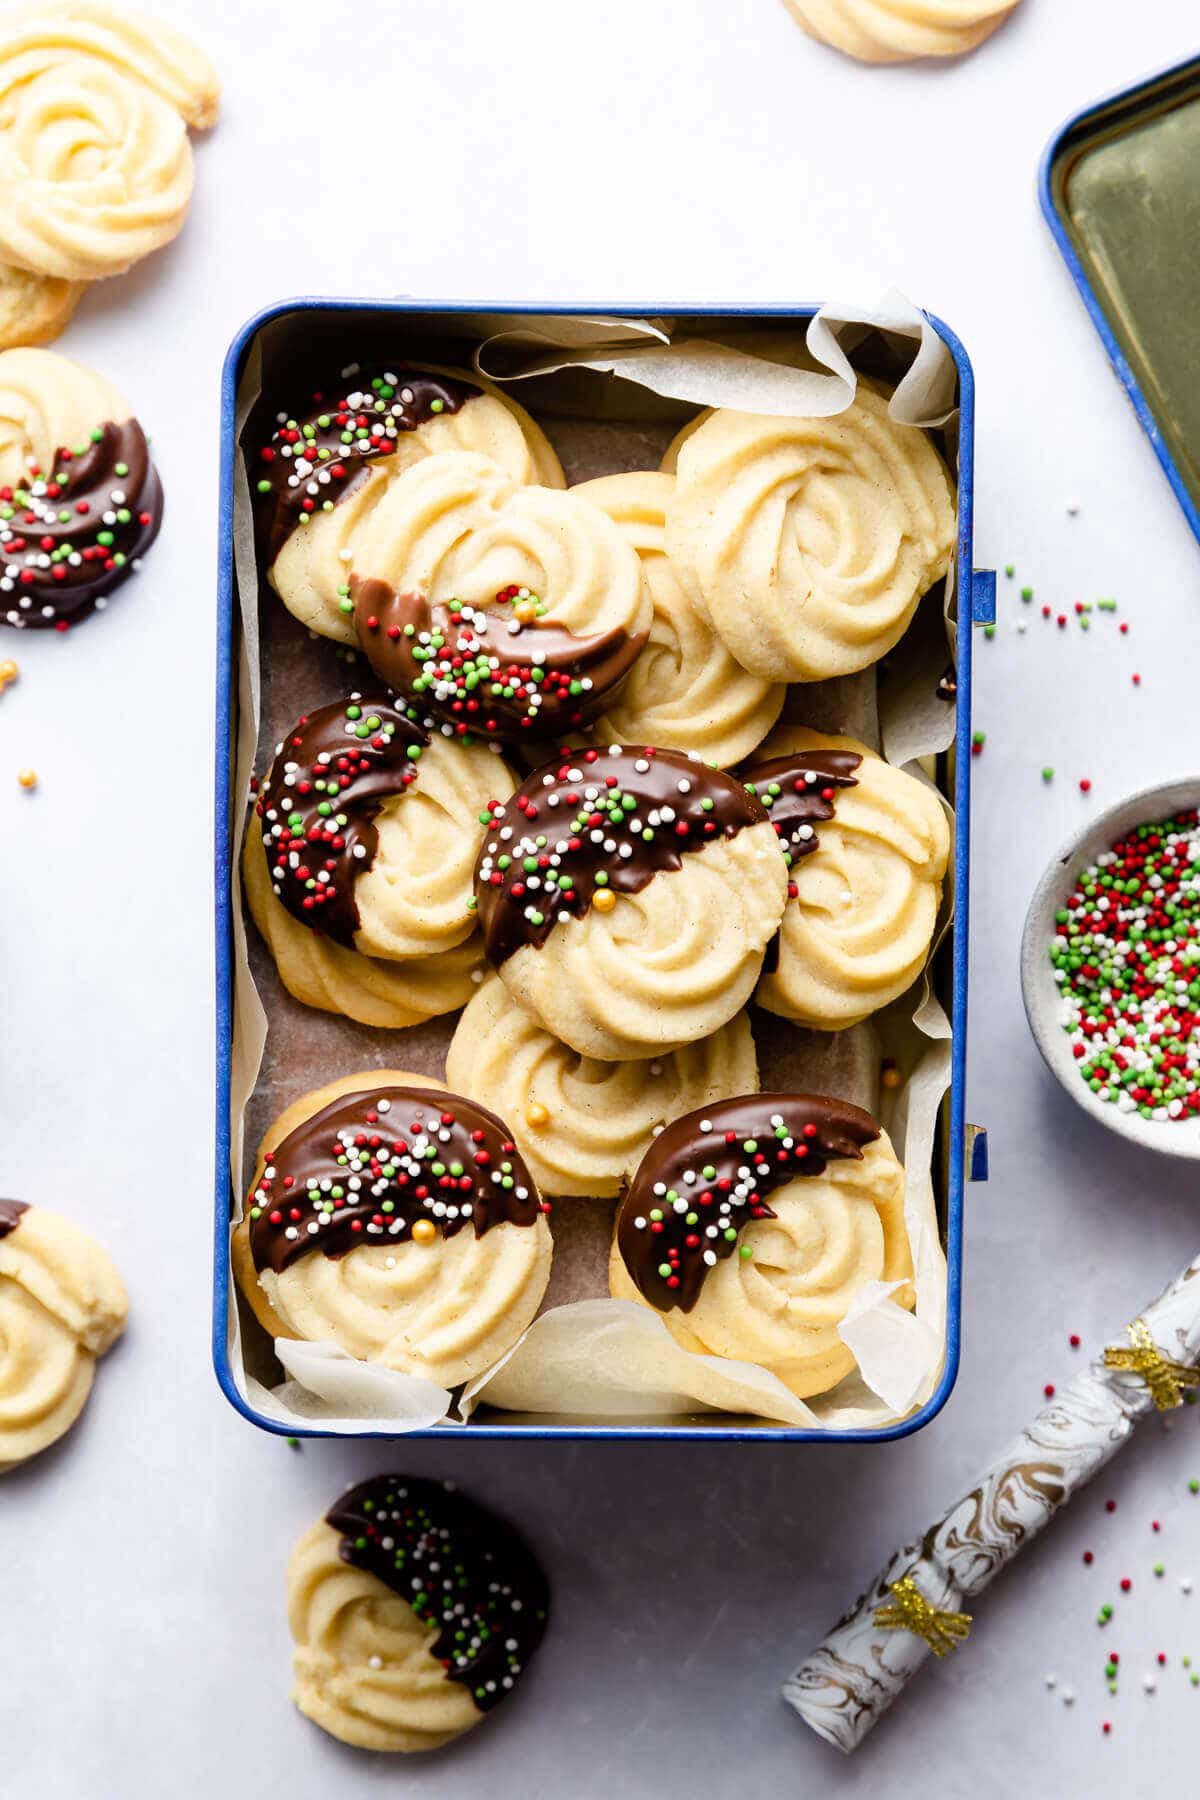
Danish butter cookies, also known as Danish biscuits, "cookies in the blue tin", or royal dansk cookies, are an easy and utterly delicious treat any time of the year, but I especially love them during the festive season. The combination of fragrant vanilla and butter is just superb, and their iconic taste brings back many happy memories of the past holidays.
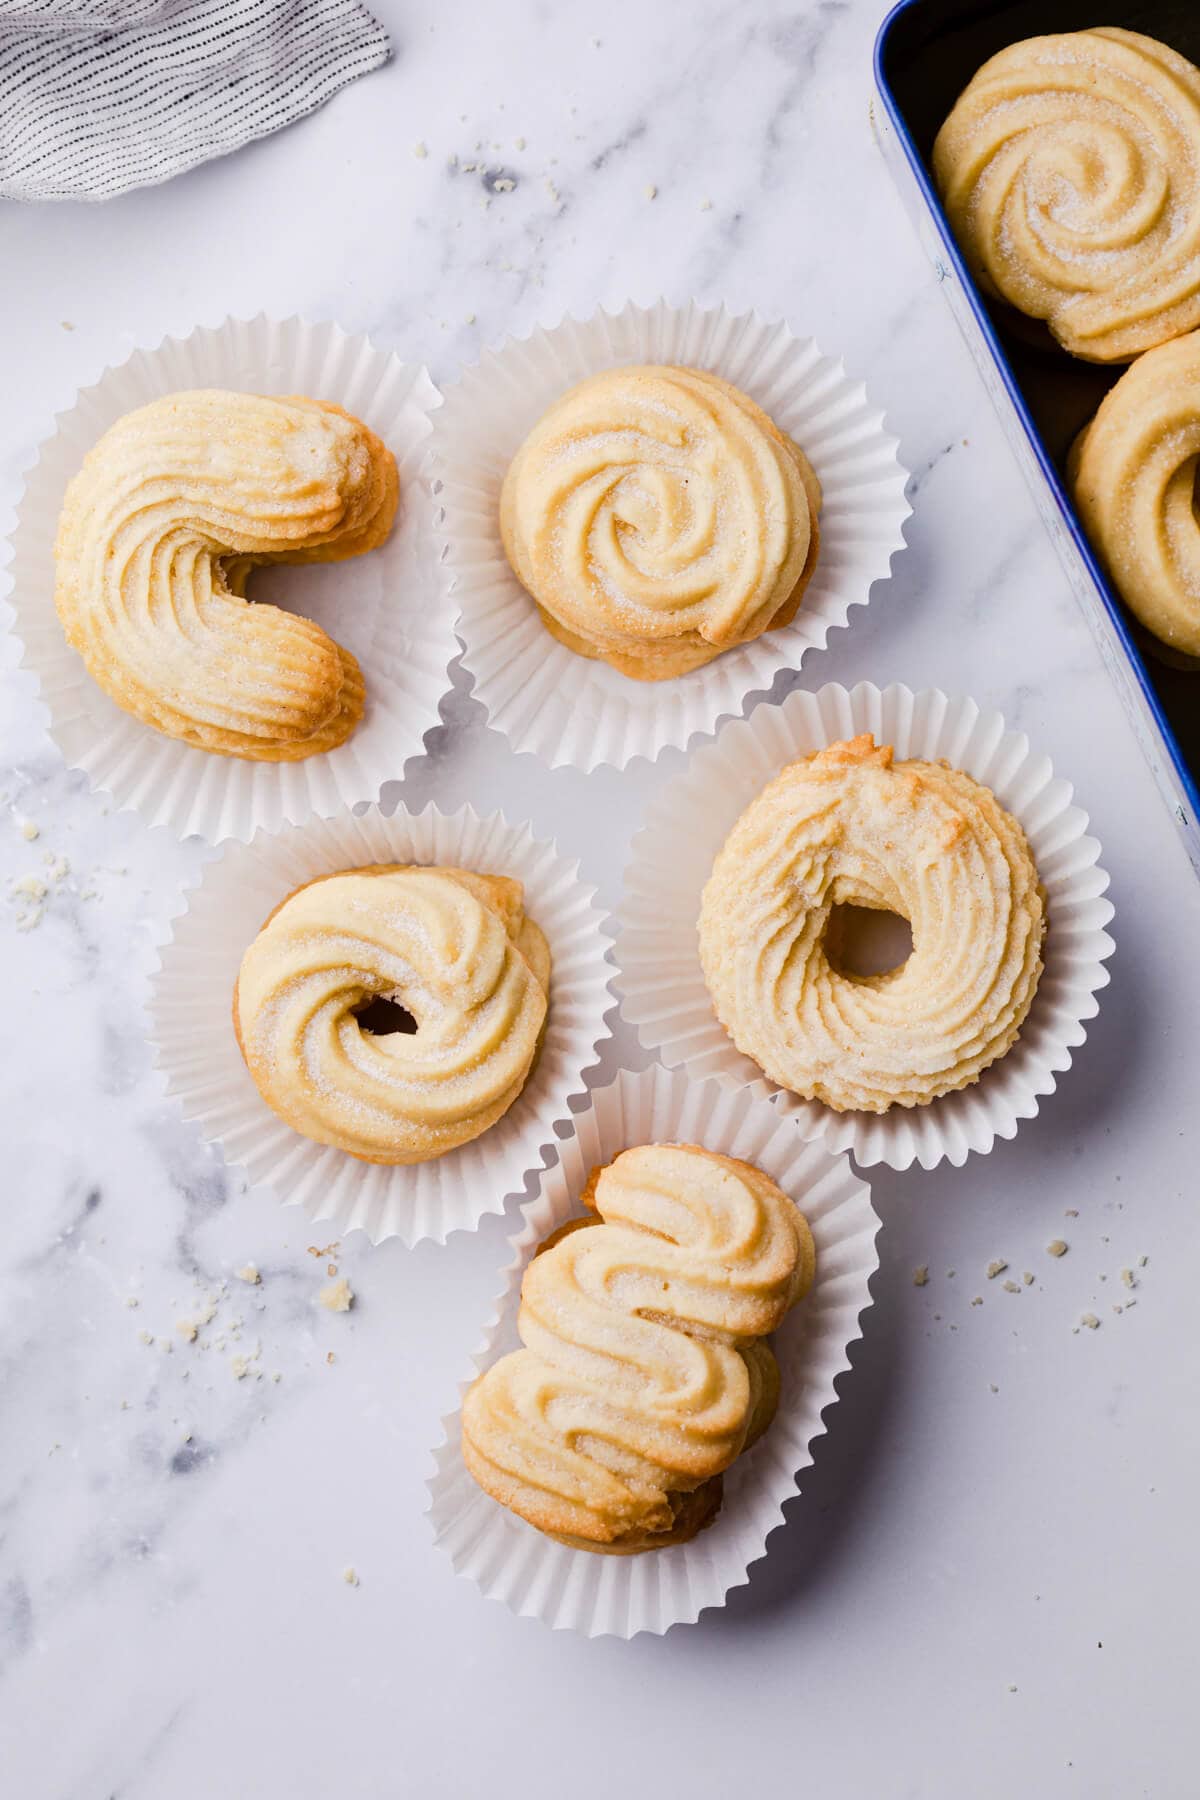
They often come in a various shapes and sizes. Piping bags with different nozzles are used to achieve some of their characteristic, twisted shapes.
What is great about these cookies, is also the fact that they make a fantastic gift for friends and family. Just like my chocolate thumbprint cookies, or my lemon pistachio biscotti, they are among my favourite recipes to bake around Christmas time.
Jump to:
Ingredients and substitutions
The iconic Danish butter cookie (or a biscuit, depending where in the world you are), in it's simplest form, is made of mix of butter, sugar and flour. They have wonderful, crisp and delicate texture, which just melts in your mouth with each bite you take.
Here's what you will need to make these butter cookies:
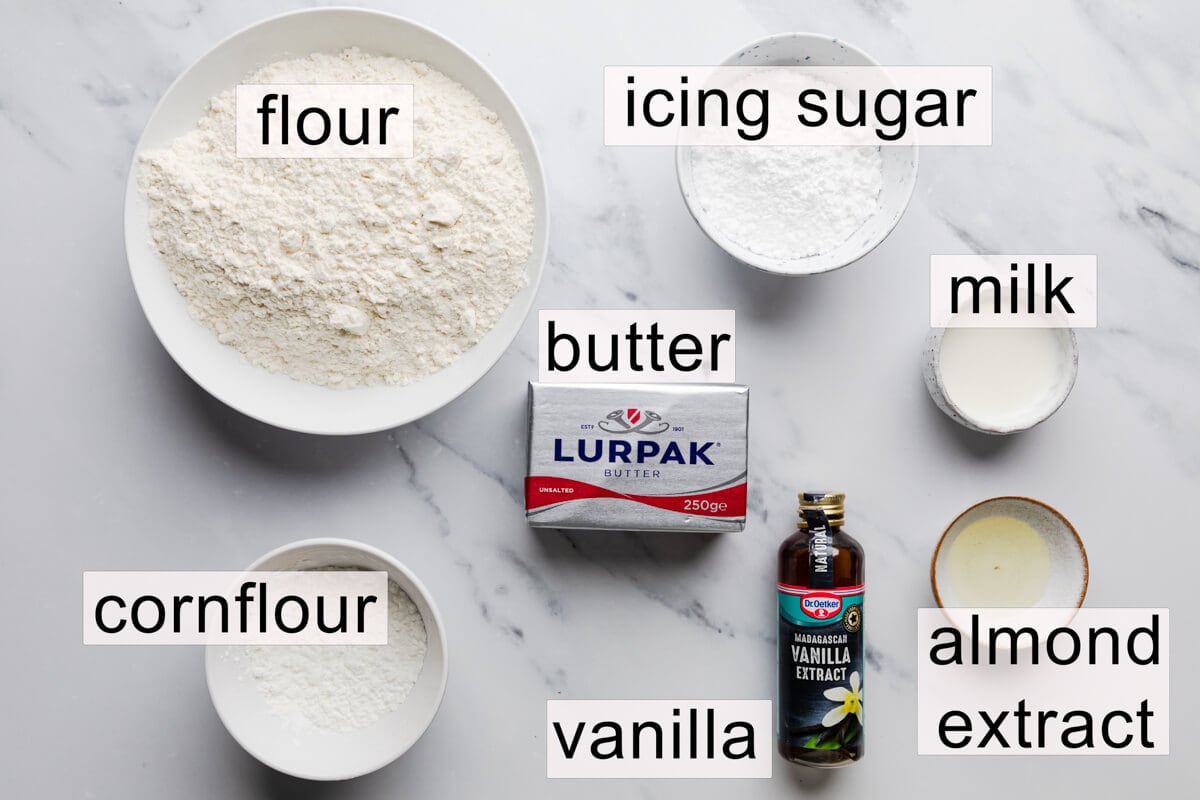
- Butter - Use a good quality, unsalted butter. To stay as close to the original recipe as possible, I'm using Lurpak (Danish butter), which is higher in fat content, due to the additional churning. Salted butter will also work, just skip any extra salt from the ingredients.
- Flour - Butter cookies are made with plain/ all purpose flour.
- Cornflour - Small amount of cornflour (corn starch) is added to create more crumbly and tender cookies. Alternatively, if no cornflour is available, use only plain/ all purpose flour (310g in total).
- Sugar - I always use the icing sugar in the cookie dough. There isn't a lot of sugar in Danish butter cookie recipe, that is why some additional sugar (typically granulated or caster) is also sprinkled on top. You can also use granulated or caster sugar instead of the icing sugar in the dough.
- Vanilla extract - This is optional, but vanilla will add lovely flavour to these cookies. Vanilla bean paste can also be used.
- Almond extract - Same as above. An optional ingredient, but fantastic for elevating the flavour.
- Milk - To help with the texture of the dough and make the piping of it easier. Feel free to use any type of milk.
Scroll to the bottom of this post for the recipe card and the full list of the ingredients.
Instructions
Before starting this recipe, be sure the butter is at room temperature. Also, make sure that your baking sheet / baking trays are ready, and that you have enough space in the fridge to accommodate them.
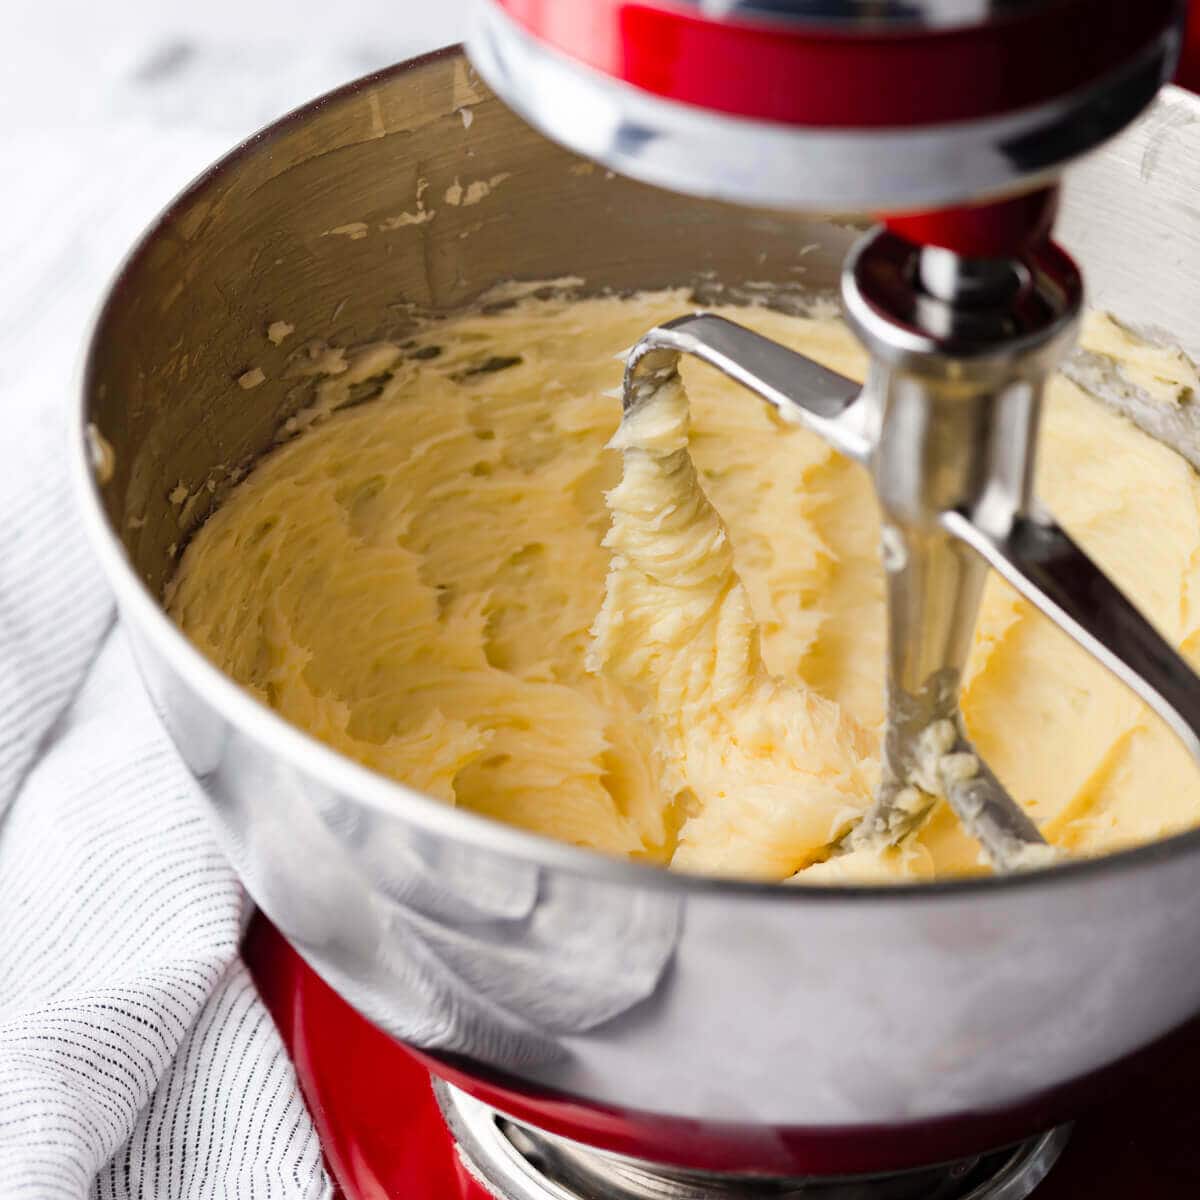
Beat the butter and sugar until pale and very fluffy, about 4 minutes. Add the vanilla and almond extracts (if using).
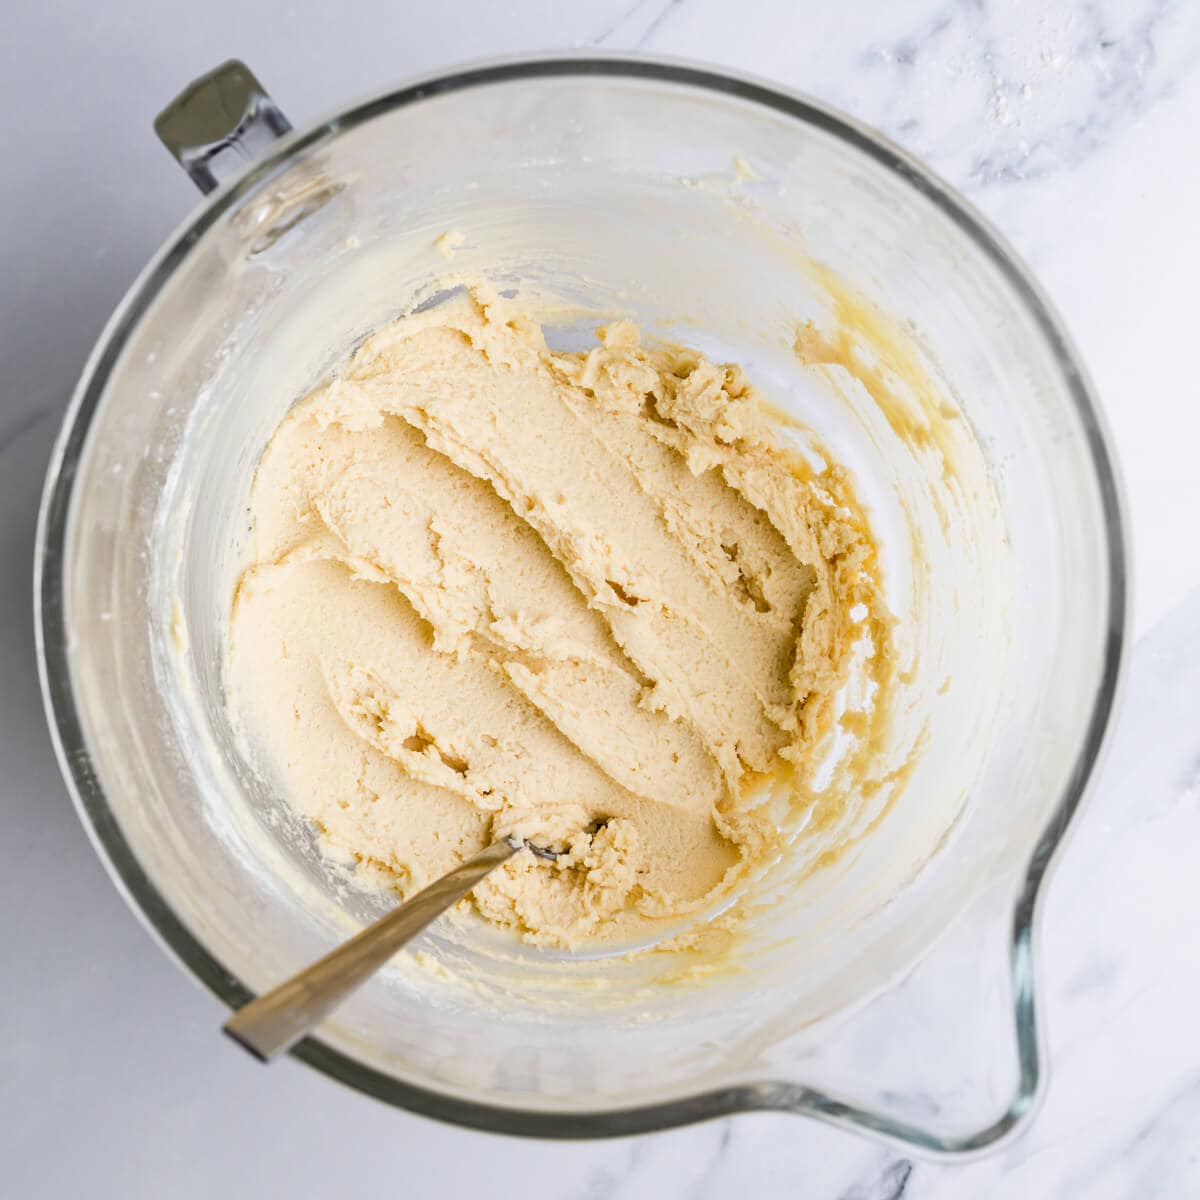
Add the flour mixture (in two additions), and a little milk (if needed). Mix until you have thick, smooth cookie dough.
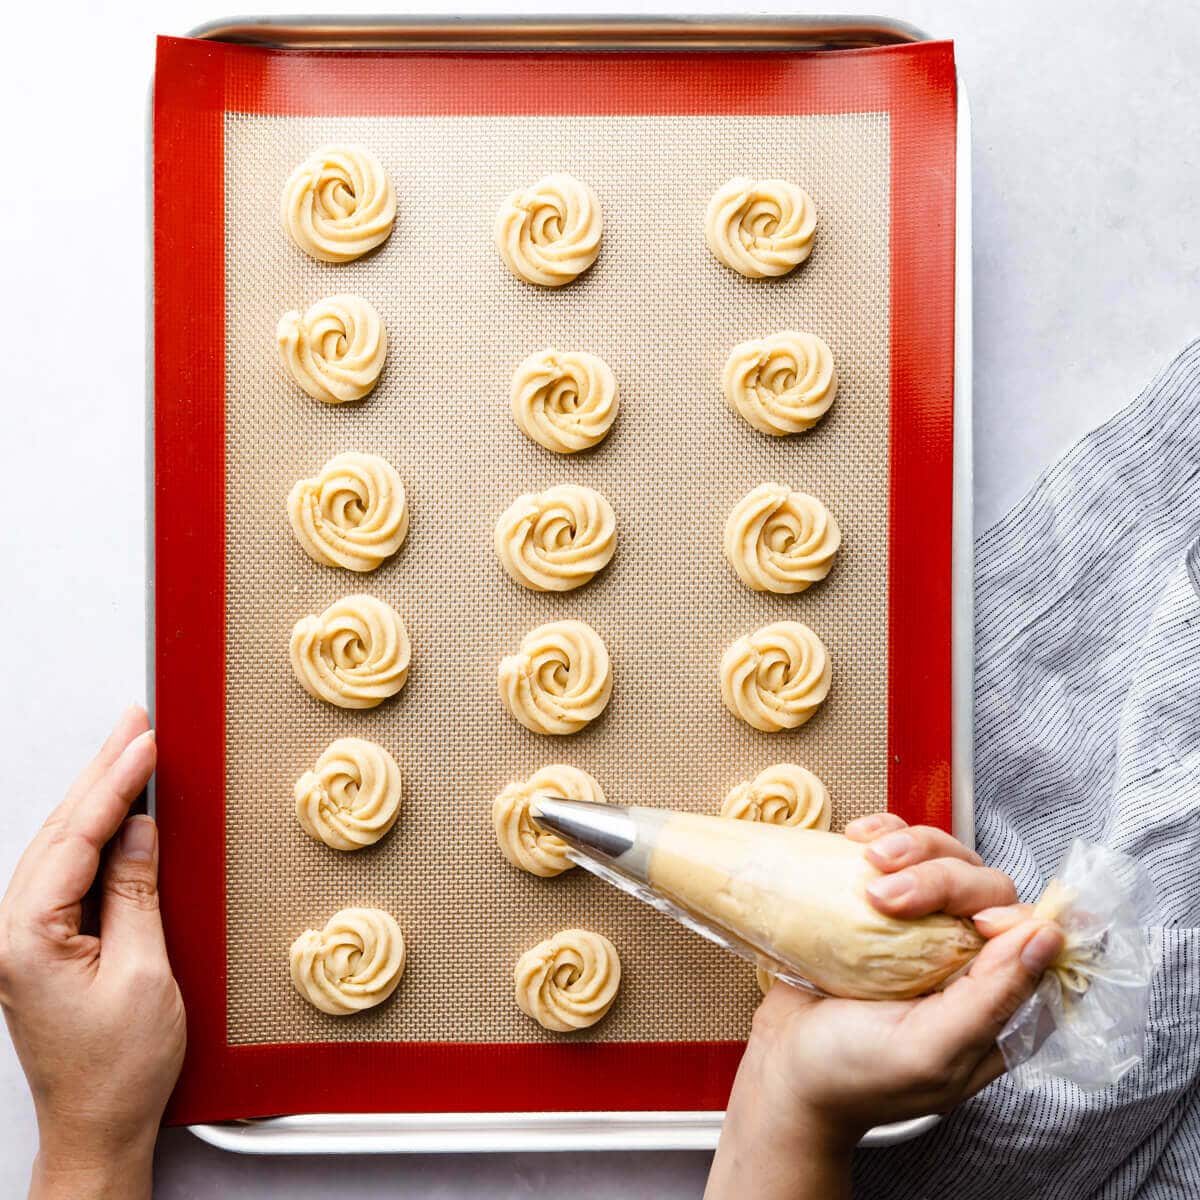
Transfer the dough into piping bag fitted with your choice of nozzle. Pipe the cookies and transfer to the fridge to chill for at least 30 minutes.
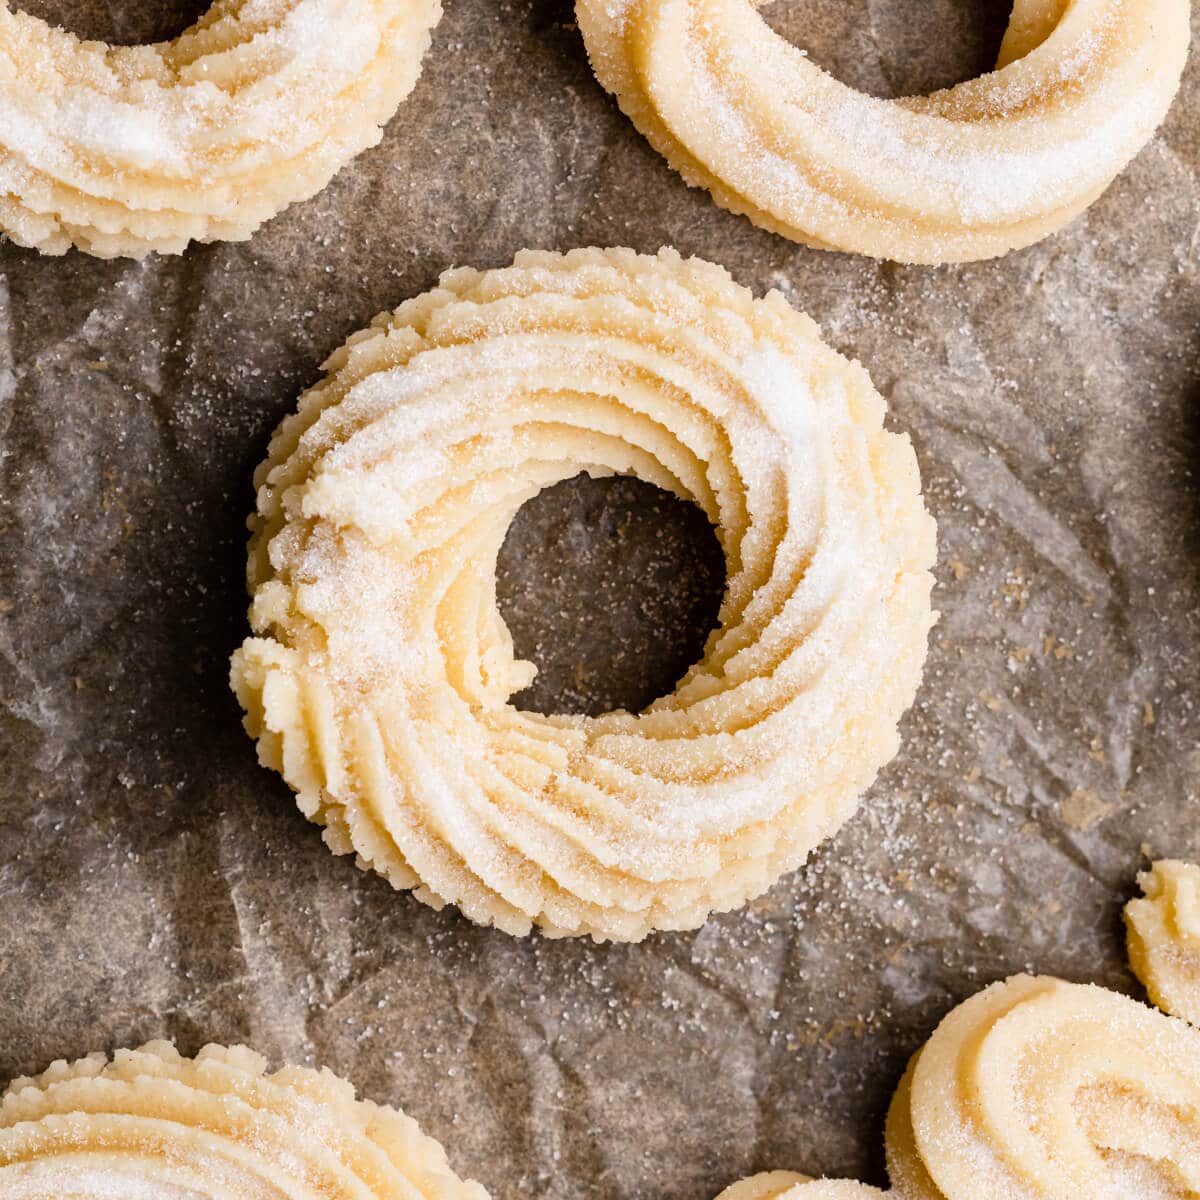
Remove from the fridge, sprinkle the cookies with some granulated or caster sugar (optional) and bake 10-12 minutes.
Hint: Rotate the baking tray half way through the baking time to ensure even browning and baking of the cookies.
Allow the baked cookies to cool down for 5 minutes on the tray, then carefully transfer them into a cooling rack and cool completely. Once they have cooled down, you can dip them in some melted chocolate and add sprinkles.
Variations
- Different flavours - I love adding vanilla and almond extract to my danish cookies, but you can experiment with some other flavours, like lemon, orange, coconut or peppermint.
- Spice it up - Add a pinch or two of cinnamon or cardamom to the cookie dough for more delicious flavour.
- Add melted chocolate and sprinkles - I love dipping these cookies in some melted chocolate! Use dark, milk or white chocolate for dipping, then add some sprinkles on top. Finely chopped nuts will also be a great addition!
- Gluten-free Danish butter cookies - Check out this gluten free butter cookies recipe from Gluten Free On a Shoestring blog.
- Vegan butter cookies - Swap the butter for a vegan alternative and use vegan milk substitute. Alternatively, check out this recipe for vegan butter cookies from The Hidden Veggies blog.
Equipment
- Handheld electric mixer or stand mixer with the paddle attachment.
- Baking sheets/ baking trays - As this recipe makes a rather big batch of cookies, it's handy to have 2- 3 baking trays.
- Reusable or disposable piping bag - For piping the dough. Alternatively, use a zip-lock bag with one of it's corners snipped off.
- Large piping nozzle - It's best to use the large, wide piping nozzle to pipe the cookie dough into the iconic ring shape or rosettes. This type of the nozzle will also create the signature ridges on the cookie rings, which will trap the crunchy sugar topping. Use an open star tip, like Wilton 6B, Wilton 8B or Ateco 868. The universal Wilton 1M will also work, but you may have to add more milk to the cookie dough, if using it (because it is a narrower nozzle, it will be harder to pipe the dough through it).
Storage
These danish style butter cookies will keep well in an airtight container for up to a week. It's best to store them in a single layer, with some parchment paper between them.
This recipe is great to make ahead of time. You can pipe the biscuits/ cookies and store them in the fridge for up to 2 days (make sure to cover them with some clingfilm).
You can also freeze them for up to 2 months. Make sure cookies have completely cooled down, then transfer to the freezer-friendly container or a bag. Thaw in the fridge overnight, or at room temperature for at least an hour.
Unbaked cookies can also be frozen for up to 3 months. Place the shaped cookies on a tray (in a single layer) and into the freezer for at least a couple of hours. Remove the tray from the freezer and transfer cookies into a container or a bag and return to freezer. Bake from frozen, adding 2-3 minutes extra to the baking time.
Top tip
Do not skip the chilling time. The cookies need at least 30 minutes in the fridge, to allow the butter to solidify. If you bake them straight away, without chilling first, they will melt and over-spread in the oven and they will loose their shapes.
Do not chill the dough alone (in a bowl or in the piping bag), as it will become too hard to handle and to pipe after.
If you have limited space in your fridge, pipe the cookies close together onto one large baking tray, to fit as many as possible. Transfer the tray into the fridge, and once the cookies have chilled, you can carefully lift them up and then fit into 2-3 baking sheets and bake.
Also, be sure to not overbake the cookies, as they don't take long to be ready! Depending on the size of your butter cookies, they may need less or more baking time. Smaller ones will take about 10-12 minutes, bigger cookies will take about 15 minutes. Keep an eye on them, they are ready when their edges are just starting to turn golden brown.
FAQ
They are very similar in taste, texture and in ingredients, however there are few subtle differences. Shortbread is more dense in texture, with less sugar and butter being used. The dough normally gets sliced or cut into the shape before baking, where butter cookies are piped.
Just like any cookies, these butter cookies will spread a little in the oven. However, if your cookies came flat and over-spread while baking, it's probably because you didn't chill them for long enough.
Same as above. Chilling the dough is a crucial step in this recipe. Also, check the oven temperature and make sure it is not set too high.
To pin this recipe and save it for later, use the button on the recipe card or on the photos above.
If you try this recipe, or any other recipe on Anna Banana, please take a moment to rate the recipe and/ or leave me a comment. I love hearing from you, but it also helps other readers who are thinking of making the recipe.
📖 Recipe
Danish Butter Cookies
Equipment
- baking trays
- electric mixer
- Piping bag
- large piping tip/ piping nozzle
Ingredients
- 250 g unsalted butter room temperature
- 70 g icing/ powdered sugar
- 1 tsp vanilla extract optional
- ½ teaspoon almond extract optional
- 280 g plain flour
- 30 g cornflour/ cornstarch
- ¼ teaspoon salt
- 1- 2 tablespoon milk any
Instructions
- Before you start, make sure you have baking trays ready. You can line them up with baking paper, or use silicone baking mat. Make sure to have enough room in your fridge, to be able to fit the baking trays.
- Place the softened butter and icing sugar in a bowl of an electric mixer and beat together until pale and fluffy, about 4 minutes.250 g unsalted butter, 70 g icing/ powdered sugar
- Add almond and vanilla extracts (if using) and beat again, scraping the bottom and the sides of the bowl to ensure it is all mixed in.1 teaspoon vanilla extract, ½ teaspoon almond extract
- In a large bowl, combine together the flour, cornflour and salt. Tip half of the flour mix to the butter and sugar mix, beat to combine, then add the remaining flour and mix again until combined, scraping the bottom and the sides of the bowl. Add 1 tablespoon of milk and mix well.280 g plain flour, 30 g cornflour/ cornstarch, ¼ teaspoon salt, 1- 2 tablespoon milk
- Transfer the cookie dough into a piping bag with a nozzle of choice (you want to use the nozzle with large opening tip, to easily pipe the dough). I used large open star nozzle, but others that will also work great are Wilton 8B, Ateco 826 or Ateco 827. Do not overfill your piping bag, smaller amount of cookie dough will be easier to handle and to pipe.
- Pipe the dough onto baking trays. If it is too hard to pipe, add a little bit more milk to your dough. Make sure to add only about ½ tablespoon of milk at a time, before adding any more. Place the baking trays with piped cookies into the fridge and chill for minimum 30 minutes.
- Preheat the oven to 170°C (160°C fan). Sprinkle some granulated or caster sugar on top of the cookies, if you'd like. Bake cookies in the middle shelf for 10-15 minutes (smaller cookies will be ready in about 10-12 minutes, bigger ones will take a bit longer), or until the edges just start to turn golden brown. Remove from the oven and allow to cool on a baking tray for 5 minutes, before transferring into a cooling rack to cool completely.
- To decorate, dip the cookies into some melted chocolate and sprinkle with your favourite sprinkles.
Please note that all my recipes are developed and tested in metric grams. I recommend that you use digital scales for a more accurate results. I have provided a conversion to US customary in the recipe but please note that I haven’t tested using this method.
Video
Notes
- You may get different amount of cookies, depending on how big or small you pipe them
- If the dough feels too stiff and too hard to pipe, add more milk to it. Add only about ½ tablespoon of milk at a time, before achieving the right consistency.
- The more milk you add, the longer you should chill the dough for. 30 minutes is a minimum.
Nutrition
This post was originally published in December 2020. It has been updated with the new photos, video, revised recipe and tips in October 2022.
michelle perry
can you make these cookies without using a piping bag and do them into a log and slice and bake them?
Anna
Hi Michelle, I haven't tried that method, but I don't see why it wouldn't work. I would love to know the results, if you try that!
Carly
Hi
Would I be able to use a large ball tip nozzle to pipe these?
Thanks
Anna
Hi Carly, I'm afraid I haven't tested it with ball nozzle, and personally, I don't think it will work, as you need a large opening. But if you do try it, I would love to know the results!
Toni
These are really perfect cookies! My kids loved it!
Anna
Yay, so glad to hear that Toni, especially if the kids approved of them too!
Jacqueline Debono
I've never piped cookie dough before but these butter cookies turned out great! I didn't dip them in chocolate, but I will next time!
Anna
Thanks so much for the review Jacqui! So glad you enjoyed the recipe! And I think that the plain ones are just as good as the ones dipped in chocolate 😉
Melanie C
Absolutely delicious, thank you for the recipe! I’ll be keeping it handy as the kids will be asking for these cookies again!
Anna
Hah, pleasure all mine Melanie, I'm so happy that kids approved of these as well!
Leslie
I LOVE these butter cookies!! So simple, so perfect! That melted chocolate is the perfect addition to these as well!
Anna
Thank you Leslie, I'm so happy to hear that you like them as much as I do! And chocolate makes everything better 😉
Tammy
Your photos are so beautiful! These look delightful. I love butter cookies...they bring back the best holiday memories for me.
Anna
Thanks Tammy, they are definitely a current favourite in our house!
Jenny
The perfect melt in your mouth cookie. Delicious, buttery, and lovely. I will make them again; they disappeared fast! Thanks so much!
Anna
Thanks Jenny, so happy to hear that! Yeah, the only trouble with these is that they disappear very fast! 🙂
Kushigalu
Butter cookies are my all time favorite. Love the texture, how pretty and festive they look. Would be perfect treat for holidays. Thanks for sharing.
Ben M
These tasted great and they look beautiful. I made these for some Christmas num nums around the house and they definitely didn't last as long as I hoped. I guess I will just have to make some more. Oh no! 😉
Anna
Hey Ben, that's so great to hear, thanks so much for your feedback on this recipe! Haha, I always have the same problem, they disappear so fast in our house, that at the moment I bake them almost daily! 🙂
Amanda
These were so fun to make and decorate! They turned out so pretty and festive and were delicious -- perfect light texture.
Anna
Hey Amanda, thanks so much for this positive review and for taking time to write it! I'm so happy to hear that you enjoyed these cookies! Happy Holidays!
Sheila
The Danish butter cookies call for corn flour.... is that the same as cornstarch??? Or am I looking for a different product? Thanks so much, I’m really looking forward to making these
Anna
Hey Sheila, thanks so much for stopping by. Yes, cornstarch is called cornflour in the UK, but both are pretty much the same. Let me know if you make them and how did you get on! Happy baking!
Bernice Hill
These look amazing Anna! Just like the ones from a Danish cookie tin. I've never piped a cookie before, though we do have an extruder to make spritz cookies. I'm going to give these a try this year, especially with the chocolate dip!
Anna
Hey Bernice, thanks so much for your kind words! It's really fun to pipe these, just make sure to use one of the larger nozzles/ piping tips and you are good to go! Let me know how did you got on!
Kerrie
I'm not sure if I got the dough right but I used 2T of milk and I still needed to apply pressure to pipe the dough out. It wouldn't break off when I stopped squeezing so I would push it off with my finger. I baked until the edges took on some colour and the bottom was a little brown however the insides didn't look quite dry yet. Maybe my cookies were thick, I used a large star tip.
Anna
Hey Kerrie, thanks for your comment. Sorry to hear that you had some trouble with the dough. When piping the dough, you should have to apply a bit of pressure, you don't want that dough to be too runny as the cookies will not hold their shape. I've used small and large nozzles when making these, and baking time is normally around 10 minutes, or as soon as the edges are turning brown. Perhaps they needed a bit longer in your oven, or the temperature was just a bit too low. I would recommend adding just a little bit more milk to the dough to make it easier to pipe and adding a couple more minutes for the baking time.
jill
These cookies are so good and beautiful too! After a test run to see if they would make the my holiday cookie boxes they are a GO! I'll be adding these for years to come! Thanks for sharing!
Anna
Hey Jill, I'm so happy to hear that you will be including these butter cookies in your festive box! The pleasure is all mine, have a lovely Holiday!x