
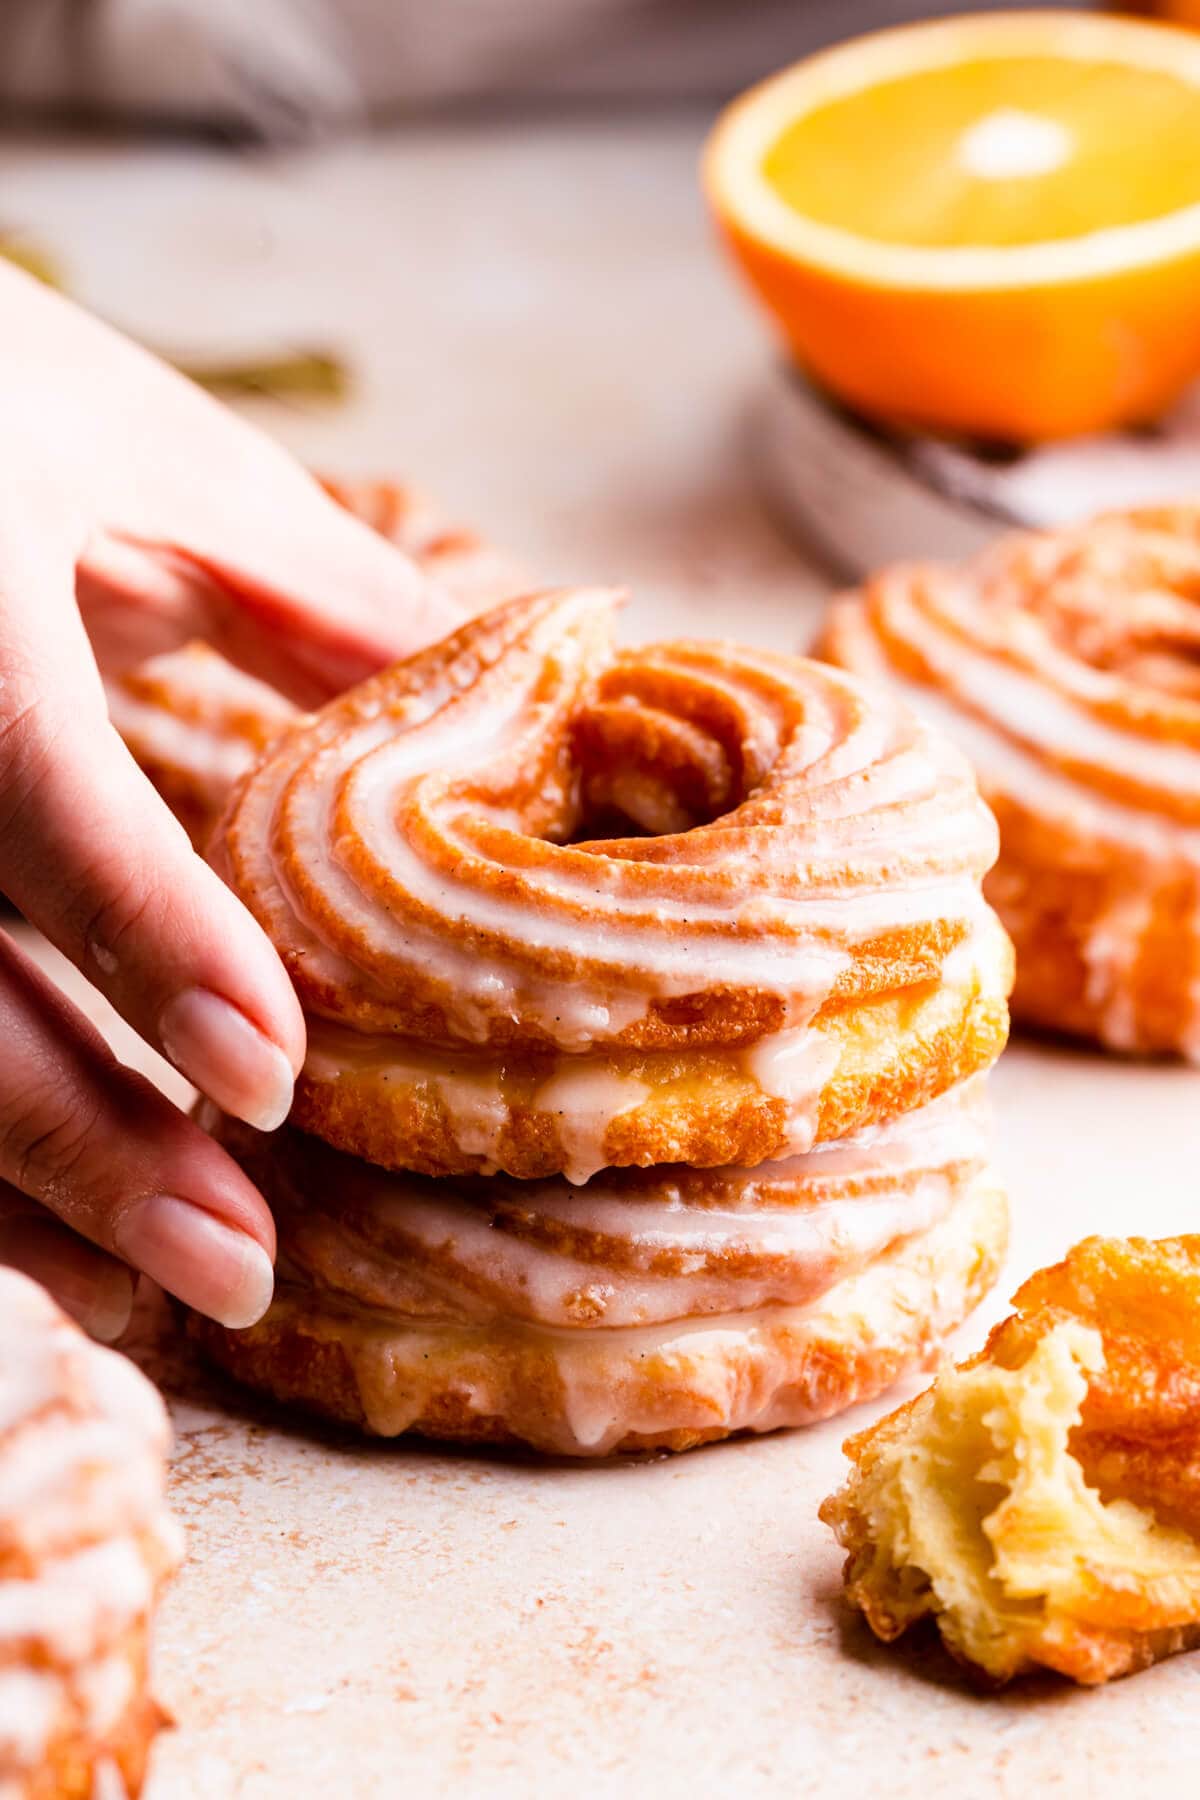
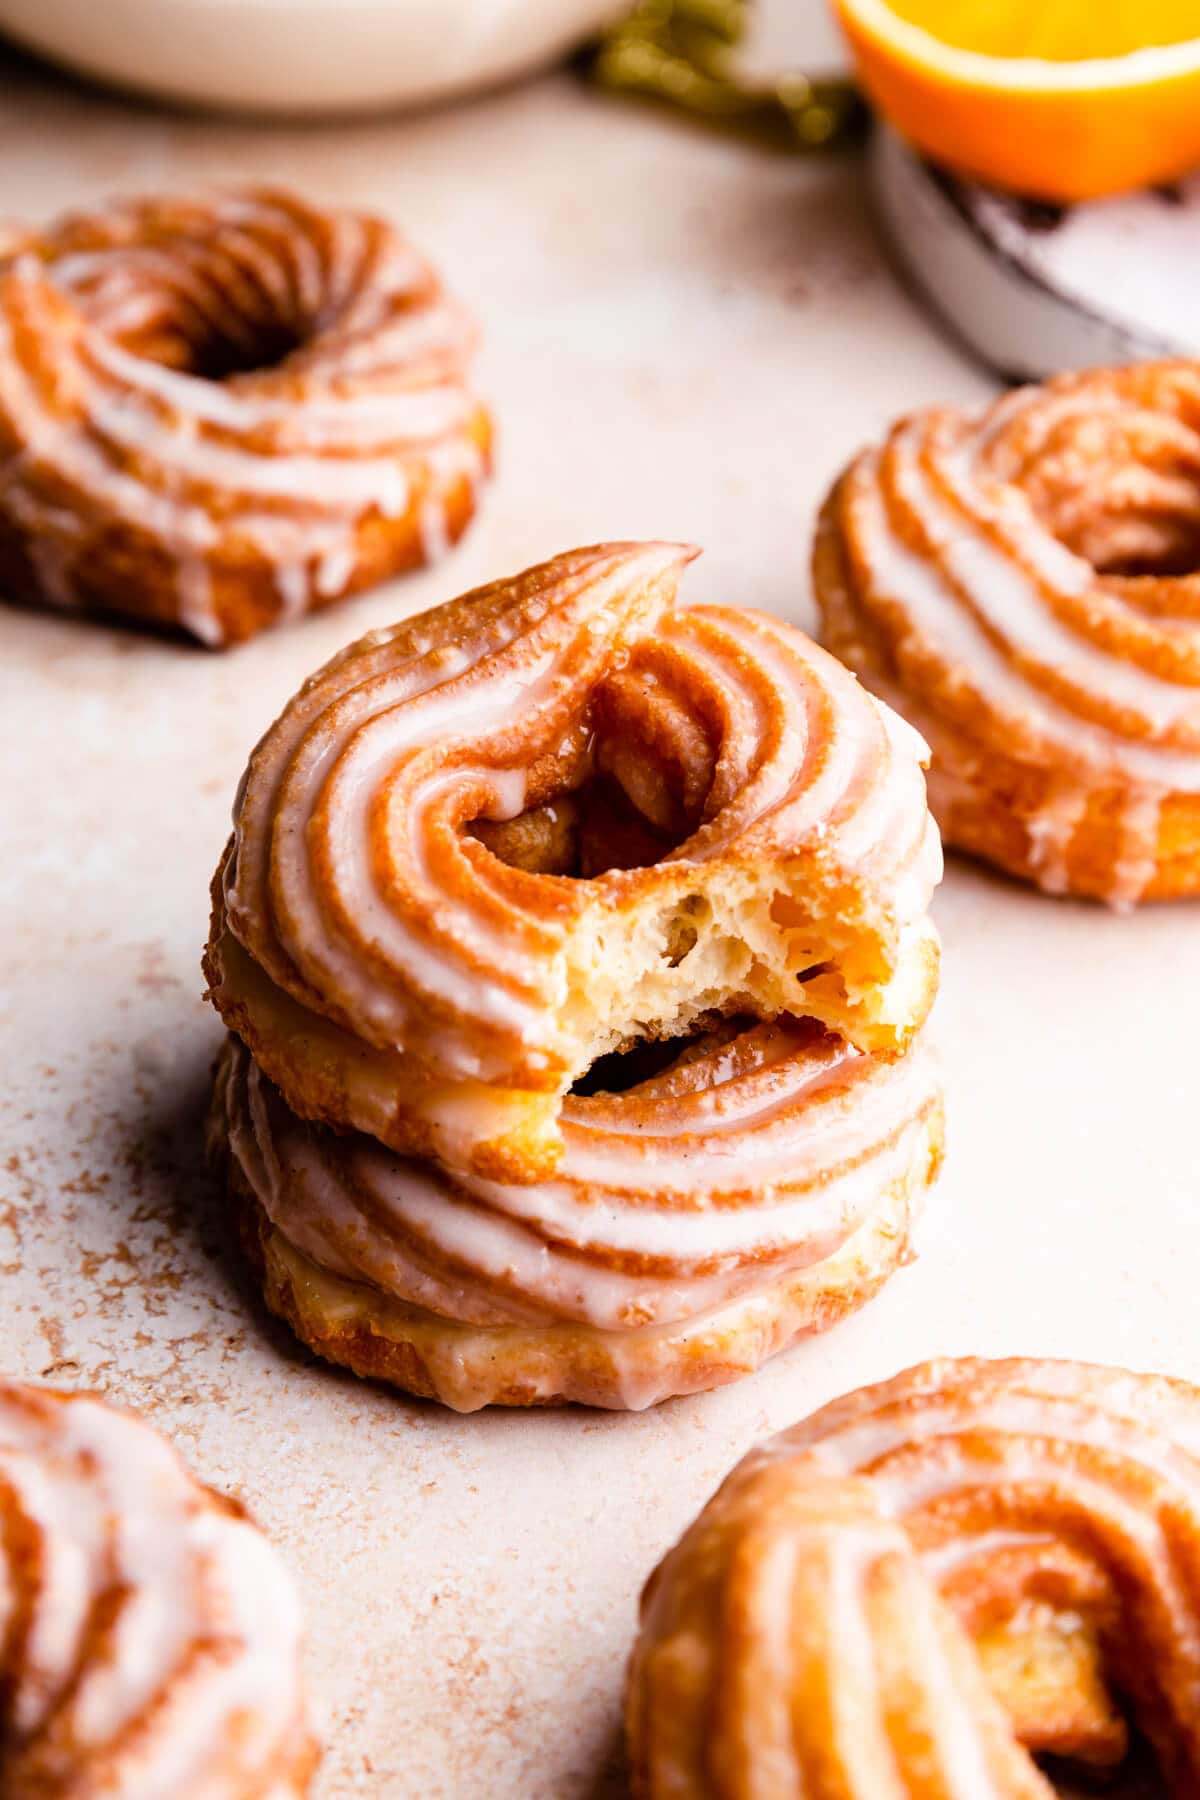
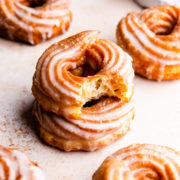
These homemade French cruller doughnuts are incredibly moreish and surprisingly easy to make! Delicate, light and airy in texture, and golden-brown and crispy on the outside. Serve them dipped in some simple glaze, along with a cup of coffee for utterly delicious treat, that is simply impossible to resist!
They are made with choux pastry, which is then piped into rings and deep fried or baked. You can try them with lots of different glaze variations, or perhaps with a filling of custard, pastry cream or your favourite curd!
What I love most about french crullers, is that they are much easier and quicker to make than traditional doughnuts. Unlike my popular Small Batch Doughnuts recipe, or my Pumpkin Spice Doughnuts recipe, these guys do not require any yeast or proving times.
Choux pastry can be made in advance and stored in the fridge, allowing you to enjoy freshly made, melt-in-your-mouth crullers for breakfast!
Jump to:
What's a cruller doughnut?
French cruller donut is a doughnut made with choux pastry, also known as pâte à choux. As you may know, it's the same type of dough that is used to make profiteroles or eclairs. It is cooked twice: first over the stove/ hob, then oven baked, or deep fried in this case.
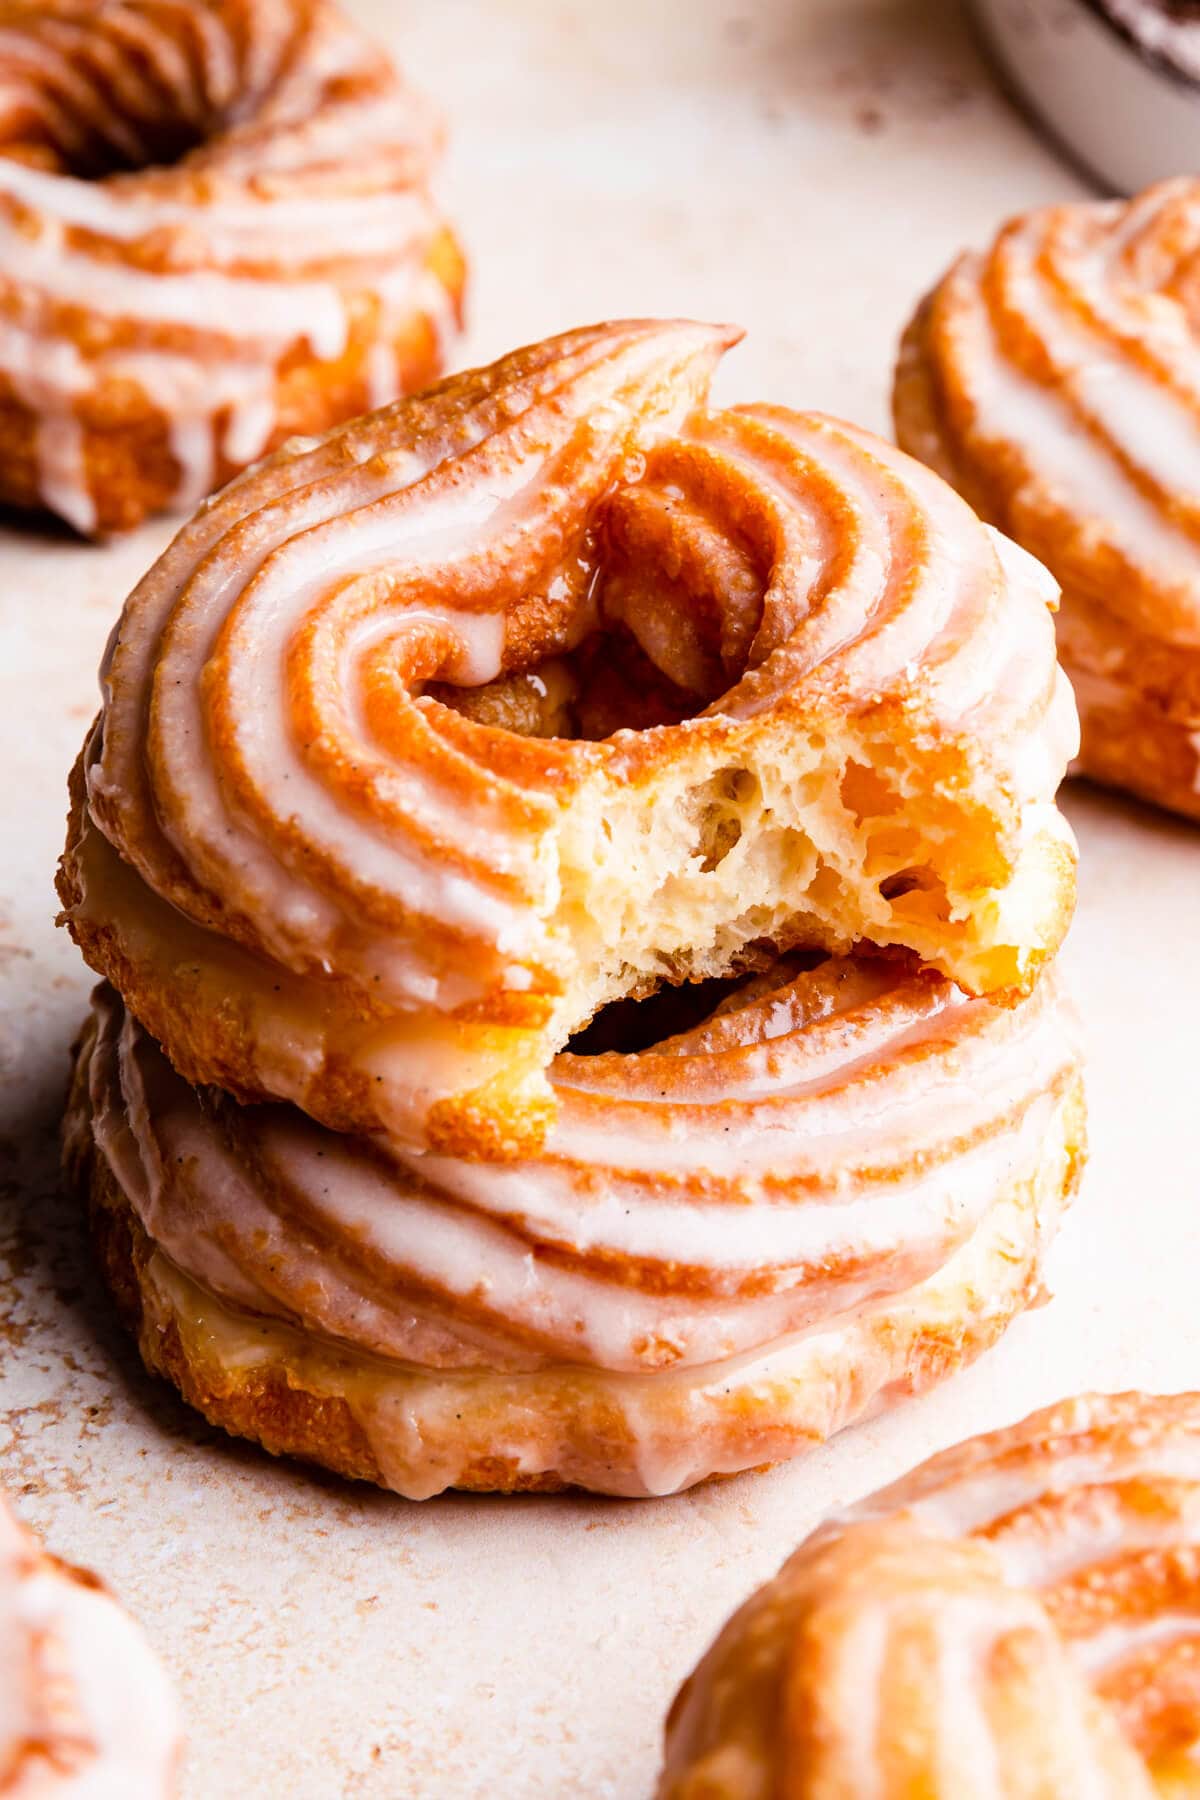
Crullers (sometimes also called chouxnuts), are much lighter and more delicate than the traditional doughnuts. Choux pastry dough rises and becomes incredibly airy when fried, which is why these doughnuts have such delicate and light texture.
They should be crispy on the outside, with the distinctive edges that are just perfect for absorbing the sweet glaze, and super soft and airy inside.
Ingredients
Only few simple and very basic ingredients are needed to make these chouxnuts. Here's what you will need:
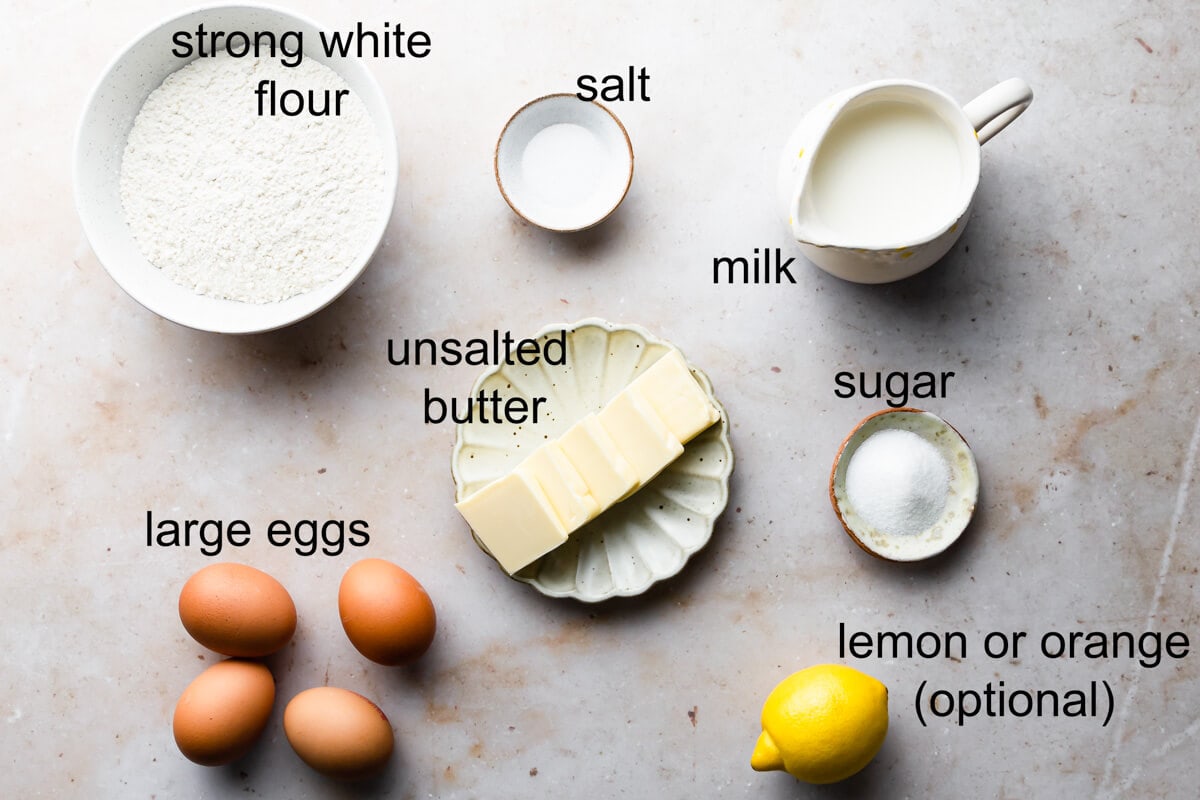
- Milk - Full-fat / whole milk works best, but you can also use semi-skimmed milk.
- Butter - Salted or unsalted butter is fine. If you are using salted butter, reduce the amount of salt to ¼ teaspoon.
- Sugar - Only a tablespoon of sugar is needed. You can use white caster sugar or granulated sugar.
- Salt - Just a small amount, about ½ teaspoon of fine salt, for seasoning.
- Flour - Use strong white bread flour or plain, all purpose flour.
- Eggs - You will need 4 large eggs in total. 3 whole eggs and one egg white only.
- Lemon or orange zest - This ingredient is optional, but adds lovely flavour to the crullers.
- Vegetable oil - For frying the doughnuts. You will need about 1 litre of oil.
- Icing / powdered sugar (for glazing).
Instructions
Watch this Instagram Reel to see me making these cruller doughnuts!
Making choux pastry is actually really easy and straightforward. Start by placing the milk, butter, sugar, salt and 120 ml of water in a medium saucepan over a low heat, stirring until sugar dissolves and the butter melts.
Bring this mixture to a gentle boil, then remove it from the heat. Tip all of the flour into this mixture and using a wooden spoon, stir it vigorously, until well combined, then return to a low heat and cook, stirring it constantly for 2 minutes.
Transfer the dough into a bowl of a standing mixer, and spread it into a thin layer over the sides and the bottom of the bowl. Leave it to cool for 10-15 minutes.
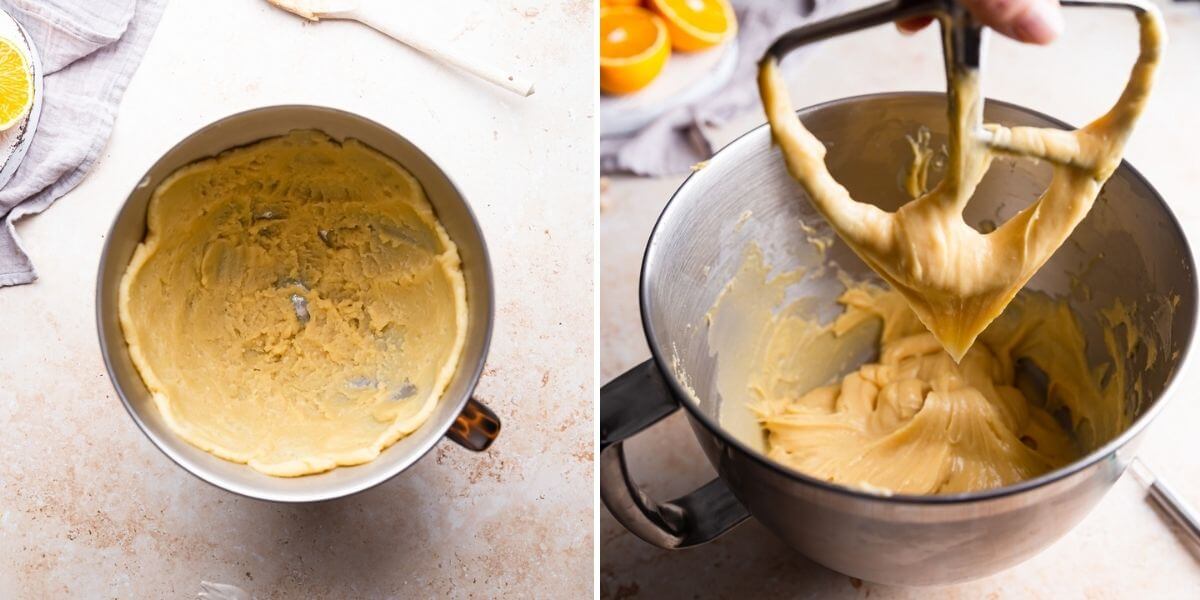
Scrape the sides of the bowl, and add 2 beaten eggs into the dough and mix it on medium speed until the eggs are fully incorporated. Add the remaining beaten egg and repeat.
Gradually, add the remaining egg white until the mixture is thick and shiny and drops off a spoon when tapped lightly (you may not need all of the egg white). If it clings, add a little more egg whites, 1 teaspoon at a time to get the right consistency.
Hint: The easy way to know if your choux pastry is the right consistency, is to perform the 'V' test. Place a rubber spatula or your paddle attachment upright in your choux dough, stir it a little, and then lift the spatula or the paddle attachment. If your choux dough is ready, it should form a V shape at the end of spatula or paddle (as in the photo above).
Scoop the choux paste into a large piping bag fitted with large open star nozzle (or large French star nozzle) and place it in the fridge for at least an hour.
Piping the crullers
While the dough for your homemade crullers is chilling, cut the baking paper into 12 squares, 9cm x 9cm. Next, draw a circle 7cm in diameter on each of the paper squares, and turn them into other side, so the circle is at the back of the paper.
Half fill a deep-fat fryer or large heavy-based saucepan with vegetable oil and place it over a medium heat. Heat the oil until it reaches 180°C on the cooking thermometer.
Pipe a circle of dough onto each square, making sure you connect the ends of each donut.
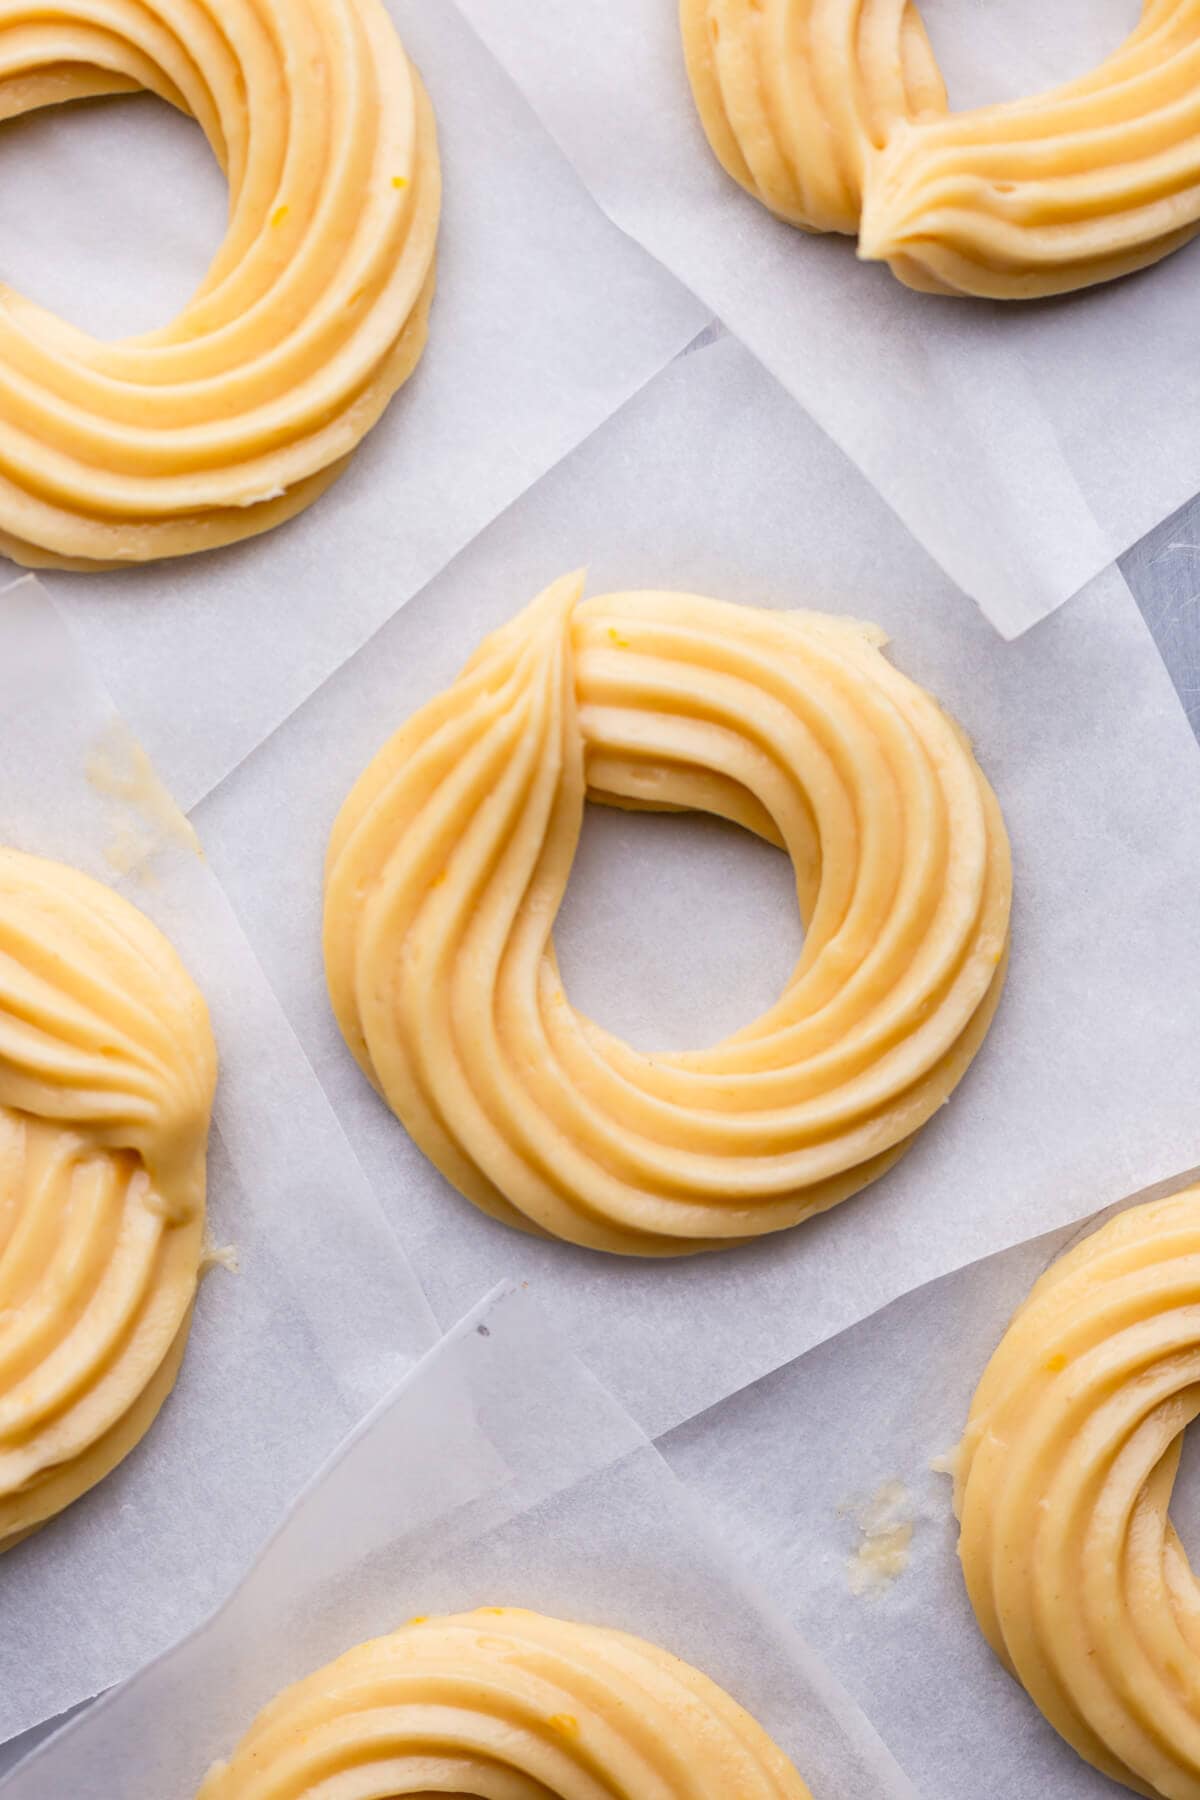
Hint: Dip the tip of your finger in some water, then gently tap the apex or any end points on your cruller doughnuts. This way, you will avoid burning them.
Frying instructions
Please take extra care when frying these chouxnuts. The oil will be VERY HOT, so it is important to be extra-careful.
Once the oil temperature reaches 180°C, carefully lower the choux rings into the oil, with the baking paper uppermost. Alternatively, place a square with a cruller on it on a slotted spoon and slowly lower it into the oil.
Gently remove the baking paper using metal tongs and fry the cruller doughnuts for 2-3 minutes on each side, until golden brown. Make sure to only fry 2-3 doughnuts at a time.
Hint: Use wooden skewer or a metal utensil for flipping the doughnuts onto other side while frying. Avoid any type of plastic utensils as they will melt in the hot oil.
Use a slotted spoon to remove the cooked cruller donuts from the oil and set them aside on a wire cool rack or large plate lined with kitchen paper. Repeat the frying process with all the remaining doughnut rings.
Once the crullers are cool enough to handle, dip each choux ring into the glaze and return to the cooling rack, dipped side uppermost.
Baked vs fried cruller
If you are not a fan of deep-frying these crullers, you can also bake them instead. The texture of the baked crullers will be slightly different than that of the deep-fried ones.
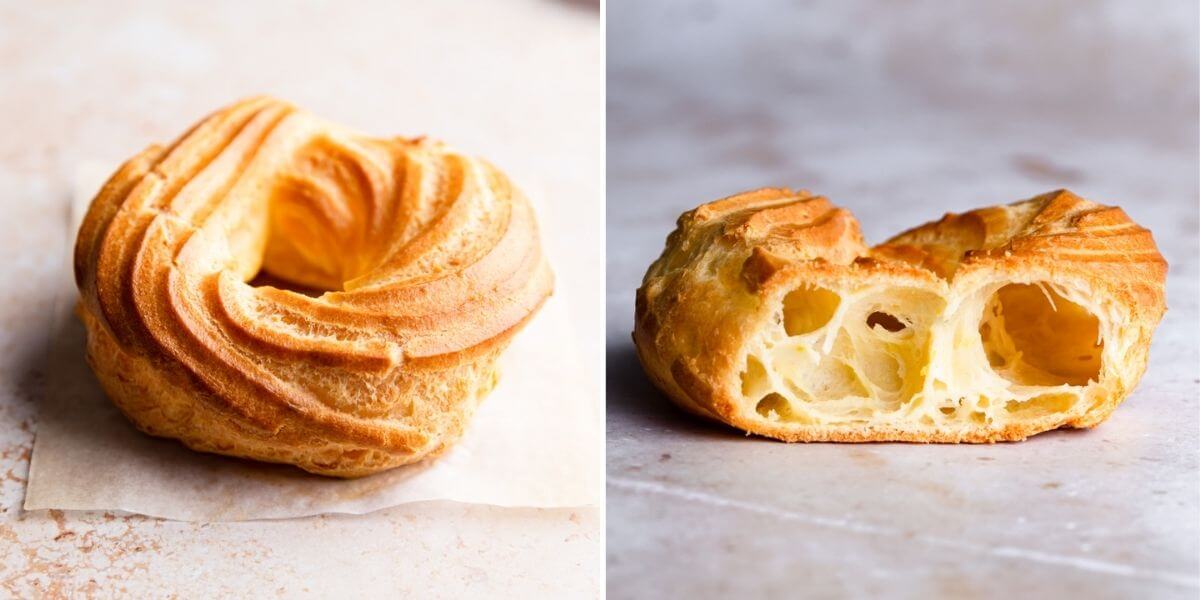
The crust of the baked cruller donut is firmer. Due to more moisture evaporating from the dough in the oven, the interior of baked cruller is less gooey and less squidgy and more sturdy in comparison. That said, they still taste DELICIOUS!
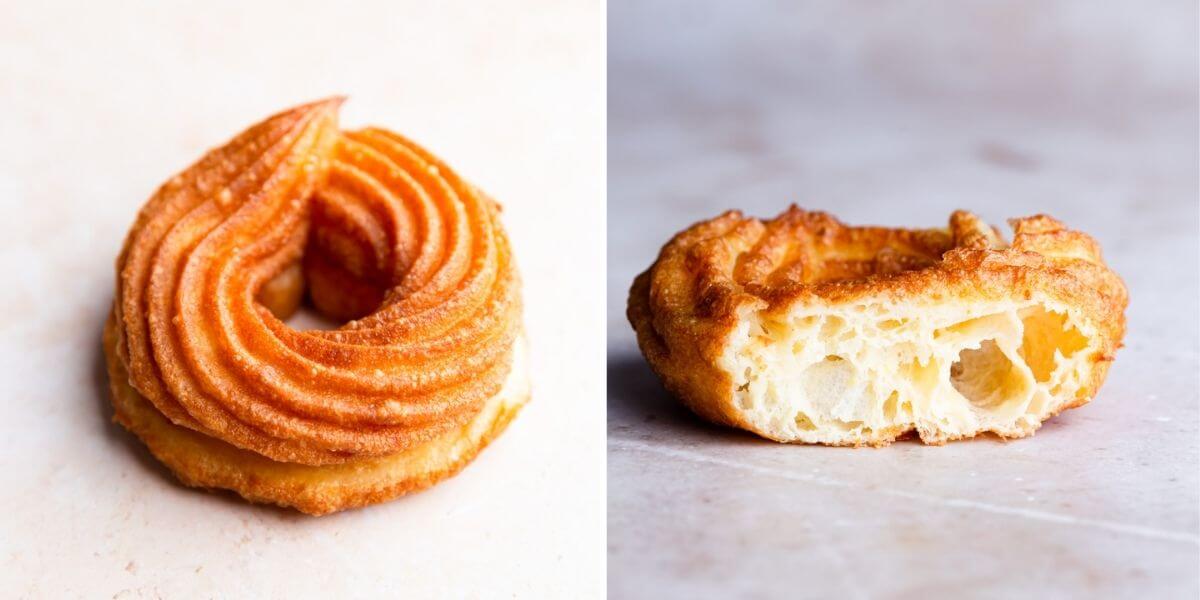
Deep-fried cruller is much softer on the inside as well as on the outside. The crust of the fried doughnut is much softer, but still crispy. The inside is much softer and more gooey.
Hint: Follow the instructions in the recipe card notes for baked crullers.
Chouxnuts can also be made in the air fryer. I have not tried the air-fried version of them, but if it's something you would like to try, check out this Air Fryer Pumpkin Spiced Crullers recipe from Recipes From a Pantry website.
Equipment
Here is the list of the kitchen equipment needed to make this recipe:
- Freestanding mixer with paddle attachment or electric hand mixer (it is also possible to make the choux pastry by hand, with wooden spoon) for making choux pastry.
- Large piping bag/ pastry bag with a large open star nozzle or French star nozzle for piping the crullers.
- Baking paper - cut into squares.
- Deep-fat fryer or heavy-based large saucepan for frying the crullers.
- Kitchen/ cooking thermometer (unless using deep-fat fryer with temperature control) to make sure the oil temperature is correct all the time.
- Slotted spoon for lowering and removing the doughnuts from the hot oil.
- Metal tongs for removing the baking paper squares from the hot oil.
- Kitchen paper to rest the fried crullers on (it will also absorb any excess oil).
Variations
Crullers can be enjoyed plain, with glaze, or even with a filling. Here are few suggestions you may want to try:
- Vanilla sugar glaze - Mix 180g of icing/ powdered sugar in a small bowl with 2-3 tablespoon of milk or water and 2 teaspoon of vanilla extract or vanilla bean paste.
- Honey glaze - Same as above, but add 2-3 tablespoon of runny honey into the mix. You can also swap honey for maple syrup.
- Cinnamon glaze - Combine icing sugar with 1 teaspoon of ground cinnamon and milk (you can use any of your favourite spices instead of cinnamon).
- Raspberry glaze - Add 2-3 tablespoon of raspberry coulis or raspberry reduction to the icing sugar and milk.
- Add the filling - make vanilla or chocolate crème patisserie/ pastry cream and fill the crullers with it. You could also use your favourite fruit curd for the filling.
- Gluten- free crullers - Although I haven't tested this recipe with gluten free substitutions, I found this recipe for gluten free crullers from Gluten Free On A Shoestring website.
Storage
Crullers are best and should be eaten on the day they are made. You can store any leftovers in airtight container up to 2 days.
You can also freeze piped, un-fried crullers for up to a month. Place the squares with piped choux rings on a baking sheet and freeze until frozen. Transfer them to freezer-friendly bag or container. Let them thaw slightly while the oil is heating up, before proceeding with frying, as per the recipe card. You will need to add a minute or two to frying time.
FAQ's
Can I use small piping tip/ nozzle to pipe the crullers?
Yes and no. Technically, you can use small piping nozzle, but your crullers will be much smaller and thinner. If you want to get the proper-sized, large cruller doughnut, you will have to use large tip to pipe them. Using a small nozzle will also make piping the doughnut rings more difficult.
How do I know when they are cooked all the way through?
You know your crullers are done when they are deep golden brown in colour on both sides. They only need 2-3 minutes of frying on each side.
Why did my doughnuts collapsed after frying?
There could be a couple of reasons for this. One is the type of flour used. I found that making the dough with strong bread flour makes much sturdier doughnuts, in comparison to plain flour. Another reason for that could be that your crullers were not cooked all the way through and needed more time to be fried.
Why did my crullers split while frying?
It is more likely due to the choux pastry has not been chilled enough. Remember to allow the dough to sit in the fridge for at least an hour or two, before piping and frying the doughnuts. Also, make sure that your frying pan is half filled with oil. Any less, and you are risking the crullers getting stuck to the bottom of the pan and splitting as a result. Lastly, make sure the oil temperature is spot on and stays right at all times.

Top tip
I found that using the strong white bread flour to make choux pastry with makes sturdier dough, which is less likely to collapse after frying.
Chilling the choux pastry helps these French cruller doughnuts to keep their shape while frying. It also makes the dough less sticky and much easier to handle.
Make sure to keep an eye on the oil temperature at all times! If the temperature is too low, the doughnuts will absorb too much oil and will become soggy and flat. When temperature is too high, they will brown too quickly on the outside, while remaining raw inside.
📖 Recipe
French Cruller Doughnuts
Equipment
- medium saucepan
- freestanding mixer with paddle attachment or electric hand mixer
- large piping bag
- large open star piping nozzle or large French star piping nozzle
- baking paper
- deep fryer or heavy based pan/ saucepan
- cooking thermometer
- slotted spoon
- metal tongs
- kitchen paper
Ingredients
- 120 ml full fat milk
- 120 ml water
- 115 g unsalted butter
- 1 tablespoon caster sugar
- ½ teaspoon salt
- 160 g strong white bread flour or plain flour
- 3 large eggs
- 1 large egg white
- 1 tablespoon grated lemon or orange zest optional
- 1 l vegetable oil for frying
For the glaze:
- 180 g icing sugar
- 2-3 tablespoon milk
- 2 teaspoon vanilla extract or vanilla bean paste optional
Instructions
- Place the milk, butter, sugar, salt and water in a medium saucepan over a medium heat. Stir until the sugar has dissolved and the butter has melted. Bring to a gentle boil and remove from the heat. Tip in all of the flour (160g) stirring vigorously with a wooden spoon until well combined.
- Return the saucepan to the heat and keep stirring the mixture for another 2- 3 minutes until you notice a thick film forming at the bottom of the saucepan. The mixture should be very thick, smooth and shiny, with no visible lumps.
- Transfer the dough into a bowl of a standing mixer, spread it into a thin layer over the sides and the bottom of the bowl with spatula and allow the mixture to cool for about 15 minutes, until it is room temperature.
- Fit the mixer with paddle attachment, scrape the sides of the bowl with spatula and add two beaten eggs into the dough. Start mixing it on a medium speed, until the eggs are well incorporated. You may have to scrape the sides of the bowl every now and then.
- Add the third egg into the dough, and again, mix on a medium speed until fully incorporated. Scrape the sides of the bowl as necessary. Add the egg white and lemon zest and stir again on medium speed until fully incorporated. Transfer the dough into a large piping bag fitted with large open star nozzle and place it in the fridge for at least an hour.
- Half fill a deep-fat fryer or heavy based large saucepan with vegetable oil and heat it up to 180°C. Make sure the oil temperature stays constant at all times of frying the doughnuts.
- Cut parchment paper into 12 squares, each 9 x 9 cm. Draw a circle 7cm in diameter onto each square. Turn each paper square over, so that the drawn circle is on the underside. Hold the piping bag vertically, over one of the parchment squares, and start piping an even circle of dough, just making the ends to meet and connect. Repeat with the remaining dough and parchment squares.
- Gently, place the cruller in the hot oil, with the parchment paper still attached to it and facing up (although, it's fine if the parchment paper detached itself from the cruller when placing it in the hot oil). Alternatively, place the square of parchment with choux ring on it onto a slotted spoon and carefully lower it into the hot oil.
- Fry the doughnuts about 2- 3 at the time for about 2-3 minutes on each side, removing the parchment paper with metal tongs. They should be deep, golden brown on both sides. Remove the doughnuts from the pan using a slotted spoon and place on a large plate lined up with some kitchen paper. Allow the crullers to cool down before glazing.
For the glaze:
- Mix all of the ingredients together, adding enough milk to create runny, but also thick enough glaze that will cover the doughnuts. Dip the doughnuts into the glaze & enjoy!
Please note that all my recipes are developed and tested in metric grams. I recommend that you use digital scales for a more accurate results. I have provided a conversion to US customary in the recipe but please note that I haven’t tested using this method.
Notes
- Using the strong white flour in choux pastry will make sturdier crullers, which are less likely to collapse after frying.
- Chilling the dough for at least an hour makes it much easier to work with. It will also help to prevent the doughnuts from splitting, while frying them.
- Keep an eye on the oil temperature at all times, make sure it doesn't exceed the 180° C mark.
- The choux pastry can be made up to 2 days ahead and stored in the fridge.
- To bake (instead of deep frying): Heat the oven to 220°C (fan) and place the crullers on a baking tray, leaving 3-4 cm space between each doughnut. Place the tray with doughnuts in the hot oven and bake for 5 minutes, then reduce the heat to 160°C (fan) and bake for another 15 minutes. Turn the heat off, open the oven door slightly and allow the crullers to sit in the oven for another 10 minutes. Remove from the oven and dip them in glaze.
- Doughnuts are best served and eaten on the same day they are made.
- Store any leftover crullers in the airtight container at room temperature for up to two days.
- Freezing instructions: Freeze piped choux rings on a baking tray until frozen. Transfer to a freezer friendly bag or container and keep in your freezer for up to a month. Thaw them slightly while your oil is heating up. Add couple of minutes to frying times, if cooking from frozen.
Nutrition
This recipe was originally published in June 2019. It has been updated with the new photos, revised recipe and tips in January 2022.

Jodi
Taste quite good but our BAKED donuts came out quite flat. We are not sure what we may have done wrong. We weigh our ingredients on a scale and we cooked the pate a choux as instructed. If they had been fluffier, they would have been perfect.
Anna
Hey Jodi, sorry to hear that they didn't rise as much as you hoped for, fried crullers will always puff up much more in comparison, but I'm really glad to hear that you still enjoyed the recipe!
Tina L
Thank you, the recipe worked. Tried 4 different recipes and all were a fail until I came across yours and they taste exactly how I hoped.
salacia
Hey, I’d really so badly like to know how to fill these cruller donuts without splitting them in the middle. I love your recipes and I love how you explain things but I cannot figure out how to do so. I’d really love it if you helped me out.
Anna
Hi Salacia, thanks so much for the kind words, glad to hear you are enjoying the recipes! Have you tried placing them in the fridge/ freezer for an hour or so before frying? Also, the correct oil temperature is crucial, I find that when oil is too hot, they will split. Hope this helps, but feel free to ask any questions!
Salacia
Heyy I think I phrased the question wrong. English isn’t my first language! I meant to fill the inside of these crullers. I don’t know how to. Should I make a whole on the side? Thank you.
Michelle
I want to eat them all! Thank you for breaking down the recipe in such a simple way. I was intimidated when I saw the beautiful doughnuts, but they were easier to make than expected!
Anna
Hi Michelle, thanks so much for this feedback, I'm so pleased that you find the tips and photos helpful!
Dennis Littley
You had me at doughnut and my family is lucky I left any for them to try!! they were delicious!
Anna
So happy to hear that Dennis! They always disappear super fast in our kitchen!
Ela
They look so beautiful and delicious my dear! Do you think the eggs can be replaced to make the recipe vegan?
Much love, Ela
annabanana
Hey Ela! Thanks so much for stopping by! Yes, I think they can be made with no eggs, just like churros (the dough is very similar). I hope you will try them some time soon! Enjoy your weekend hunni!
Bianca Zapatka
Wow these look amazing Anna! I wish I could have them all 😍 Great recipe 😘❤️
annabanana
Thanks so much my lovely friend! They're crazy good, and I think eating them all is a very reasonable thing to do! 😉 Have a lovely weekend Bianca!
Monica
These donuts are so beautiful and so unique! I love the step by step photos as well - so easy to follow along with!
annabanana
Hi Monica, thanks so much! I'm so glad to hear that you like the recipe and the photos! Hope you will try making them soon!
Analida Braeger
These are by far my favorite donut ! I always load up on the ones at tim hortons, but these look delicious and so simple to make !
annabanana
Hi Analida, thanks for stopping by! Would you believe, I've never heard of them until literally about a month ago! I feel like I've been missing out my whole life, so trying to make up for it now! 😉
Des
These look dangerously addicting and definitely impossible to resist! I have added them to our menu for next weeks breakfast!
annabanana
They are exactly that Des! Very addictive, and super easy to eat! Hope you will enjoy them as much as I do!
Kelly Anthony
I love that these french cruller doughnuts are super light and airy. Doughnuts are always impossible for me to resist so I'm excited to try a new recipe.
annabanana
Hello Kelly, thanks for your comment! They are soooo light, it's almost like eating an air! 😉 And it's impossible to stop at just one doughnut, two is an absolute minimum!
Neha
Gosh these doughnuts look so soft spongy and delicious! Would you mind sending a few over, my mouth is already watering!!!
annabanana
Hey Neha, I would love to send you some, but they don't last even an hour in my house! 😀 Thanks for your lovely comment!
Veronika's Kitchen
I looove french cruller! but never even thought to make it at home... 😉 It actually doesn't look that hard to make it, so I will try this recipe next weekend!)
annabanana
yay! That makes me so happy to hear that Veronika! They are surprisingly easy to make, and once you start making your own, there is no stopping! 😉
Kathy
Hi
What plunger do you use ,
I am looking for a French Cruller plunger that fits into the hand held donut dropper,
Thank you
Kath
Anna
Hi Kath, I don't use a plunger, the crullers are piped, then placed in the oil (and removed) with a slotted spoon. Hope this helps.
Kathryn
Oh my - these look amazing! I've got to make them - Pinning for later!!
annabanana
Thank you Kathryn, hope you will give them a go some time soon, they are too good to miss!
Marisa F. Stewart
Oh, MY!! The cruller doughnuts look amazing. I've never tried them but I'd really like to. I've always preferred the yeast doughnuts to the cake ones. The cake ones always seemed dry and crumbly. Now, your crullers would be exactly the type of doughnut I'd love to enjoy with my morning cup of coffee. The glaze on them is the perfect finishing touch.
annabanana
Hi Marisa, thank you for your lovely comment! That is very true, I have tried baked doughnuts but they are just not the same, are they? These are so incredibly light and airy and yummy! No crumbling going on here! Hope you will try the recipe some time soon! Have a great week!
Sharon
Breakfast will never be the same once I make this recipe for French crullers. Perfect with a cup of coffee and the Sunday paper.
annabanana
Hehe, thank you Sharon! They are ideal with a cuppa, especially on a weekend morning!
Alisha Rodrigues
This would make a great treat... I'm gonna make a few for my friends, I'm sure they'll love it
annabanana
Thanks Alisha, please let me know if you do! I hope your friends will like them!
Eva
I am literally drooling as I look at the pictures of these. I am particularly intrigued by the pattern, I love that they come out a star shaped tip, kinda like churros!
annabanana
hey Eva! Thanks so much for stopping by! Yes, totally like churros! Big open star piping nozzle will guarantee that distinctive pattern to hold its shape.Hope you will try them soon!
Karly
Love these! Thanks for sharing!
annabanana
Pleasure all mine Karly, glad to hear you like them!
Veena Azmanov
These Doughnuts look delicious. Love the design given to making it unique .
annabanana
Thanks so much Veena! Glad you like them!