
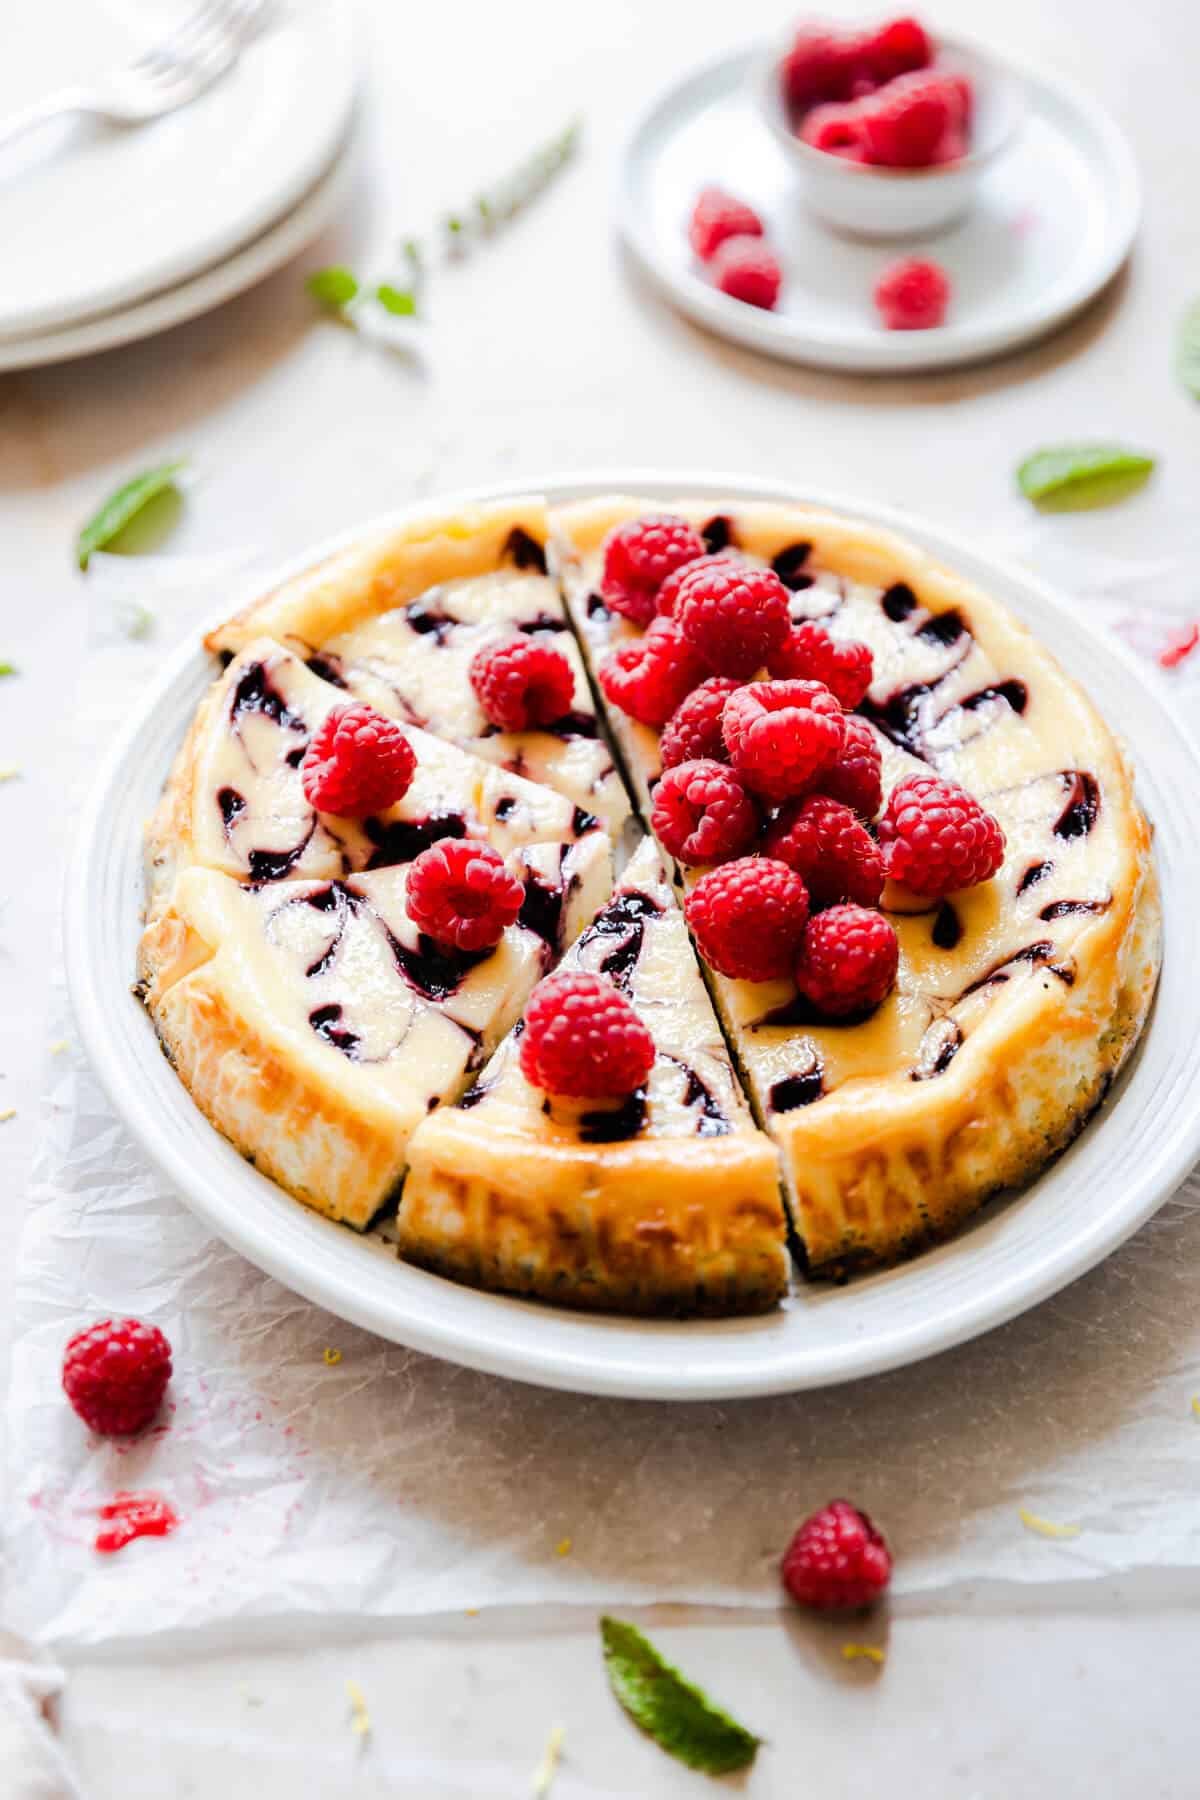
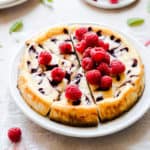
Say hello to your new favourite dessert- raspberry ripple cheesecake! Made with Oreo crust, super creamy filling and sweet raspberry sauce! The hardest part of this incredibly easy recipe is waiting for it to set!
Last week I have posted this recipe) on my Instagram and it's been such a success among my readers and followers! So today's post is another version of these delicious cheesecake bars.
What's so great about this cheesecake?
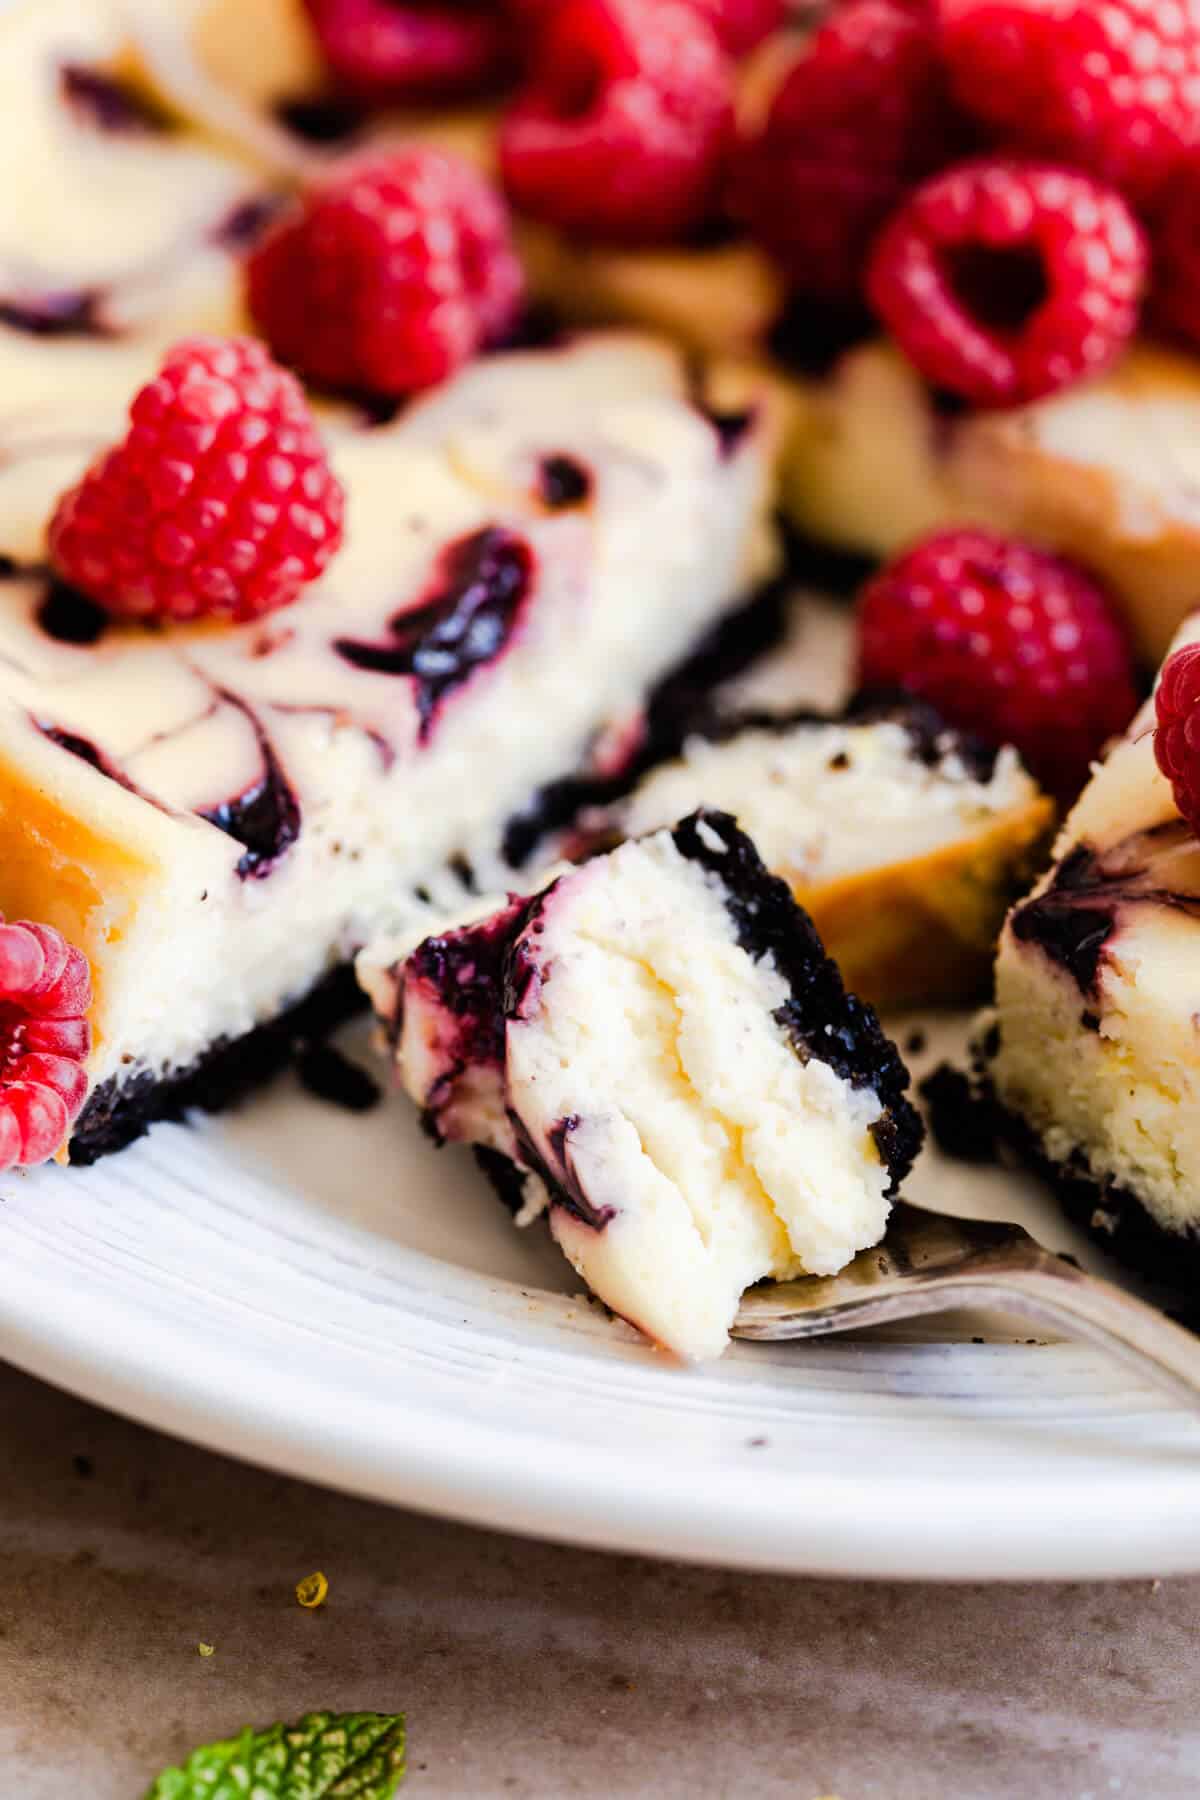
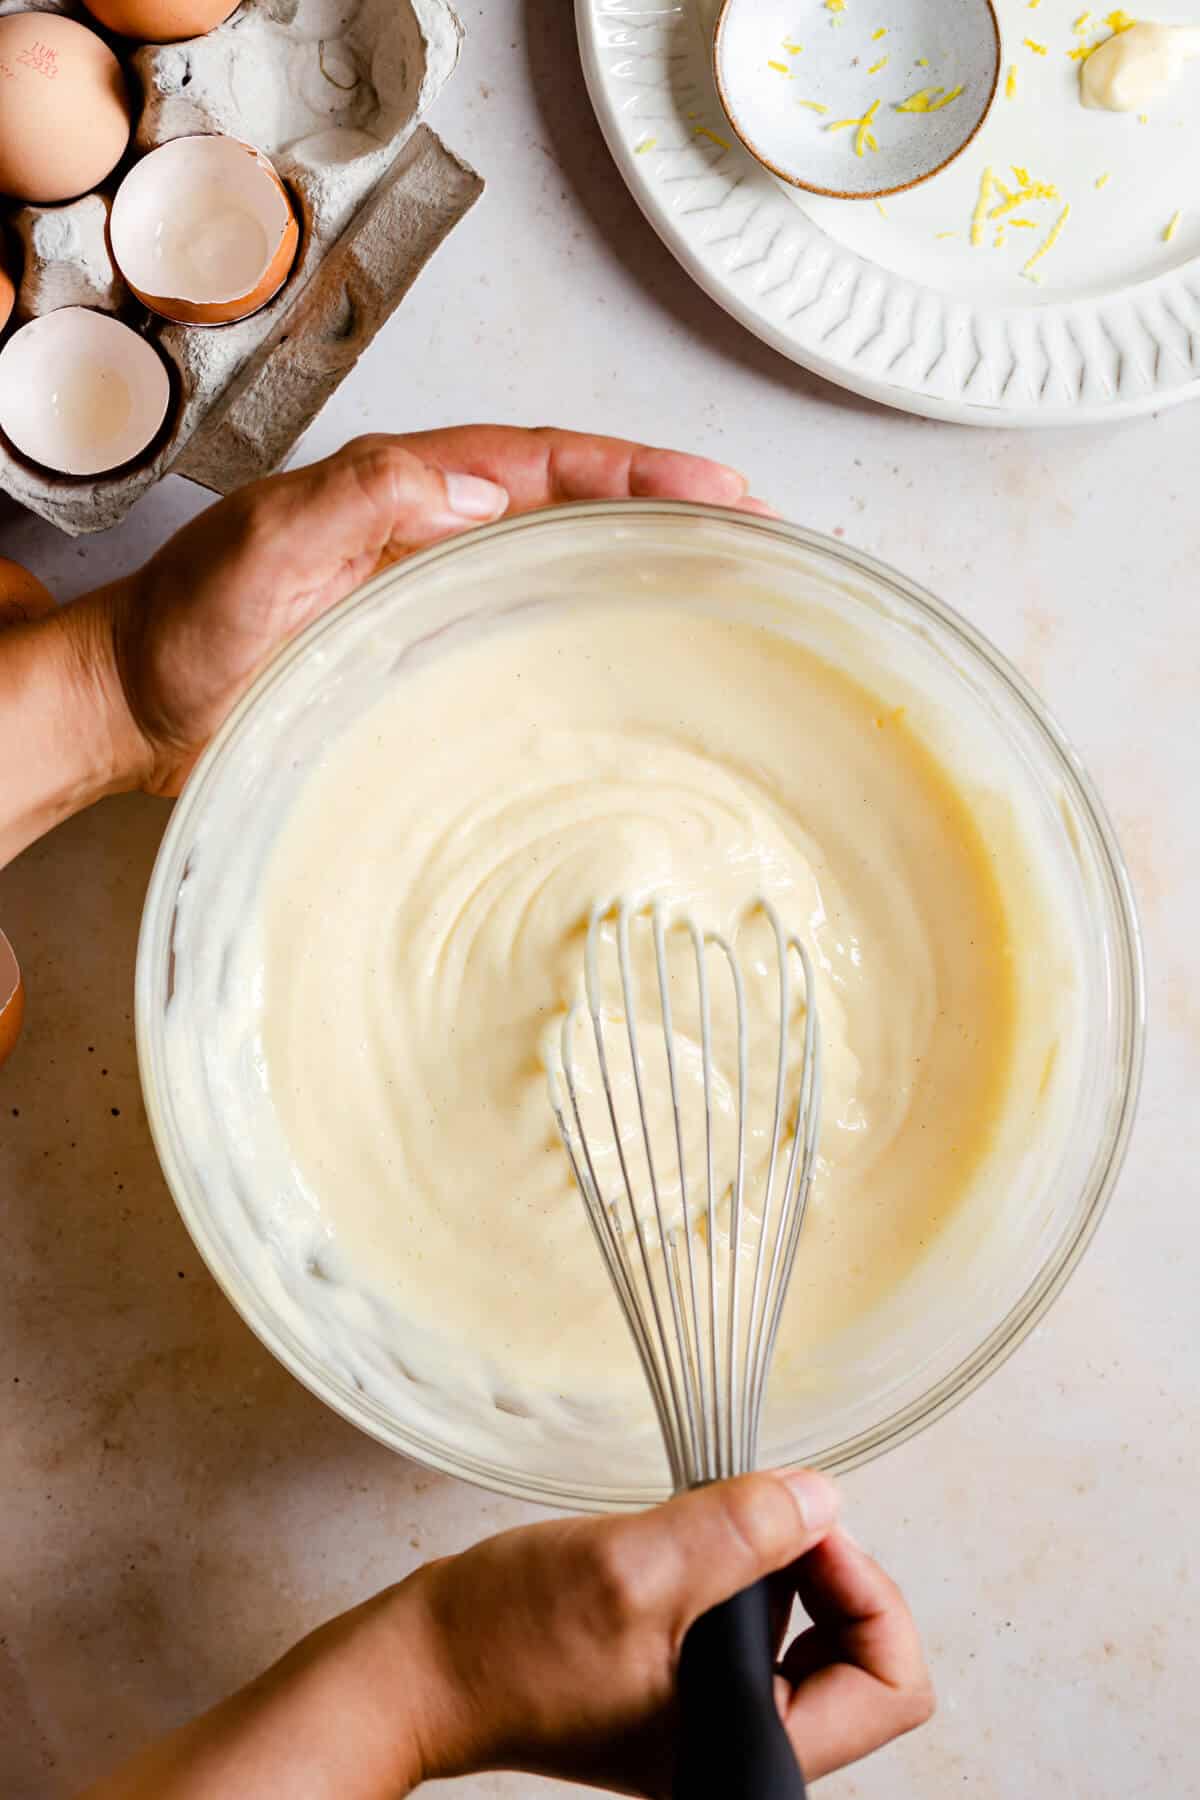
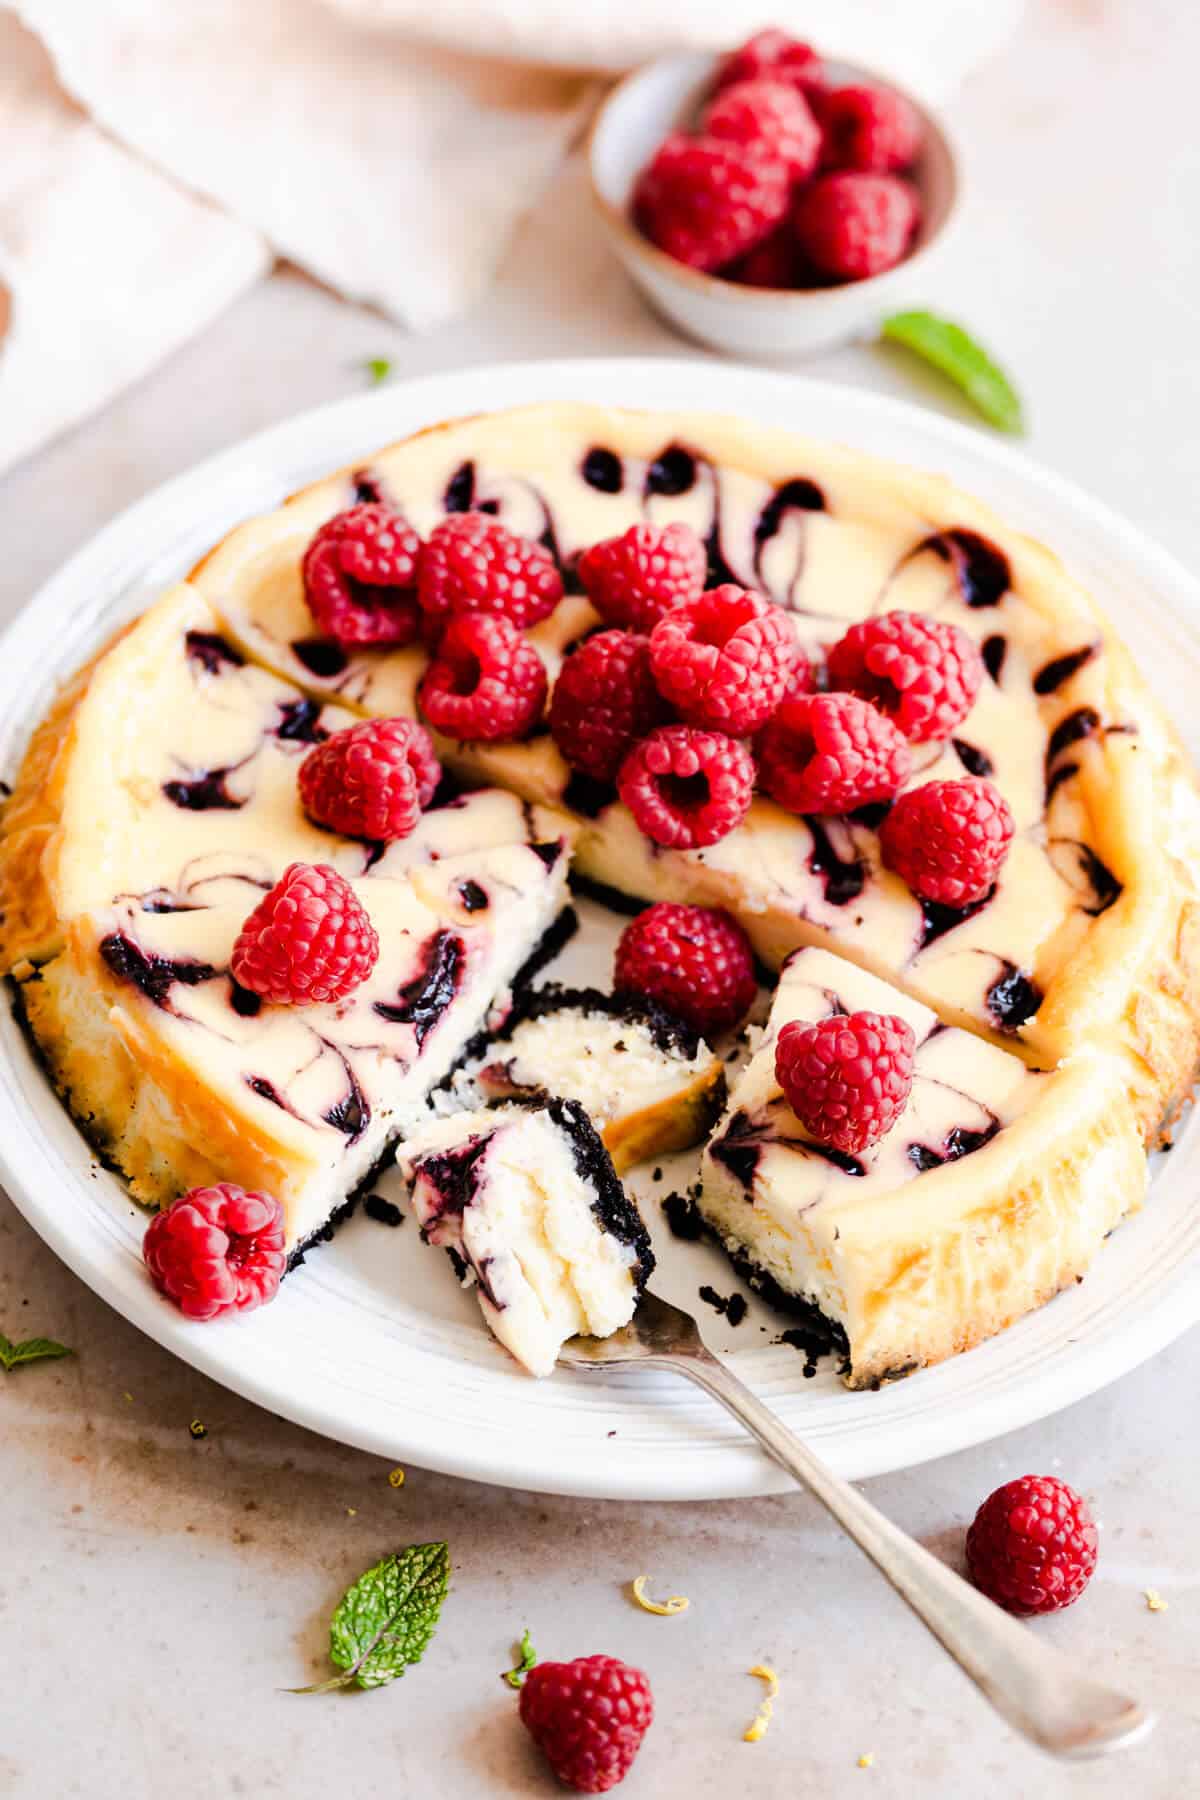
Well, I'm glad you've asked! Let's start with the texture. It's sooo creamy and super smooth! Each bite almost melts in your mouth and delivers such a delicious flavour. Next, it's the crust it sits on. Made from crushed Oreo cookies (inspired by this recipe from Baking A Moment), it adds perfect crunch and hints of dark chocolate. Then, to top it up, there is a sweet and tangy raspberry sauce, which also creates these beautiful patterns of swirls.
Will I need any special equipment for this recipe?
Only a couple of things, but nothing too fancy! Good springform or loose-bottom baking tin, baking paper, and a bigger, deep roasting tin or a deep dish that will fit your baking tin. In case if you are wondering what's the deal with another baking/ roasting tin, we need it for a water bath. But more about that below.
All of the ingredients can be mixed by hand, so you don't even need an electric mixer!
I have also made this recipe in a 8'x 8' square baking tin, which didn't have loose-bottom. It will also work, just make sure to line the baking tin with plenty of overhanging baking parchment, to help you remove it from the tin later.
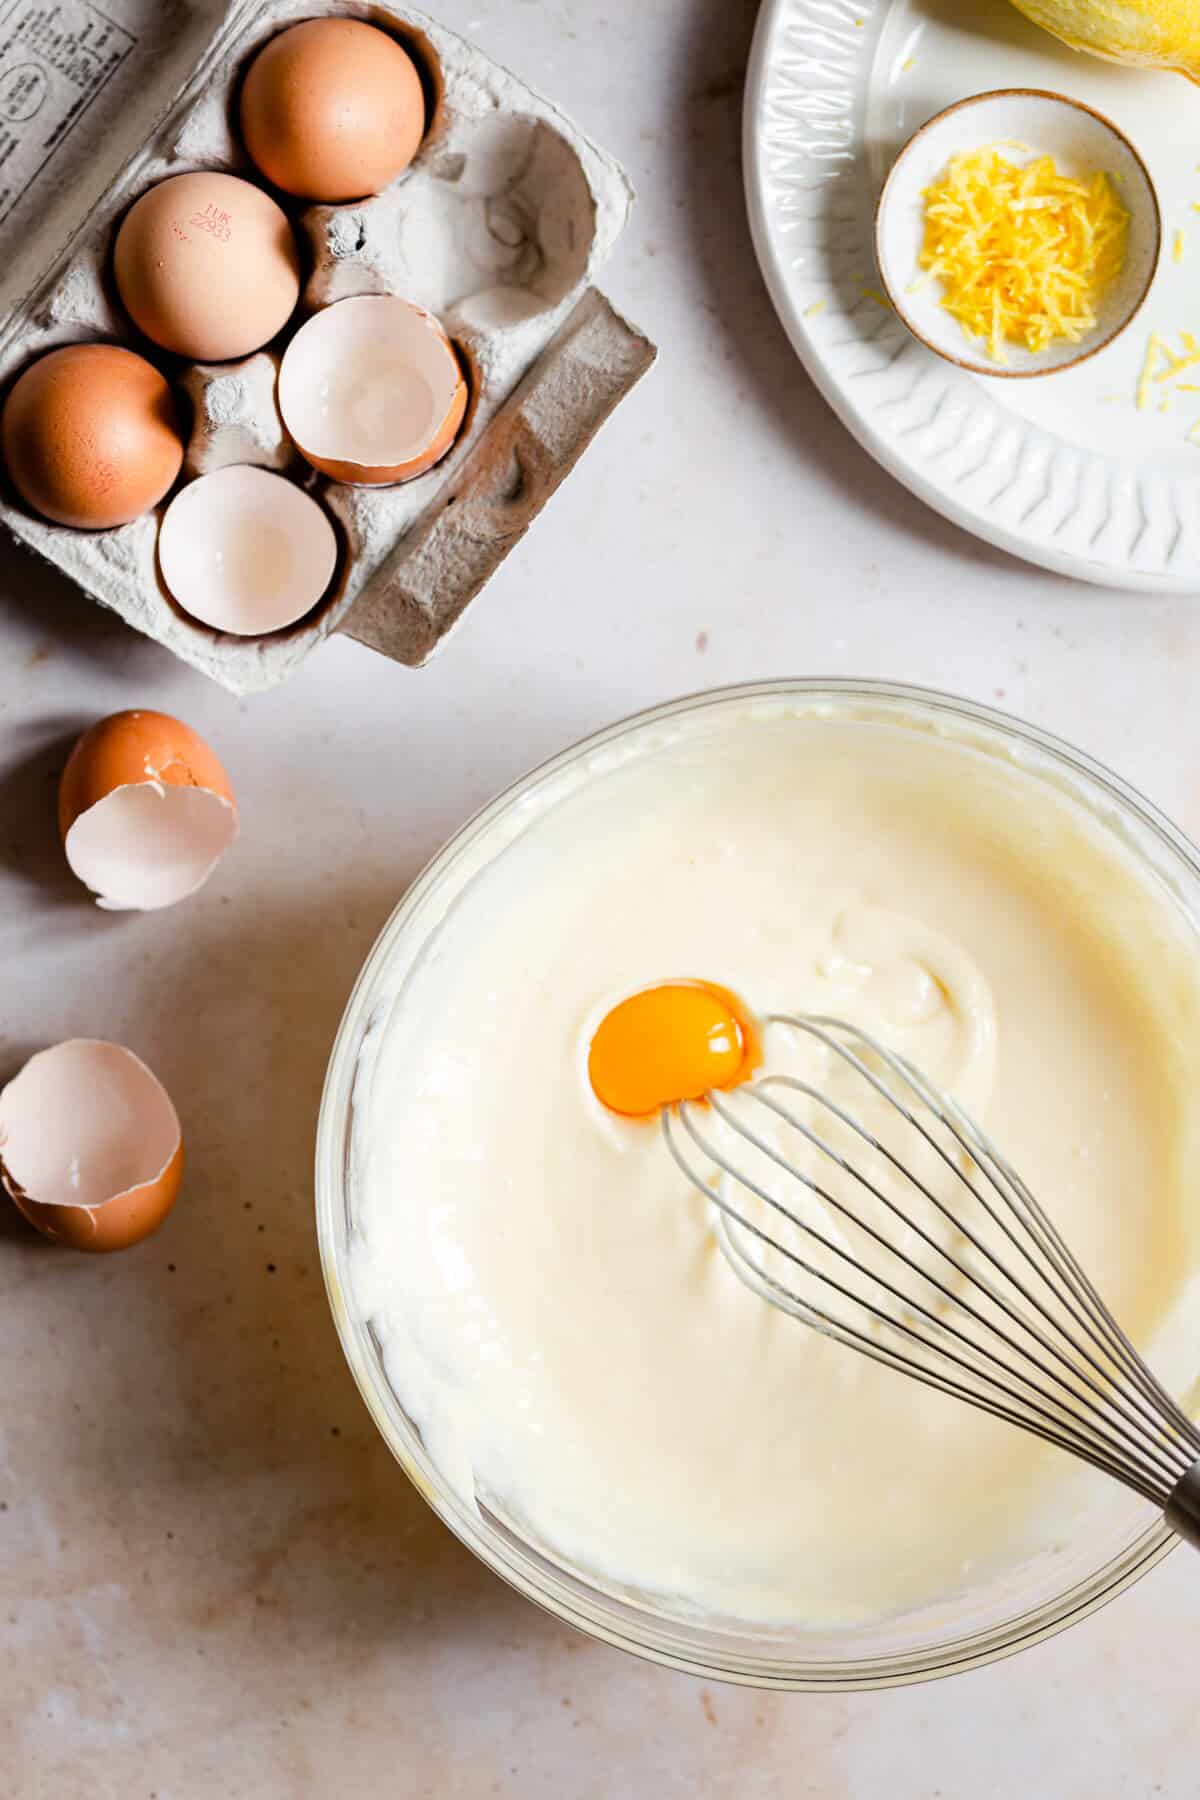
Bring your ingredients to room temperature!
Just like in my mini-cheesecakes or cheesecake brownies or any cheesecake recipe for that matter, make sure your ingredients are at room temperature! Remember that room temperature ingredients are much easier to incorporate and will create a smooth, evenly textured batter.
How to make oreo crust?
Couldn't be simpler! You can make the crust in a food processor, or by hand. If making it by hand, I recommend placing the cookies in a zip-lock bag and crushing them with rolling pin (or any heavy object) into a fine crumbs.
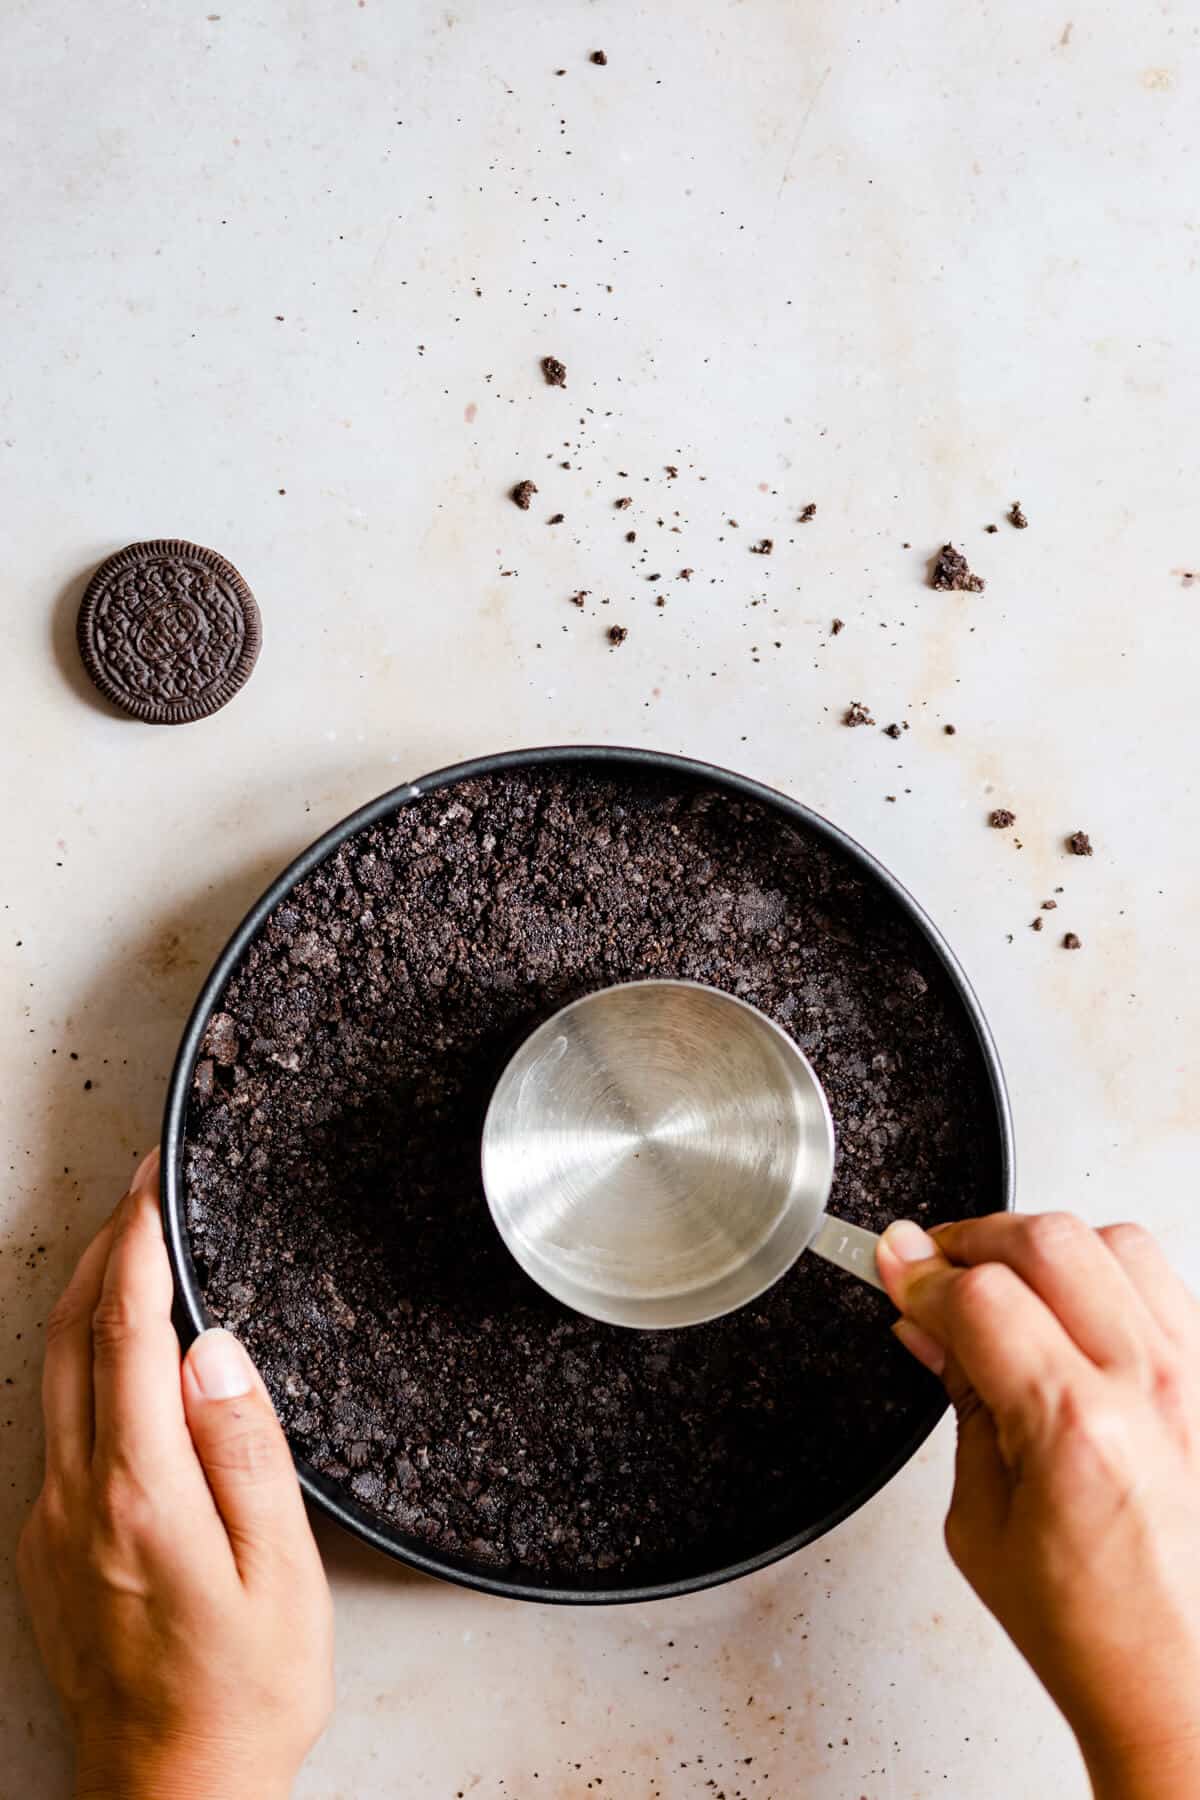
Once crushed, press it firmly into your baking tin. Using a measuring cup or a bottom of a glass or a mug will also work! Pre-bake your crust for about 10 minutes at 170 C (fan). This will produce crispy bottom and will lock in the crumbs, stopping them getting mixed into cheesecake batter.
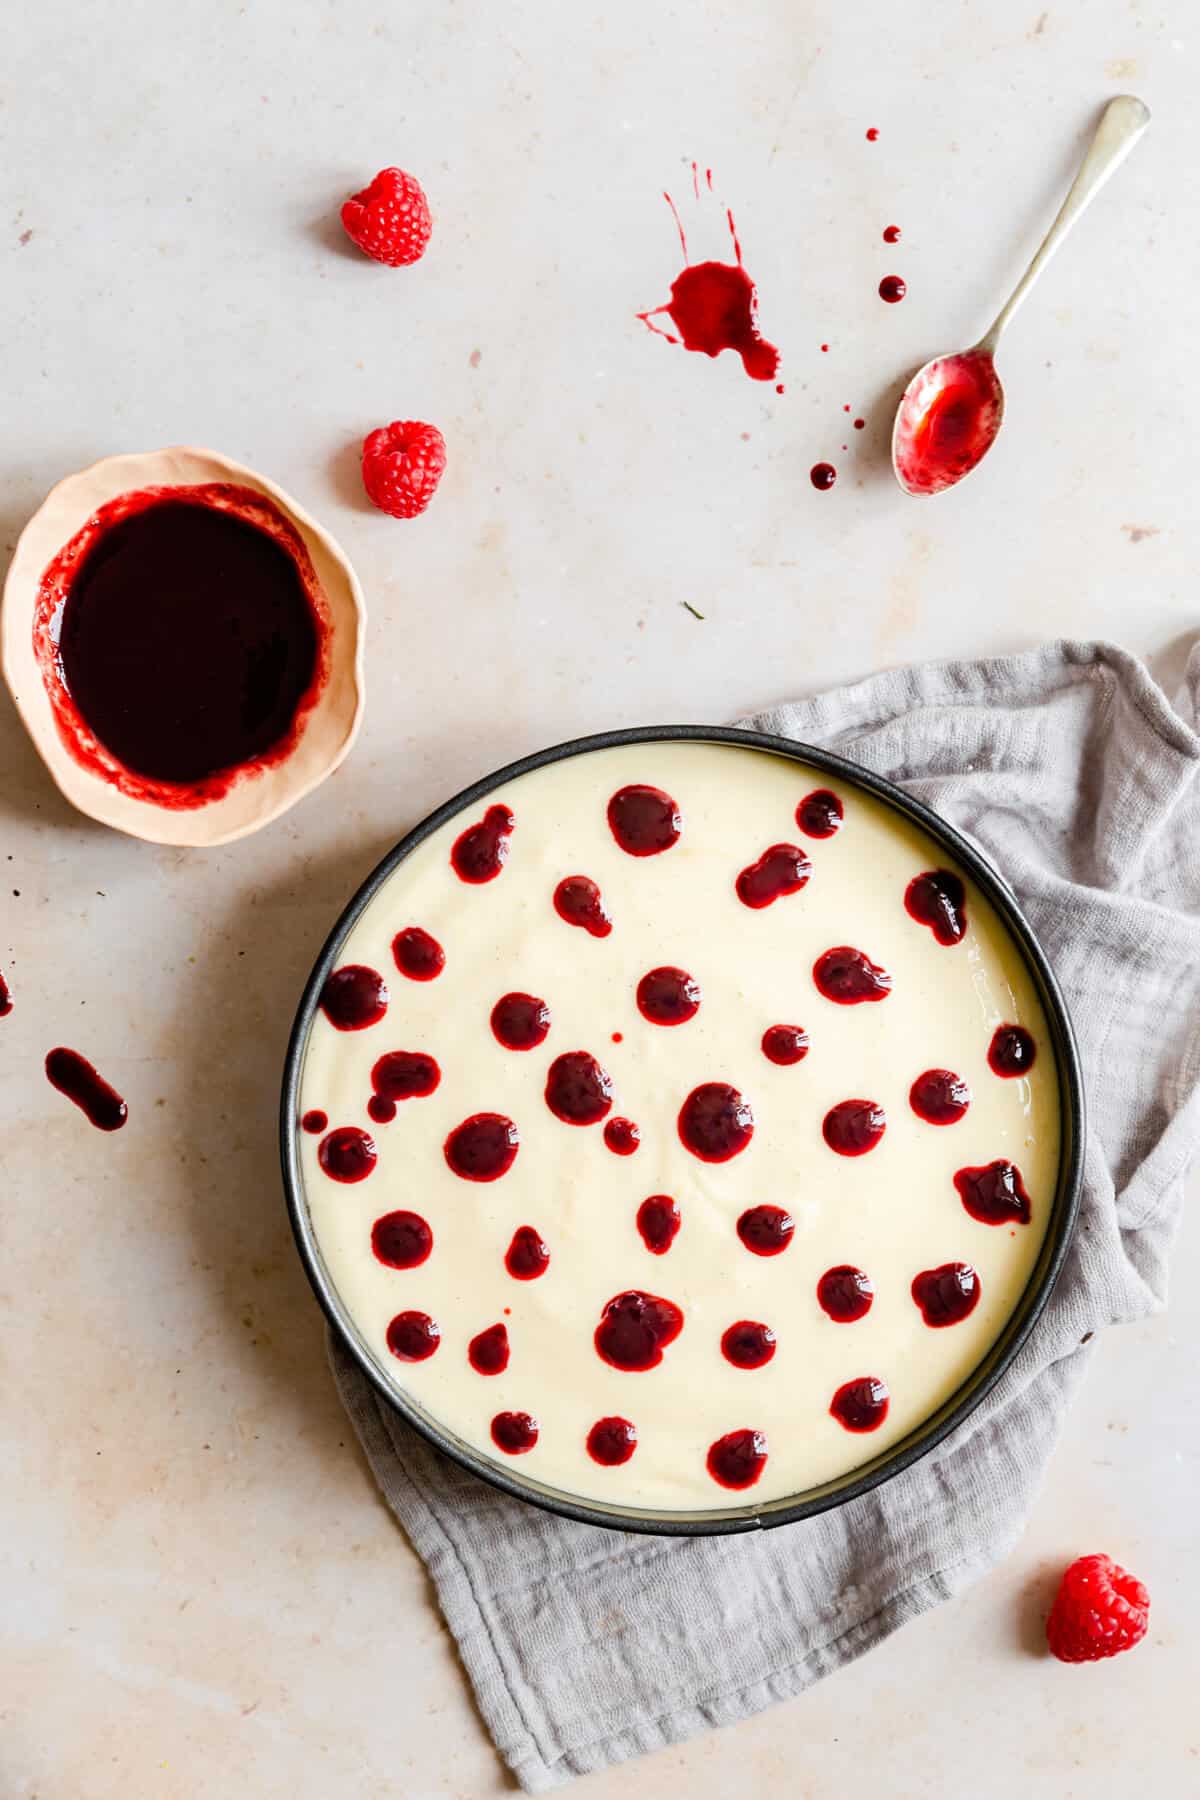
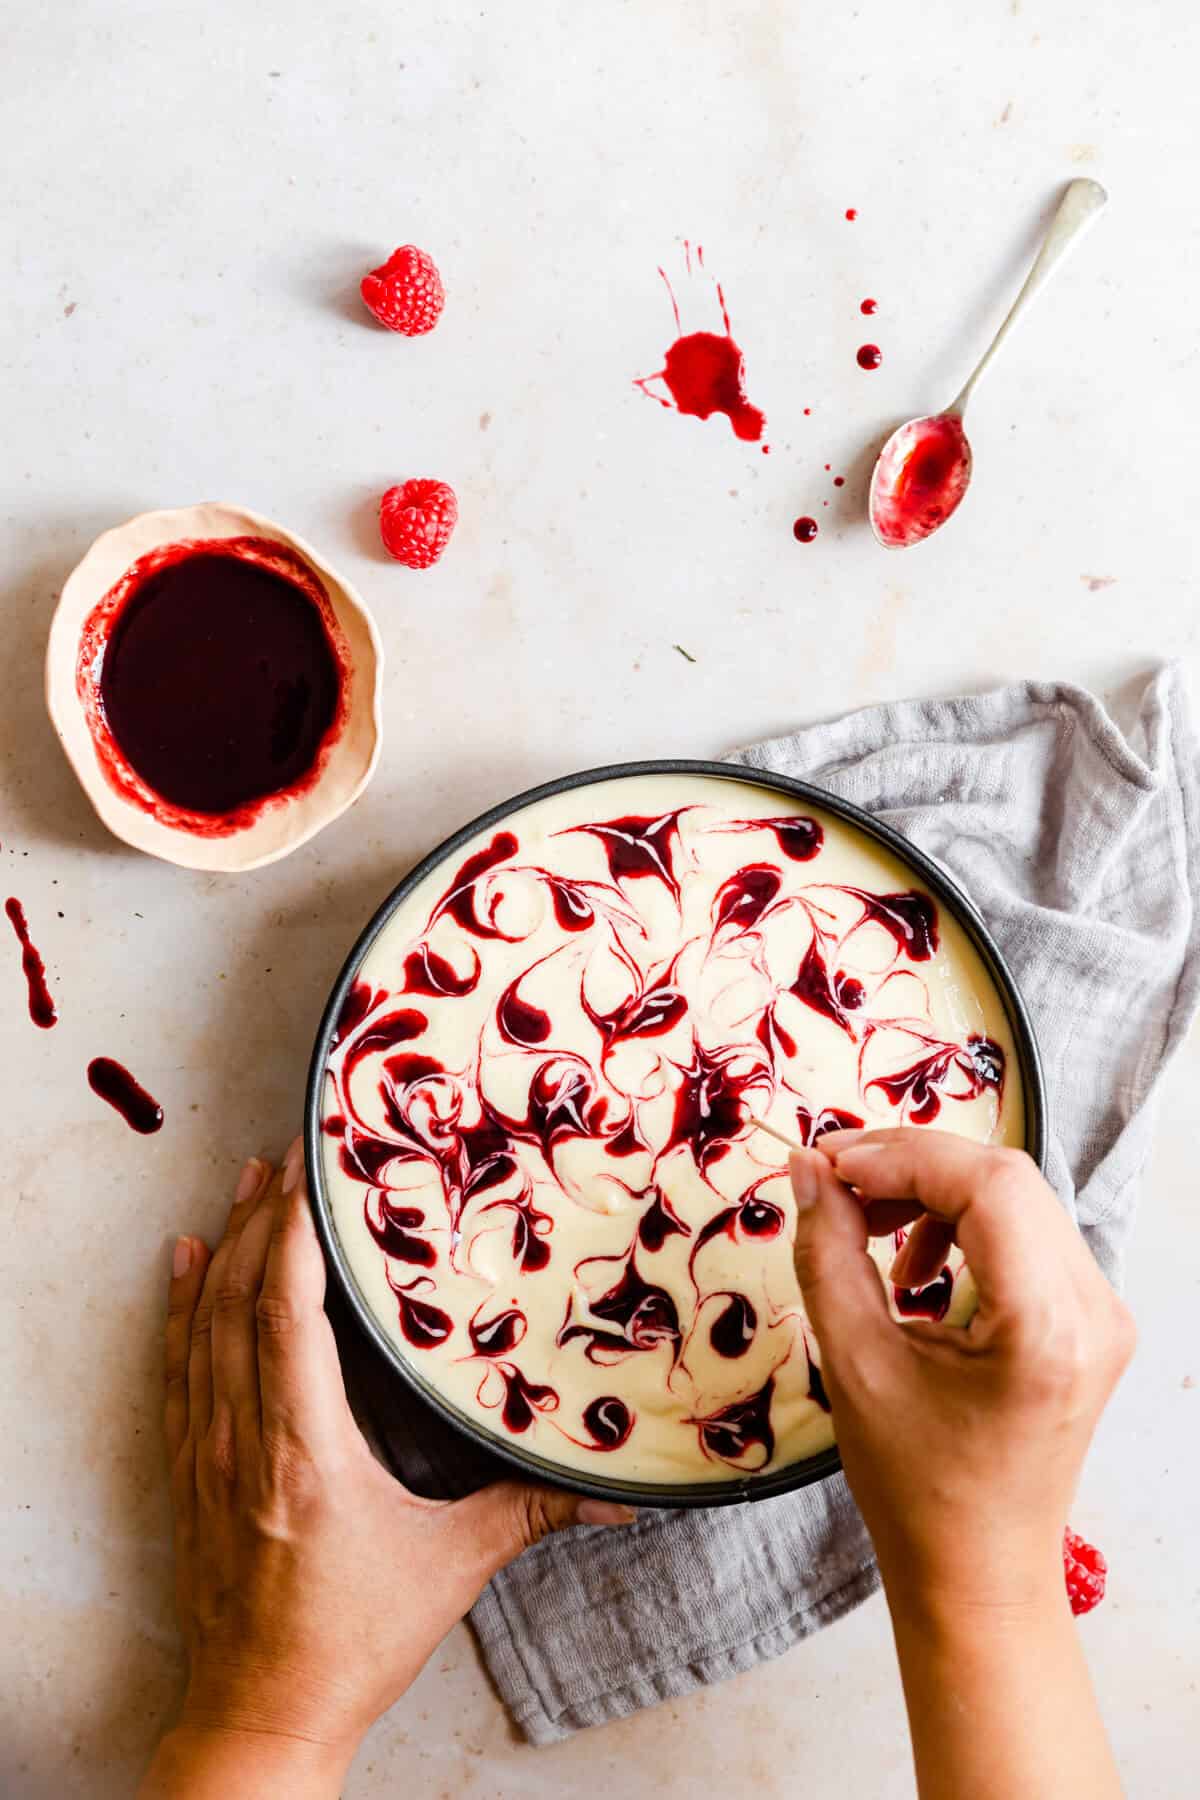
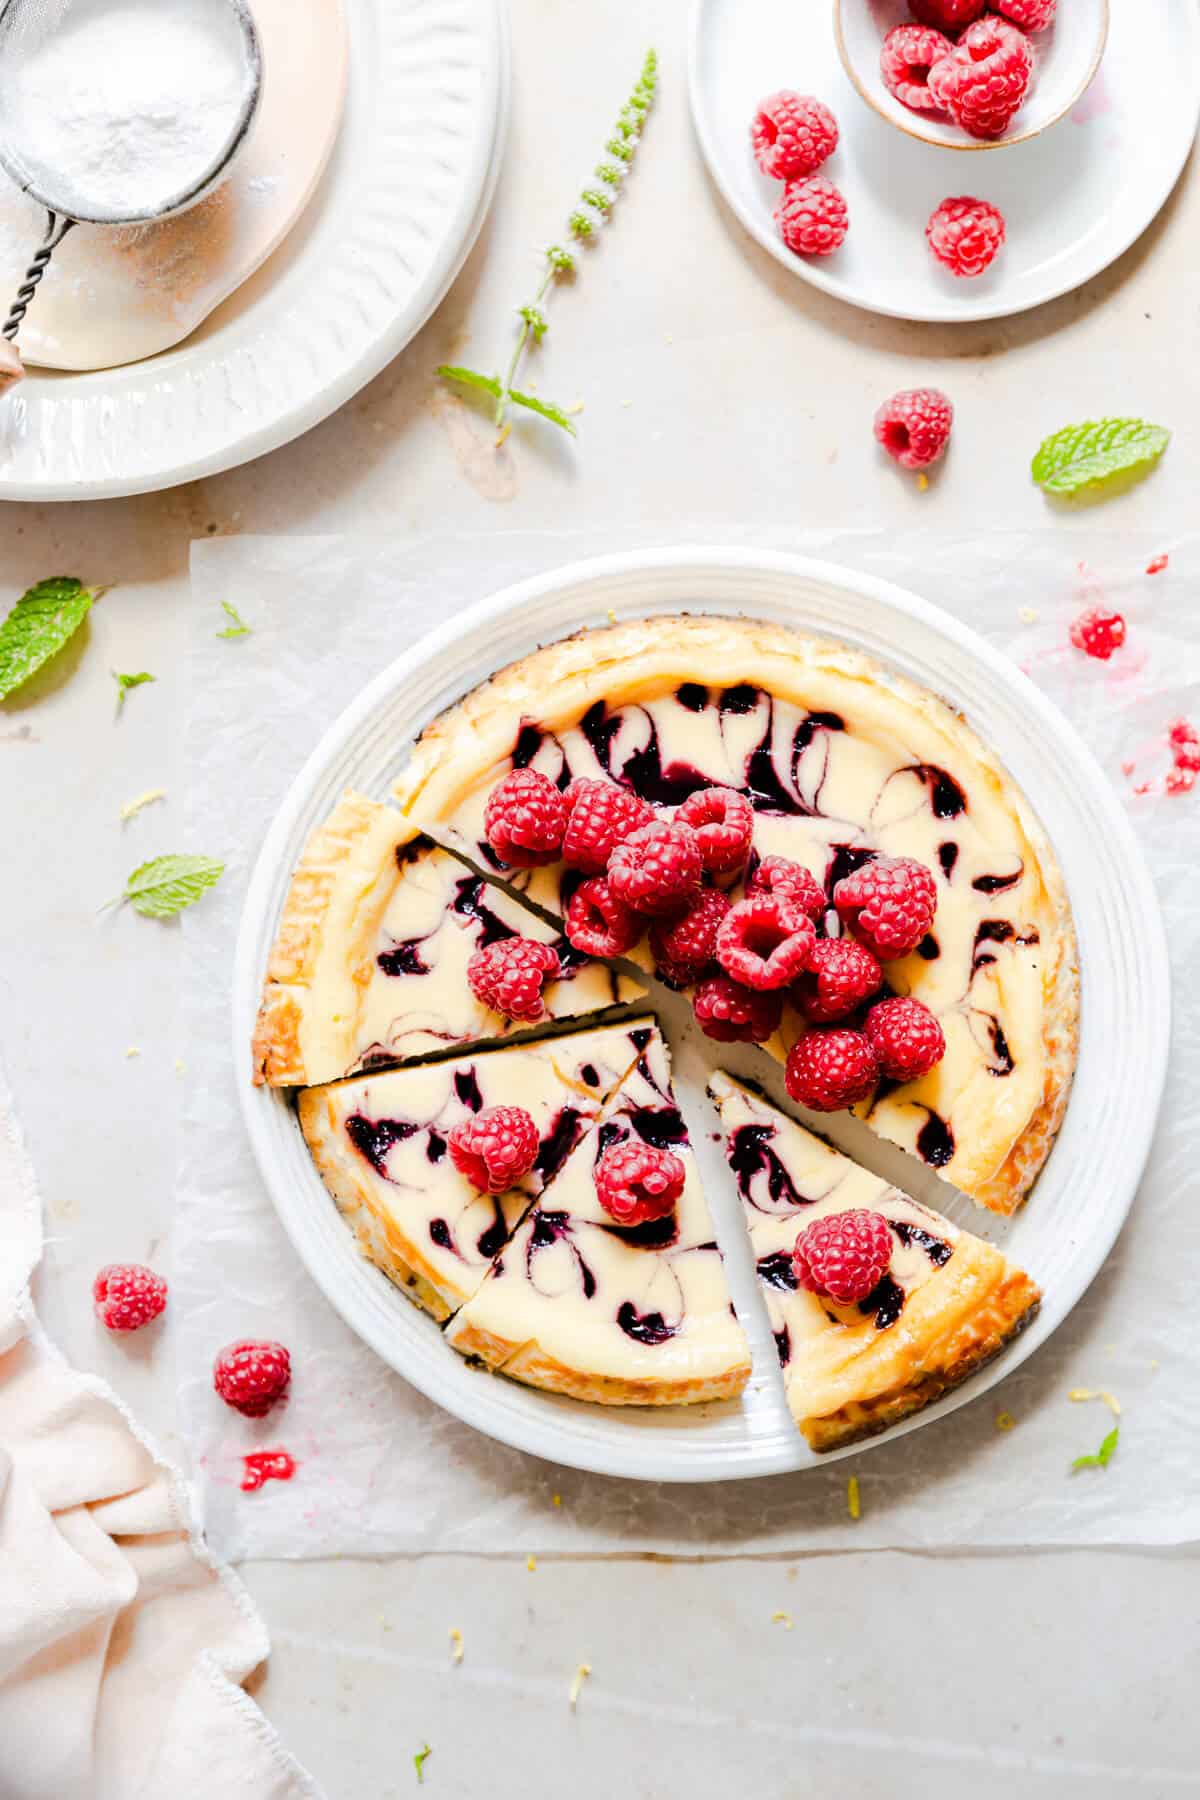
Once you have mixed and poured the cheesecake batter into your baking tin, top it up with raspberry sauce. Use a toothpick or a cocktail stick to create little swirls on top.
Importance of water bath
In case if you are not familiar with this technique, let me quickly explain. Water bath is simply a pan of hot water placed in the oven. It adds moisture to the oven, which is super important when baking cheesecakes. That moisture will prevent your cheesecake from splitting, cracking and drying out.
It also provides a more even and slower heat source, than direct heat from the oven, which results in much better bake.
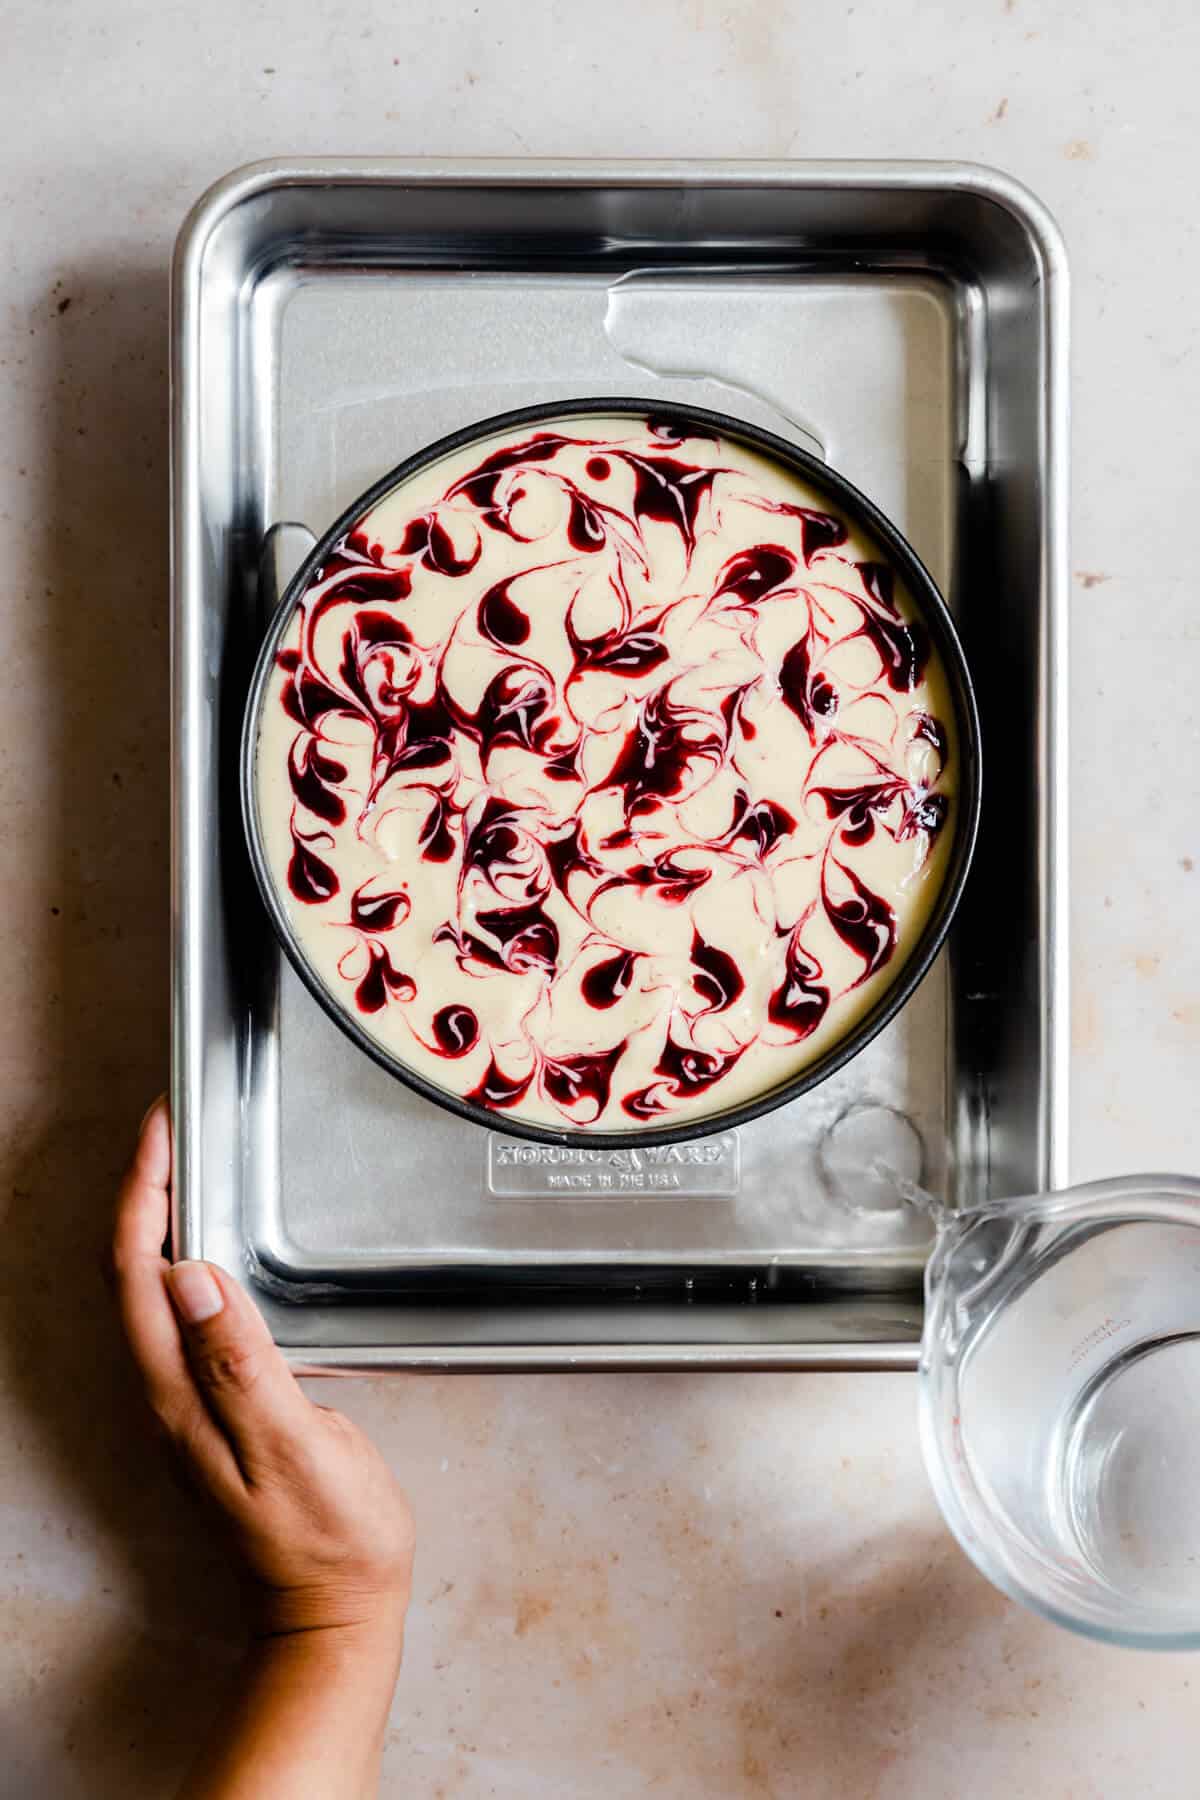
Simply place your baking tin with cheesecake into a larger, deeper dish (like a roasting tin) and pour the water all around it until it comes about halfway up the sides of the pan. If you are using a springform or loose bottom pan for cheesecake, make sure to wrap it with kitchen foil before placing it in the water bath (to prevent and leakage).
Cooling and chilling the cheesecake
Your raspberry ripple cheesecake is done when the edges are getting a bit brown and there is still slight wobble in the middle. When it's done, turn the oven off and leave the oven door opened a bit with the cheesecake still inside.
Baked cheesecakes always shrink as they cool down. So if you try to take it out straight away from the oven, the chances are that it will cool down too fast and it will crack as it shrinks. Slower cooling process should prevent that from happening.

Once it has cooled down in the oven, take it out and let it sit at your kitchen counter for about 30 minutes. After that time, you should be able to remove the ring from the baking pan off. Peel off the baking paper from around the sides and transfer the cheesecake to the fridge for few hours to firm up more. I recommend chilling it overnight.
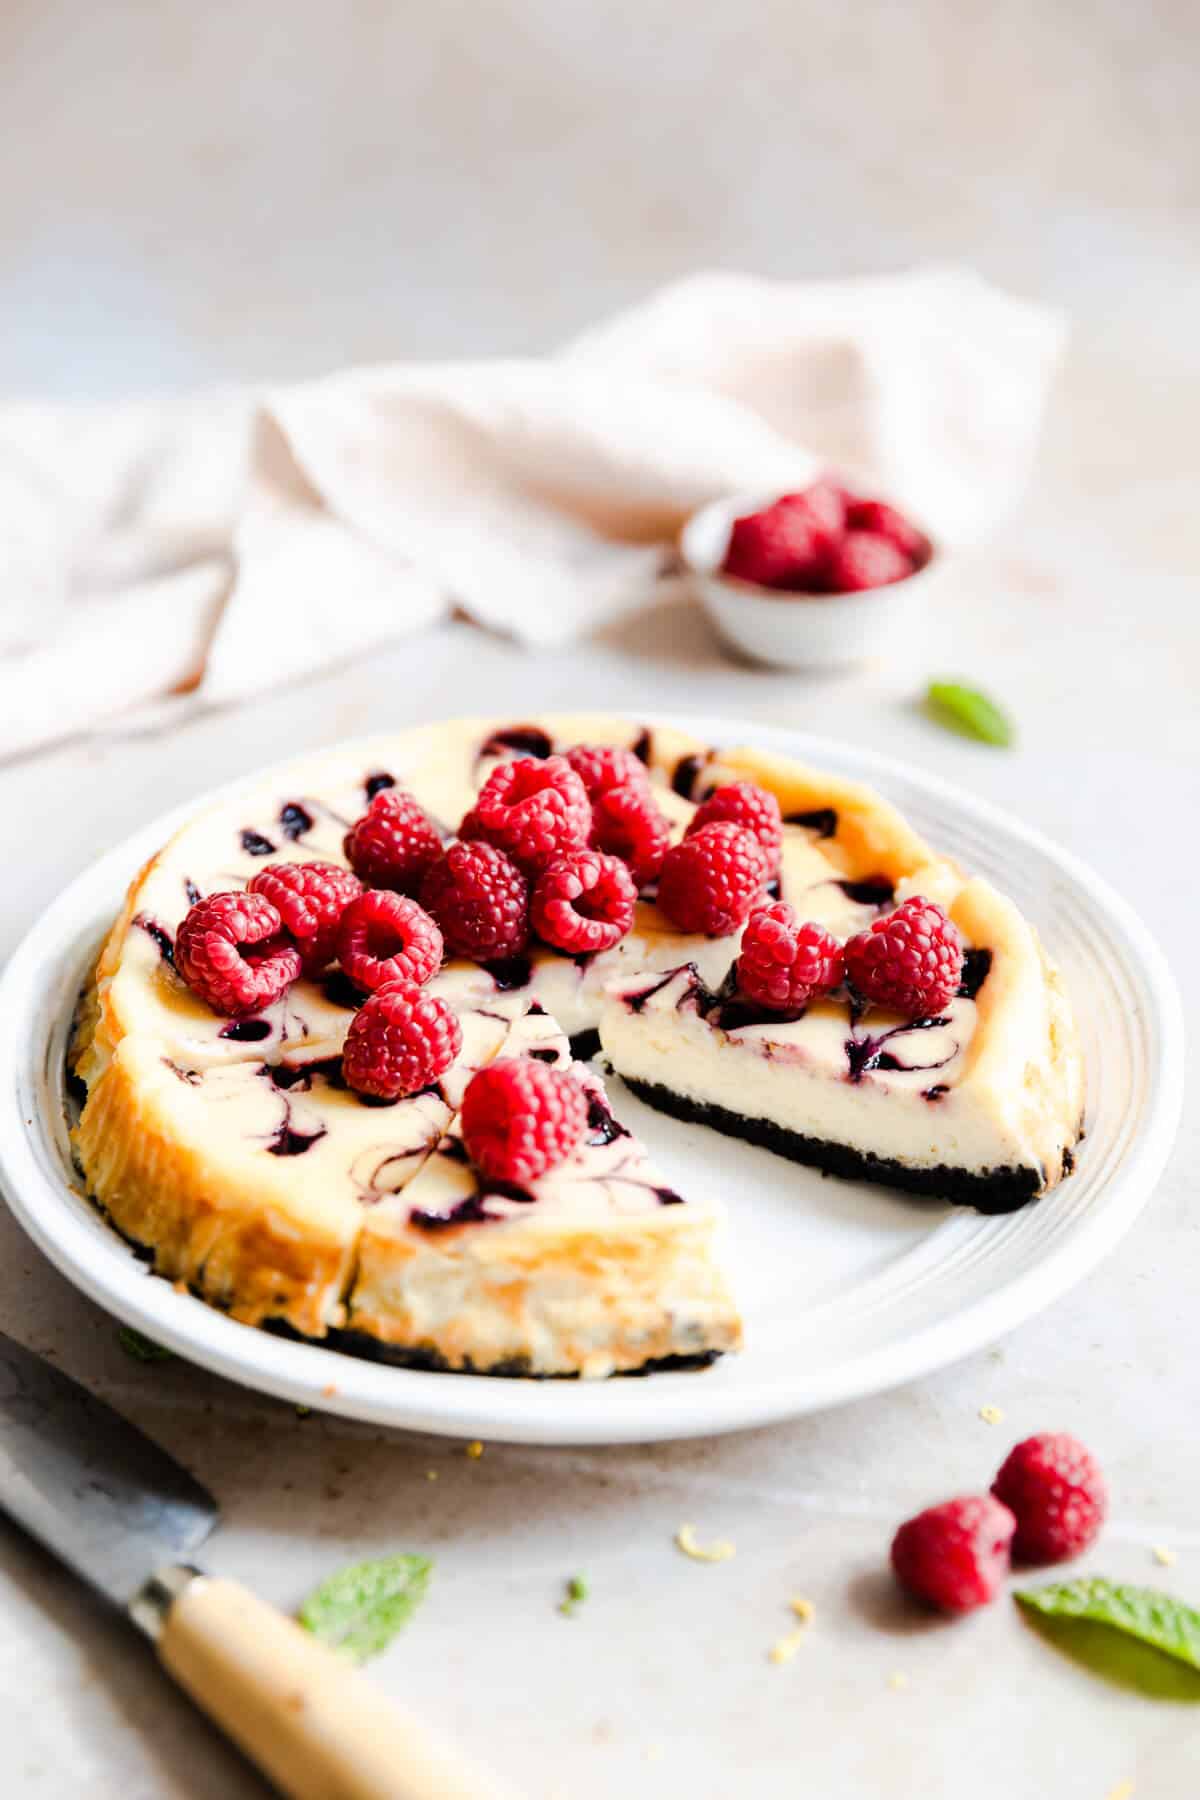
Top it with some fresh raspberries if desired. You can also use any leftover raspberry sauce to drizzle it on top.
As always, thanks for tuning in today and supporting Anna Banana! Remember to leave me a comment and a rating below if you try this or any other of my recipes! I would love to hear your feedback!
📖 Recipe
Raspberry Ripple Cheesecake
Equipment
- 8' springform or loose bottom baking tin
- baking parchment
- sieve
- mixing bowl
- handheld whisk or electric mixer
- kitchen foil
- large, deep roasting pan or dish (to fit your baking tin)
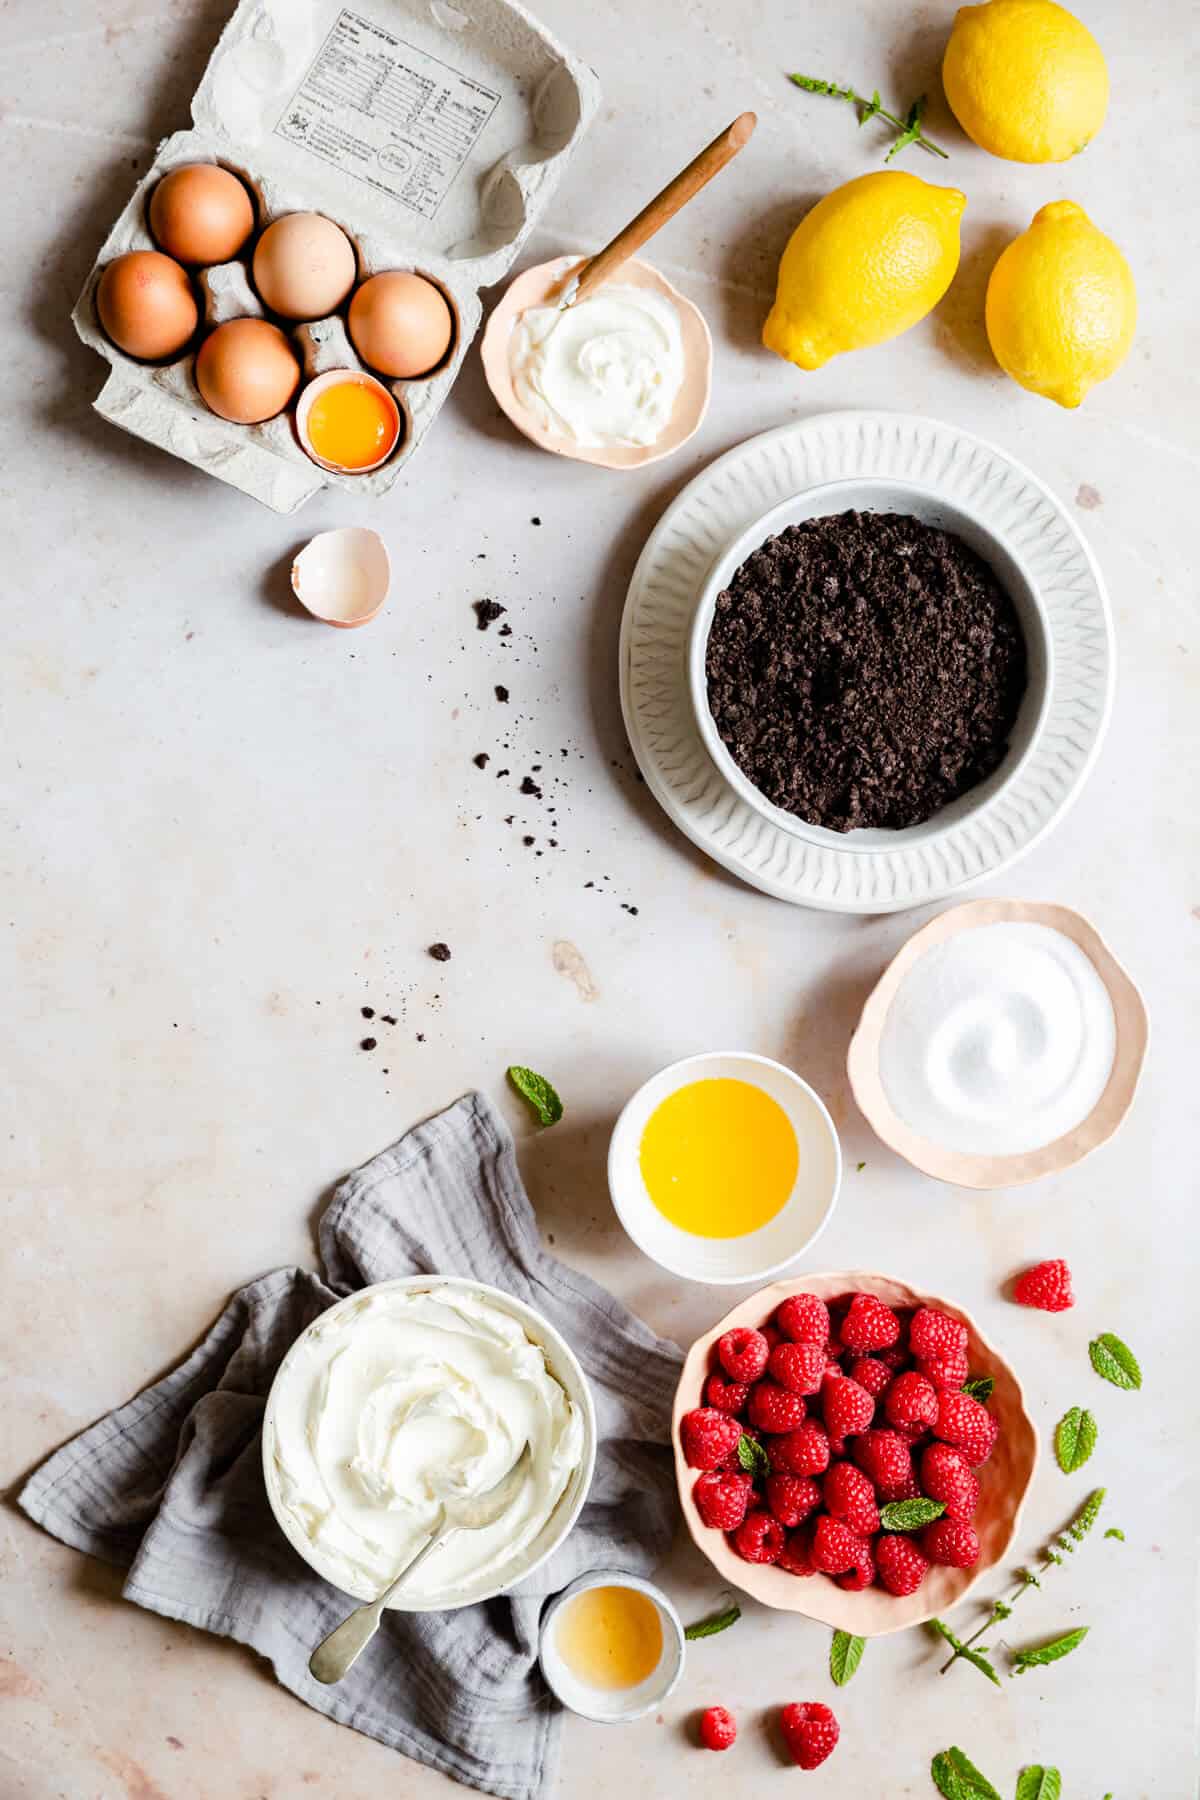
Ingredients
- 200 g oreo cookies crushed into crumbs
- 50 g unsalted butter melted
- 200 g raspberries fresh or frozen
- 340 g full-fat cream cheese such as Philadelphia
- 50 ml sour cream double cream will also work
- 150 g caster sugar
- 2 large eggs plus one egg yolk
- 1 teaspoon vanilla bean paste or extract
- 1 medium lemon zest only
Instructions
- Preheat the oven to 170 C (fan). Lightly grease and line up your baking tin with baking parchment (bottom and the sides).
For the oreo crust:
- Place the oreos in a food processor and whizz until you have fine crumbs. If doing by hand, place the cookies in a zip-lock bag and bash them with the rolling pin until their texture resembles fine crumbs. Transfer to a large mixing bowl and add melted butter. Mix to combine, then transfer it to your prepared baking tin. Using the back of a measuring cup or a glass, press the crumbs firmly into the bottom of the baking tin. Place in the oven and bake the crust for 10 minutes at 170 C. Remove from the oven and allow the crust to cool down for about 5-10 minutes. Reduce the oven heat to 150 C (fan)
- If using springform or loose-bottom baking tin, wrap the bottom and sides of it (from the outside) with kitchen foil about half way up once the crust have cooled down.
For the raspberry sauce:
- Place fresh or frozen raspberries in a small saucepan over a medium heat. Reserve a handful of raspberries for the topping, if you would like. Cook them until they release their juices and start to fall apart. Push this mixture through a sieve to remove the seeds, then return back to the saucepan and continue to cook for about 5-10 more minutes. It should reduce by about half in volume and have a thicker, viscous consistency. Set aside.
- In a large mixing bowl, combine all of the ingredients for the filling until you have smooth batter. Pour the mixture on top of the pre-baked, cooled crust. Add small amounts of raspberry sauce on top of the cheesecake and use a toothpick or a cocktail stick to create the swirl pattern on top.
- Place the cheesecake inside your bigger roasting pan/ dish and pour in the water halfway up the cheesecake baking tin. Carefully transfer the cheesecake into the oven (at reduced temperature of 150 C fan). Bake for 50 minutes to 1 hour, or until the sides are turning slightly brown but there is still slight wobble in the middle. Turn the oven off, leave the oven door open slightly and let the cheesecake sit in the oven for another hour. This slow cooling process will ensure no cracks and splits on the surface.
- After an hour, remove the cheesecake from the oven and cool it for further 30 minutes on your kitchen counter. Remove the ring from the baking tin and peel off the baking paper from the sides of the cheesecake. Transfer it to the fridge to set for minimum 4 hours or ideally, overnight.
- Top the cheesecake with some more raspberries if you desire. Slice and enjoy!
Please note that all my recipes are developed and tested in metric grams. I recommend that you use digital scales for a more accurate results. I have provided a conversion to US customary in the recipe but please note that I haven’t tested using this method.
Notes
- this recipe will also work in a square baking tin (brownie tin) which is not a loose-bottom one, just make sure to line it up with plenty of overhanging baking parchment for easy removal
- Make sure to cool this cheesecake properly before slicing it. Please read the section in the blog post about the importance of cooling this cheesecake first.
Taleen | Just As Tasty
This cheesecake looks so pretty and delicious! Love that you used an Oreo crust. Can't wait to try this recipe.
Anna
Thanks Taleen, let me know if you try it and how did you like it!
Gunjan
Love all the ingredients and those amazing flavors. Your images are making me drool.
Anna
Thank you Gunjan, glad you like the recipe and images!
Nicoletta De Angelis Nardelli
I've never been a fan of cheesecake but I would eat this in a wink! The Oreo crust, that creamy filling and the raspberry swirls are perfection.
Anna
Hey Nicoletta! Once bite of this and you will be a cheesecake convert 😉 but seriously, it's too good to miss out on! x
Laura
I love oreos and this is such a good recipe to try! Cheese cakes are always a hit at home so will be making it really soon! thank you for sharing!
Anna
Thanks Laura, let me know how you liked it!
Kushigalu
Love raspberry and this looks so gorgeous. One of the best treat to try this summer . Thanks for sharing .
Anna
They are one of my favourite summer berries too! And pleasure all mine!
Sharon
I've gotten this as restaurants many times but was very excited to be able to make my own right at home with this recipe.
Anna
That is so great to hear, thanks Sharon! Hope you've enjoyed it just as much!
veenaazmanov
This is super delicious. Raspberry is one of my favorite fruit too. Presentation Picture perfect. Cheese cake is always yum.
Anna
Thanks Veena, happy to hear that you like the recipe and the photos!
Candice
We will be making this cake over and over again for all of berry season! Such an impressive cake with simple ingredients and easy to make. Thank you for the great recipe!
Anna
Thank you so much Candice! I'm so happy to hear that!
Aditi Bahl
Tried this recipe this weekend. Came out just awesome. The flavors were bang on. Saving this to our regular dessert menu. Thanks for sharing.
Anna
Hi Aditi, thanks so much for your positive comment and feedback! I'm soo chuffed to hear that you tried and enjoyed this recipe!
dishnthekitchen
This is cheesecake perfection! I love the combination of oreo crumbs and raspberry. You're absolutely right about the water bath too. No one likes a dry cracked cheesecake.
Anna
Thanks so much Bernice! Glad the recipe is to your liking! And yeah, nobody needs a dry cheesecake nightmare , water bath always does the trick!