
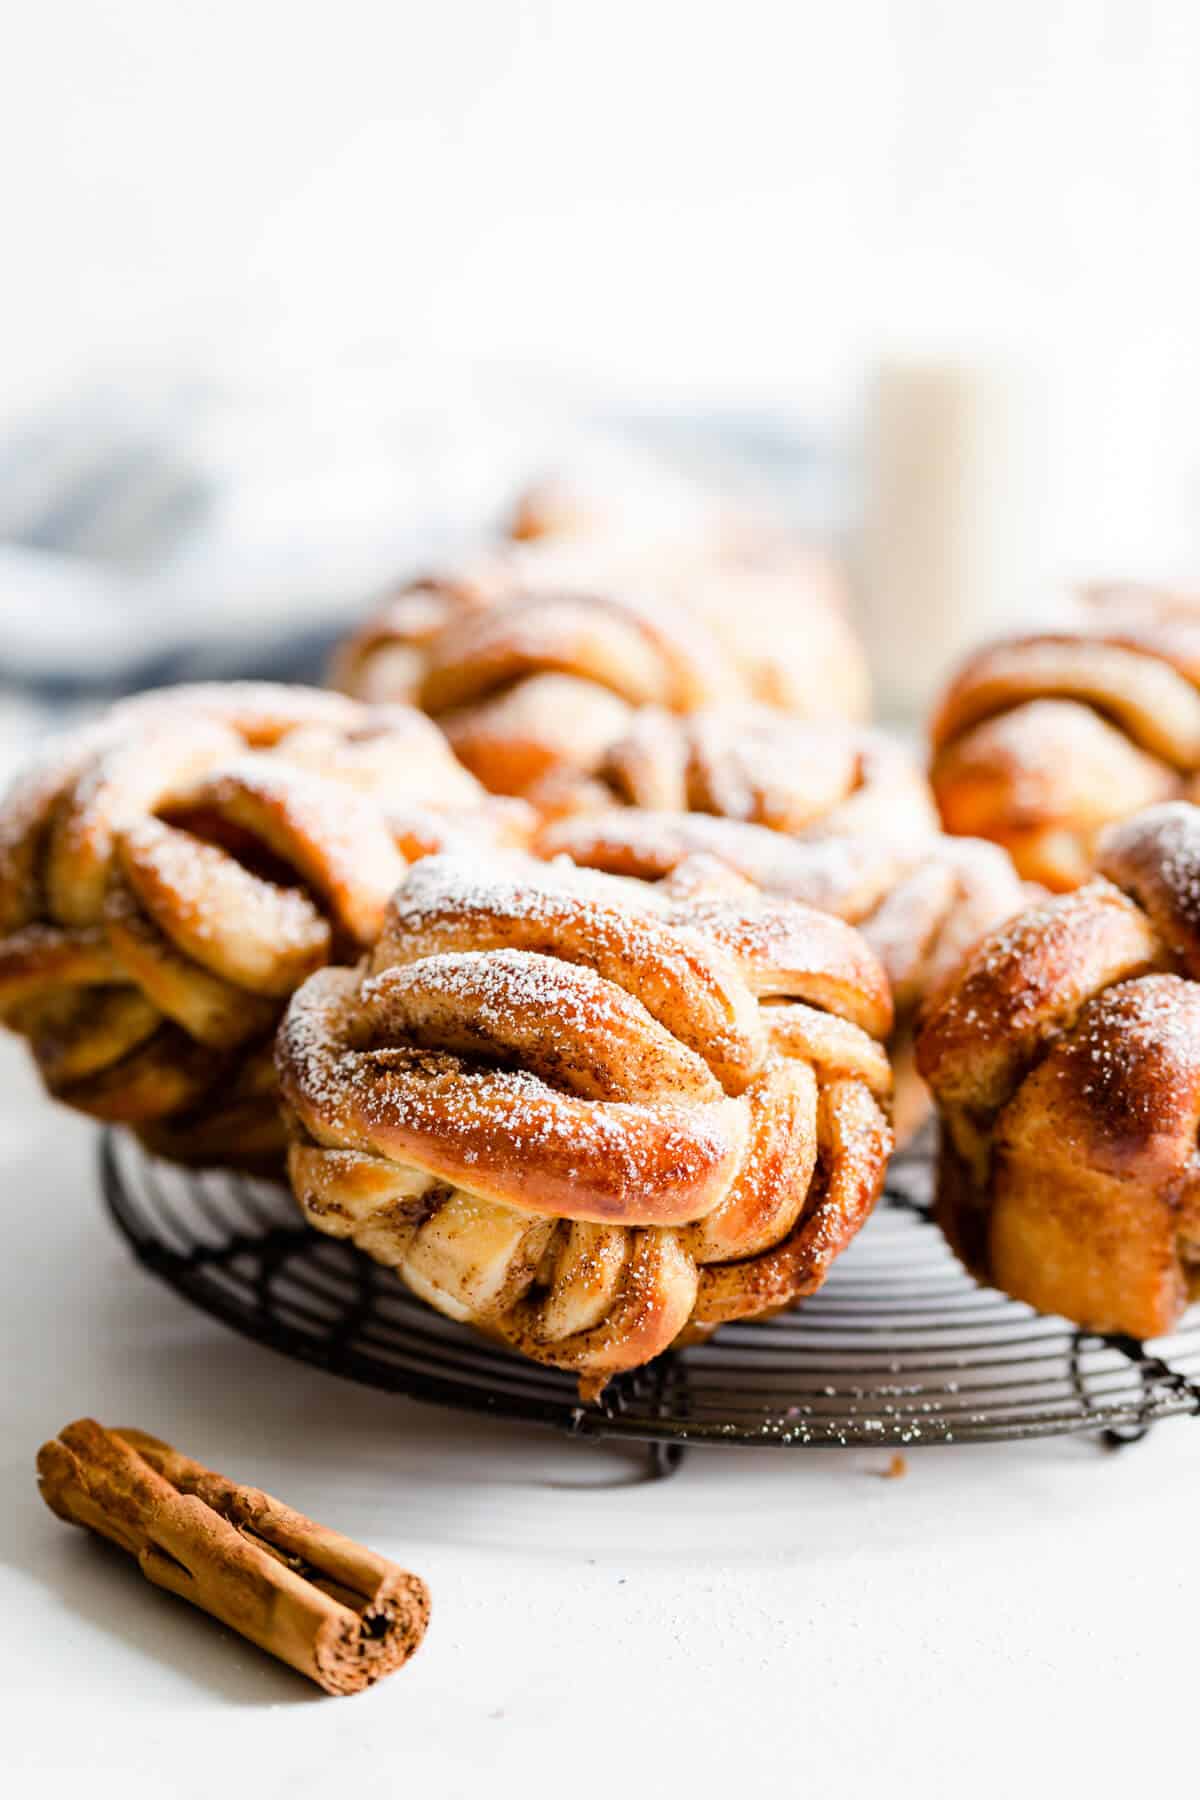
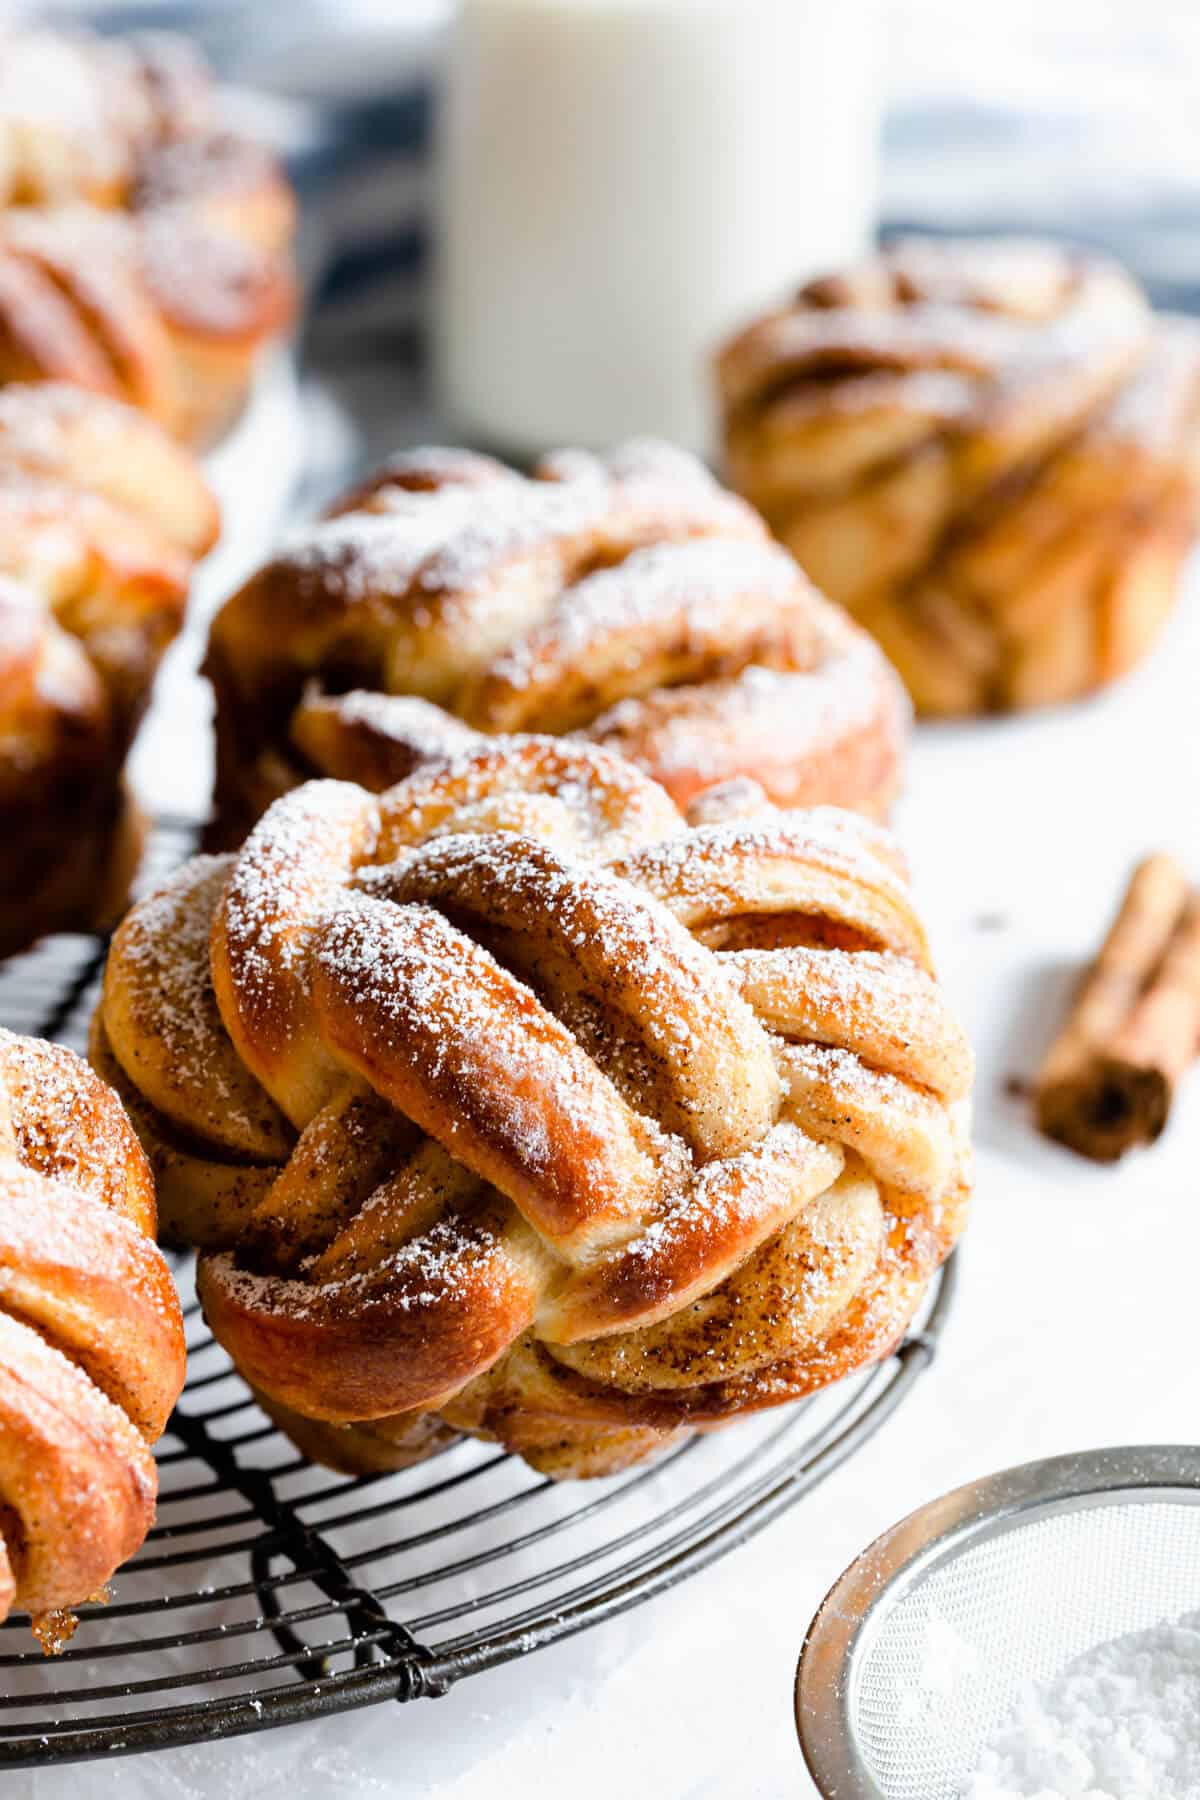
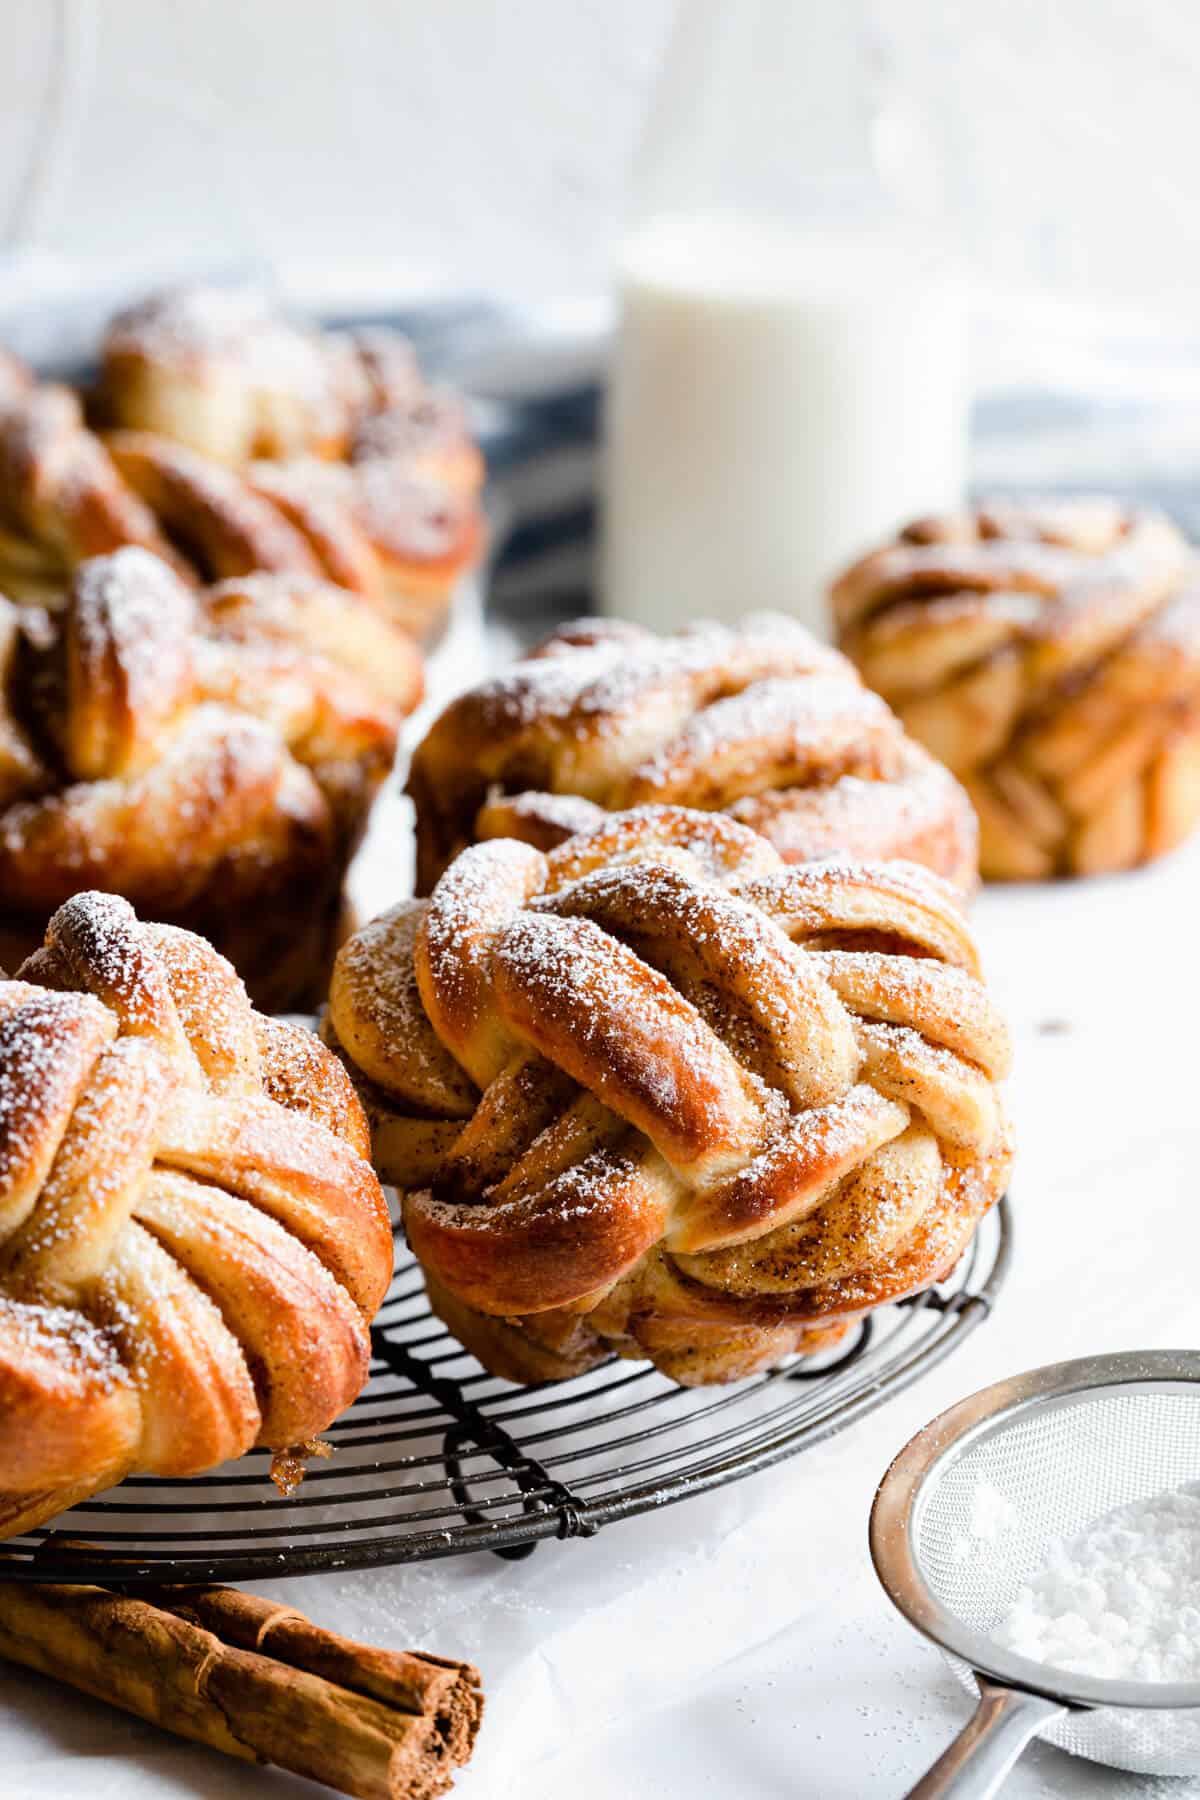
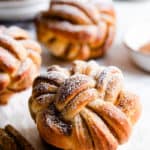
THE BEST cinnamon buns you've ever had! Sweet and sticky, with aromatic, buttery filling, these buns are not only delicious and super moreish, they are also twisted into beautiful, small knots that will guarantee to impress your friends and family!
Why these are the best cinnamon buns?
If you are following me and my blog for a while, you know how much I adore making all sorts of doughy buns, rolls and swirls. The process of making them is so soothing and satisfying, and the results are always sooo delicious, with each bite melting in your mouth!
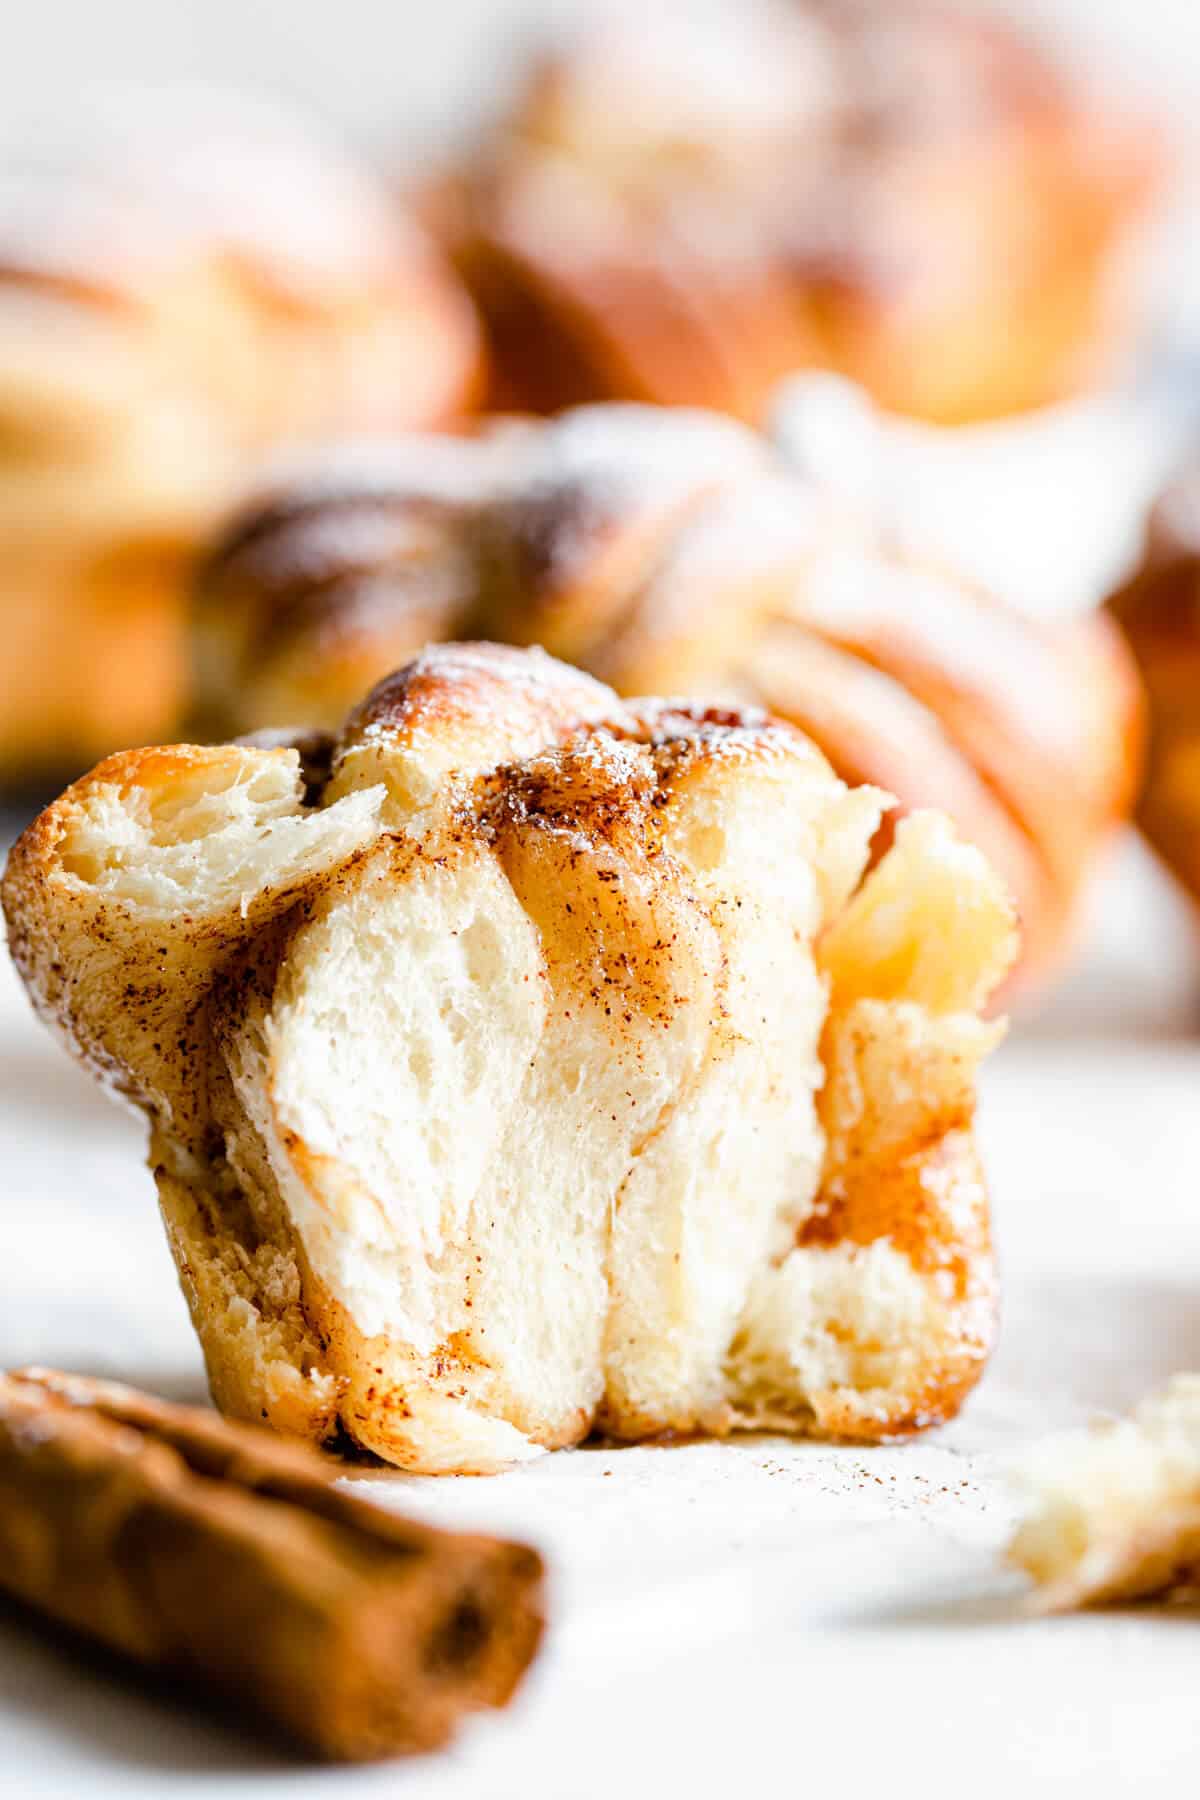
These cinnamon buns are not only made with soft and fluffy dough, which is fantastic to work with, but they're also perfectly sweet, sticky and gooey. Filled with aromatic and fragrant cinnamon butter, they are wonderfully moreish and shaped into the prettiest little knots (inspired by Richard Bertinet's technique).
Tips for making the buns
Just like my hazelnut swirl buns , these are made from the exact same basic dough. It requires proving twice, and yes, there is a little bit more effort involved in making these. But since they are such special treat, they are also totally worth it!

- Using freestanding mixer is very helpful for making the dough. Use a hook attachment, and mix it on medium-speed until the dough no longer sticks to the sides of the bowl. You can also knead the dough by hand. It will take longer and more effort, but it's totally doable! Your dough is ready when it no longer sticks to the sides of the bowl or to your hands.
- Lukewarm milk and butter- Both need to be warmed before adding to the dry ingredients. This is to help activate the yeast. It's important that mixture isn't too hot, as that will kill the yeast. Just like having it too cool won't activate the yeast. Lukewarm is what you should be aiming for.
- Fast action dried yeast- for the best cinnamon buns, use a good quality yeast which activates fast. There is a difference between fast action/ instant yeast and active dried yeast. Either type can be used in this recipe, but remember that active dried yeast will need to be activated BEFORE adding it to the dry ingredients. Check the label and make sure to follow the instructions on the packet. Also, make sure it is not out of date!
- Don't go overboard with filling- Spread the cinnamon butter in an even layer, but not too thick. It will make shaping the buns much easier.
- Once baked, allow them to cool only for a minute, then remove from muffin tin into cooling rack. Some of the filling will 'leak' out, and once it hardens, it will become more difficult to remove the buns from the tin.
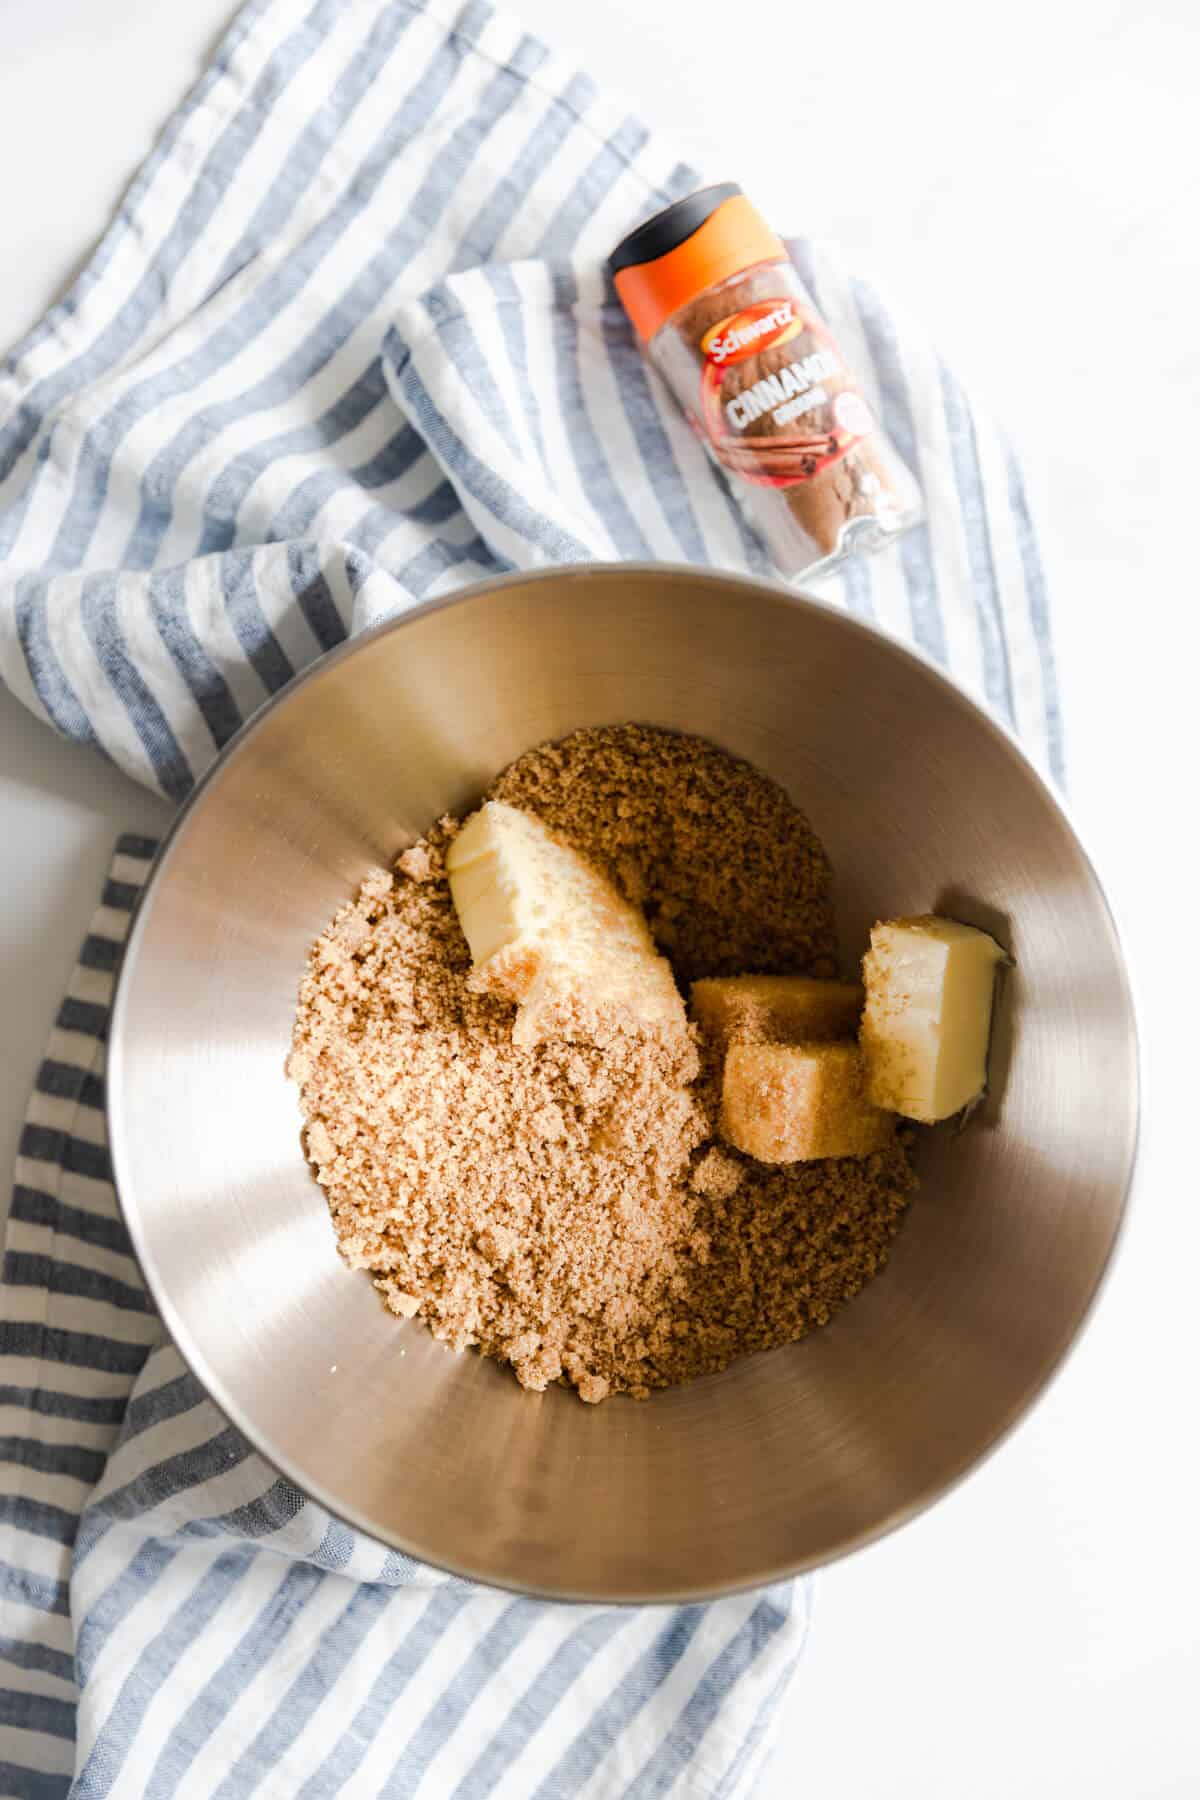
Easy cinnamon butter filling
The filling for these buns is made with 3 ingredients: butter, soft light brown sugar and cinnamon.
Before you start, make sure the butter is at room temperature. If the butter is too hard, it will be difficult to spread the filling on top of the dough. But it's equally important that the butter is not too soft, as that will cause it to melt and slip all around the dough and will come out the sides, when you cut it into strips. So room temperature is what you are aiming for (I found this post very helpful with explaining in detail what 'room temperature' actually means).
Folding the dough
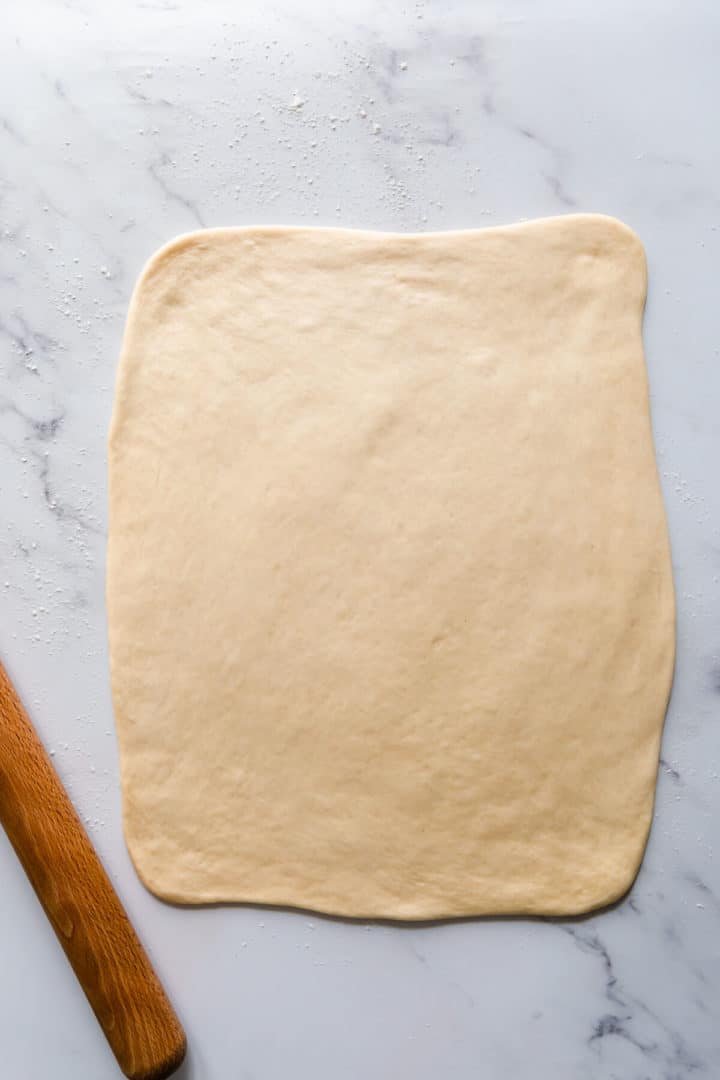
When the dough have doubled in size, it's time to roll and fold it. Tip it onto a lightly floured surface and gently knock out the air out of it. Stretch it into a rough rectangle shape.
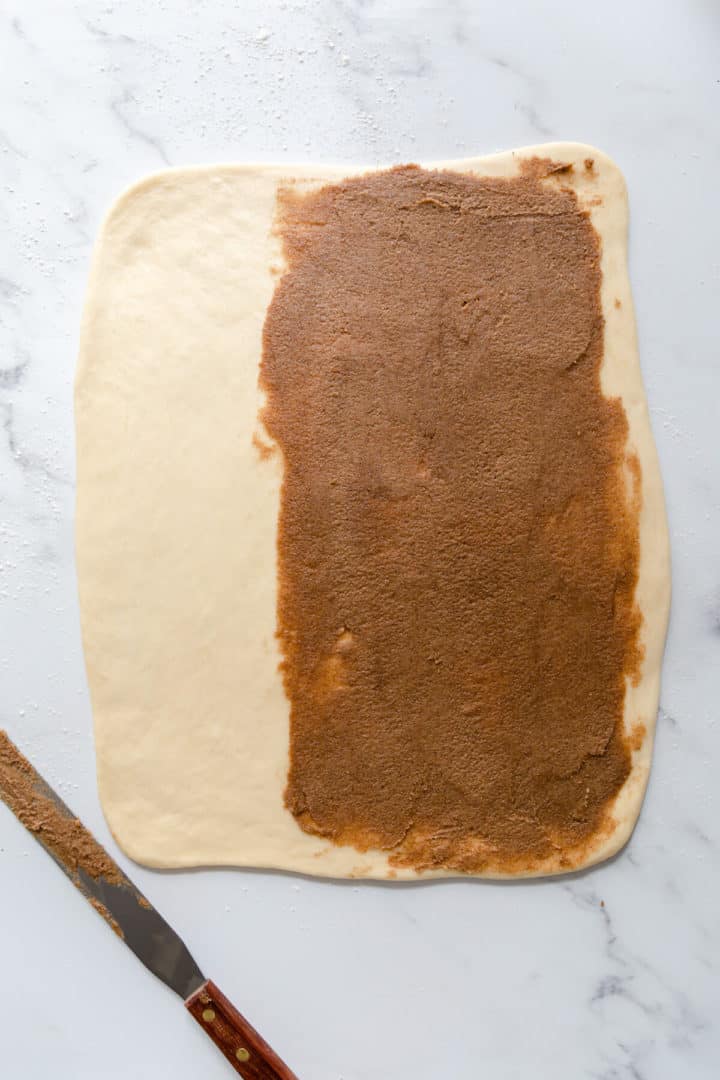
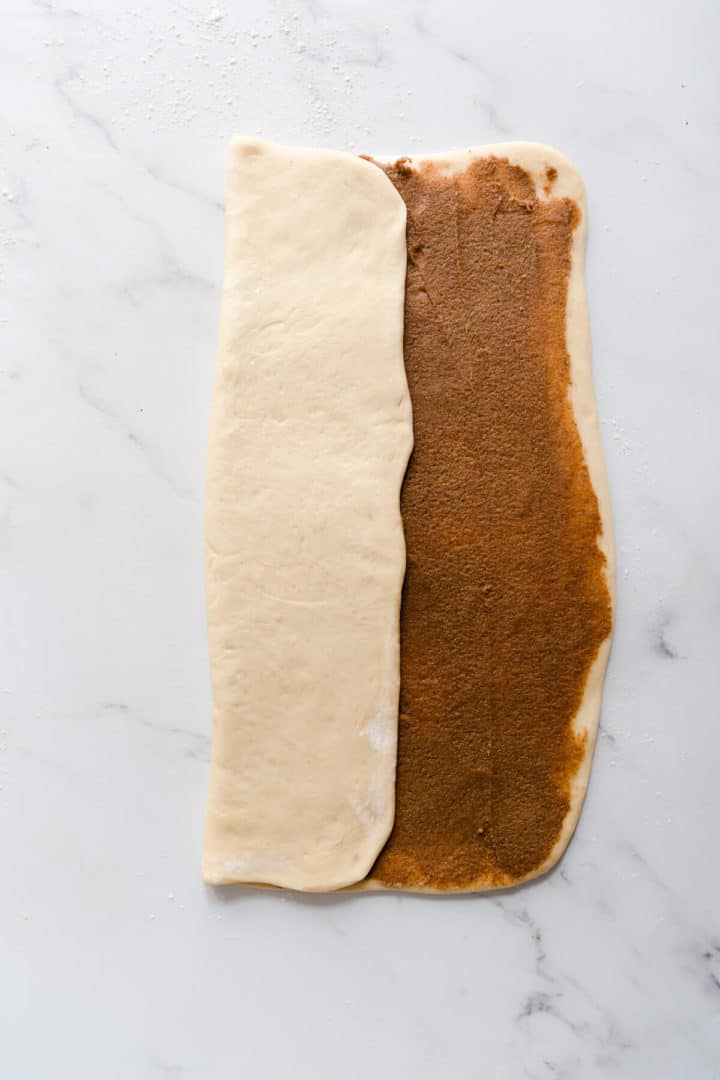
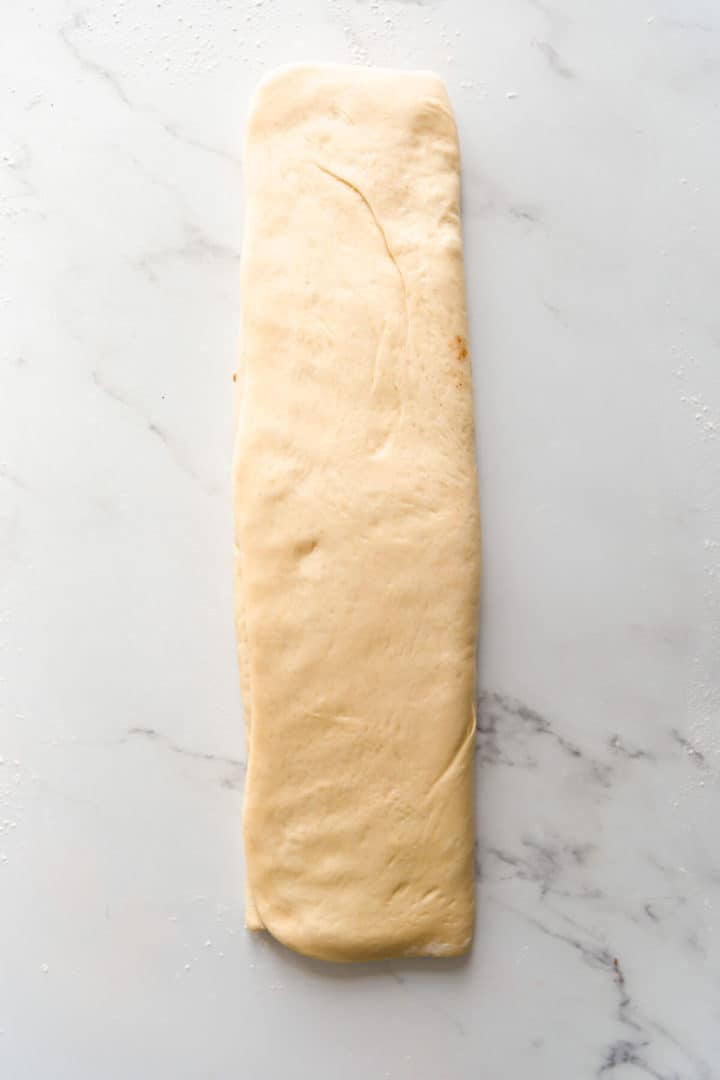
Roll it into larger rectangle, with the longer edge facing you. Spread the cinnamon butter over ⅔ of the dough surface, leaving ⅓ of the dough clean. Next, fold the clean part of the rectangle towards the middle, then the other end of the dough on top of that.
How to cut and shape the dough
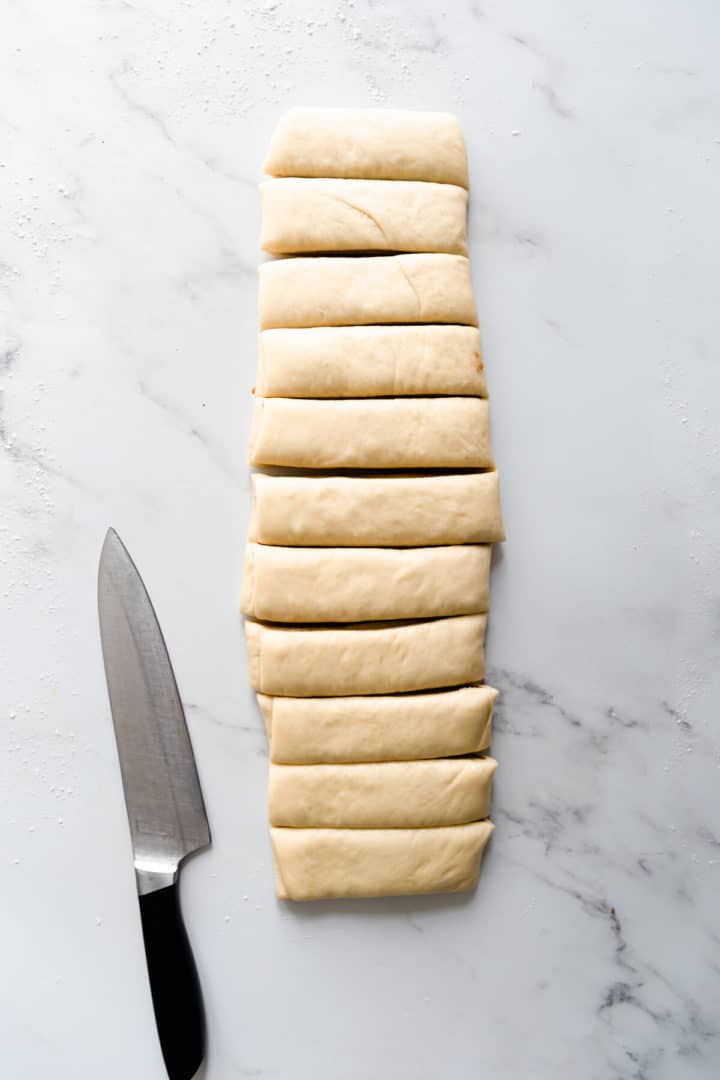
Once you spread the filling and fold the dough, it's time to cut it into strips. Make sure to use really sharp knife or a pizza cutter for this. Cut the dough widthways, you should have roughly about 12 strips, each about 4 cm wide.
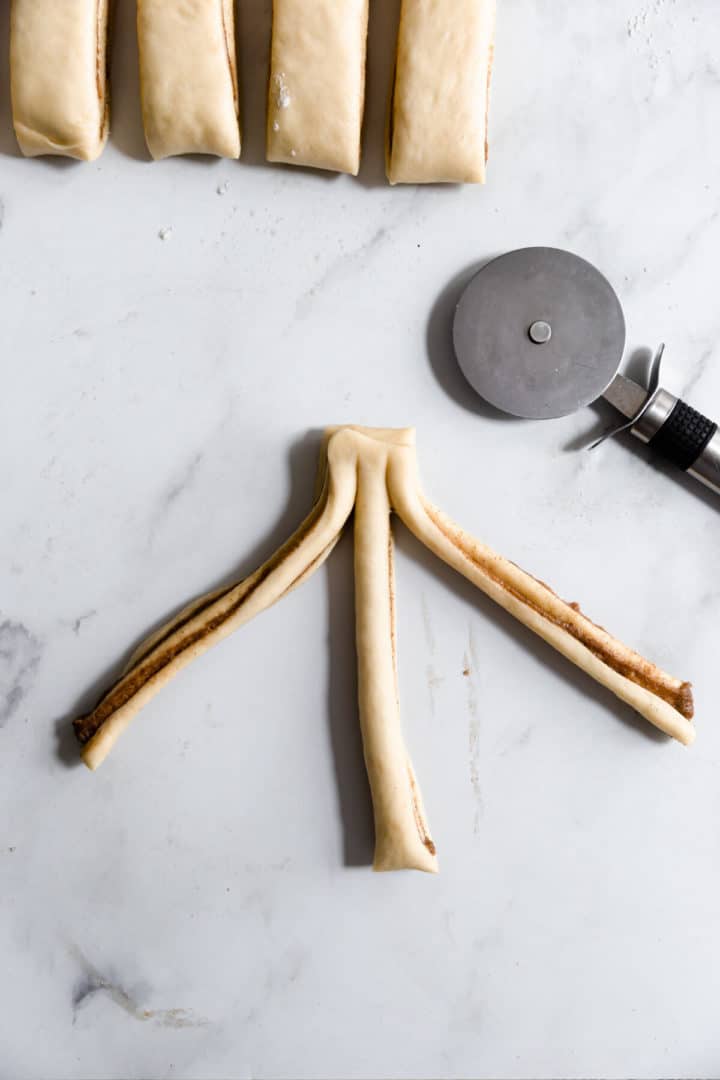
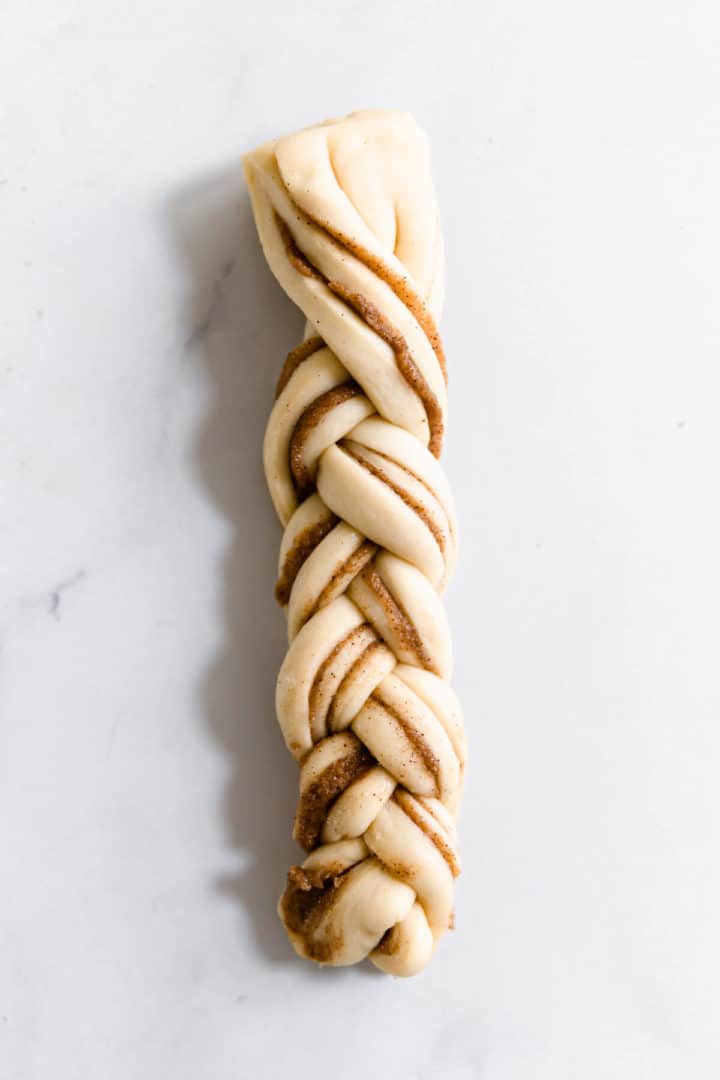
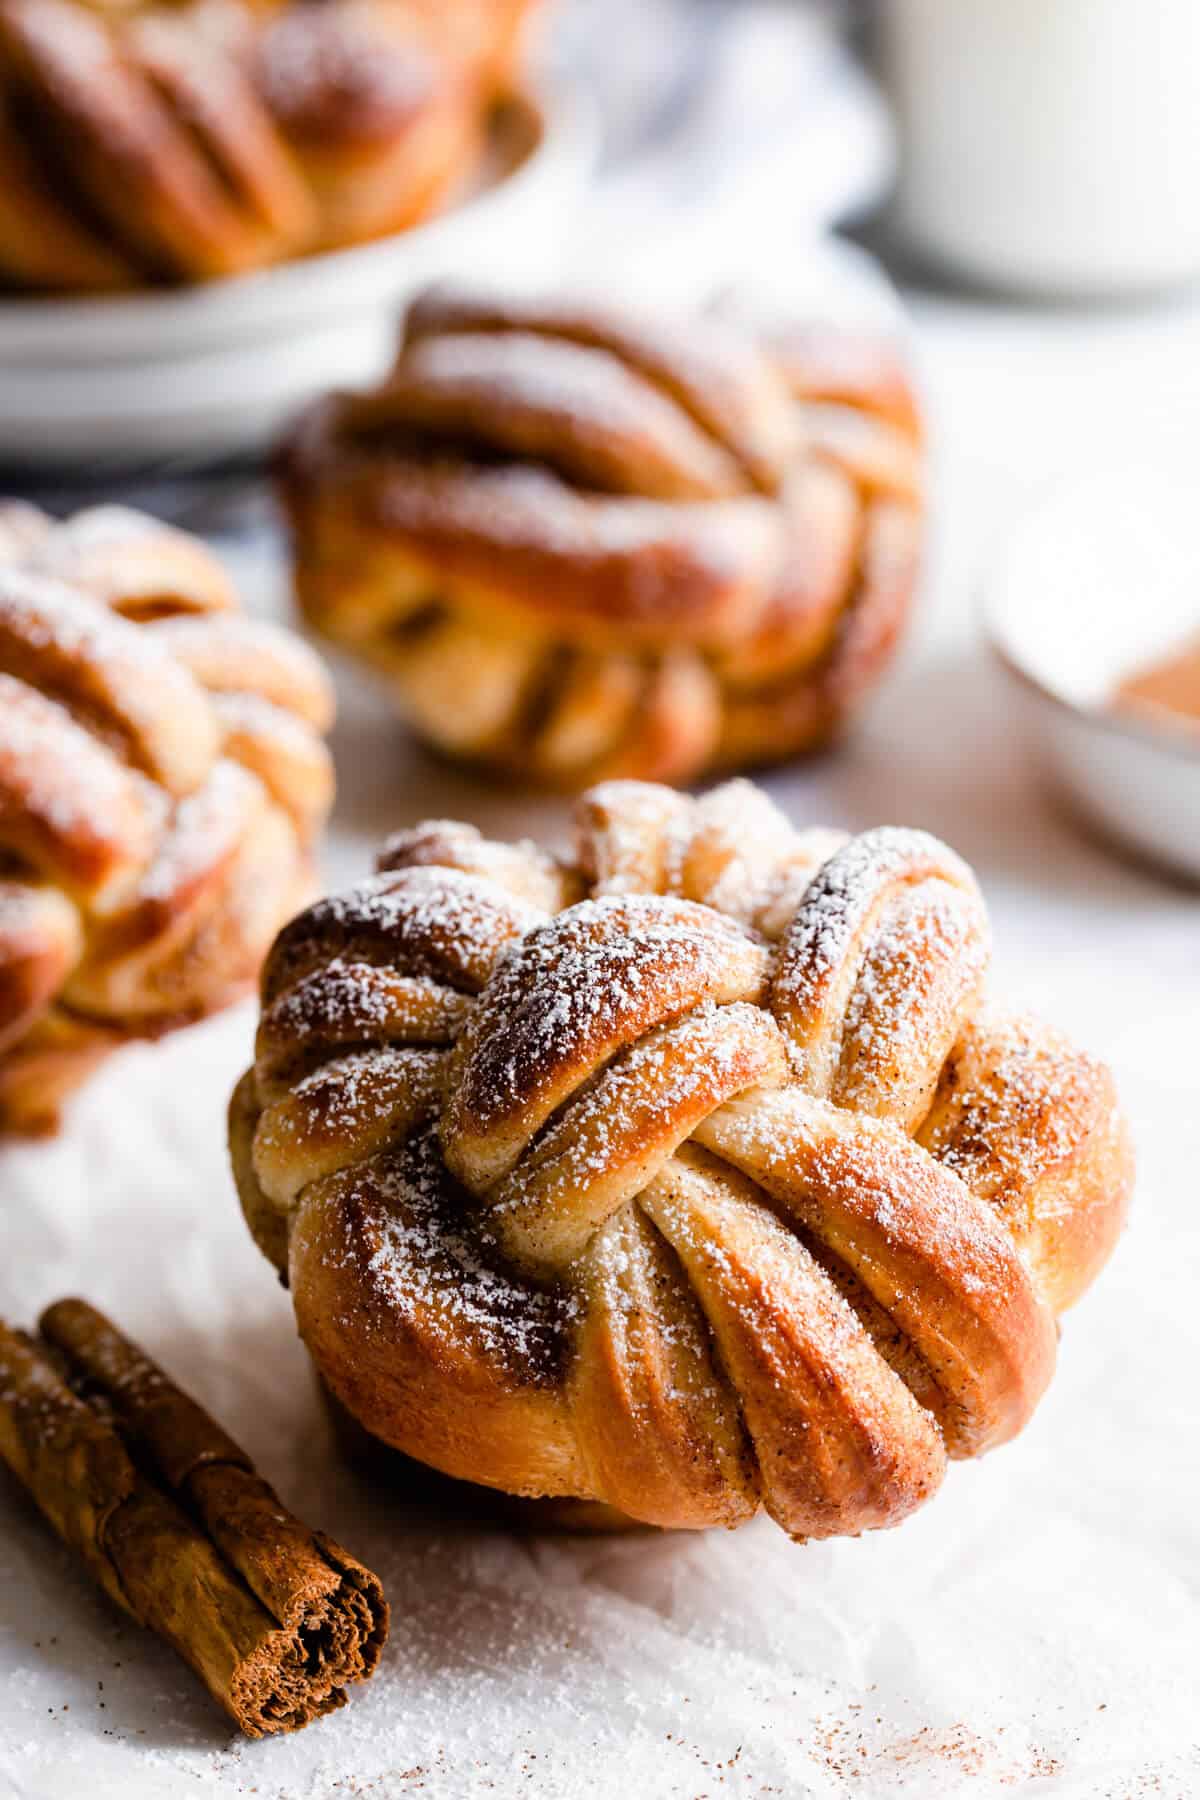
Gently flatten each strip, patting it with your hand. Next, make two cuts down the length of each stripe. Each stripe should have three strands. Plait them together and roll it up along its length to create knot.
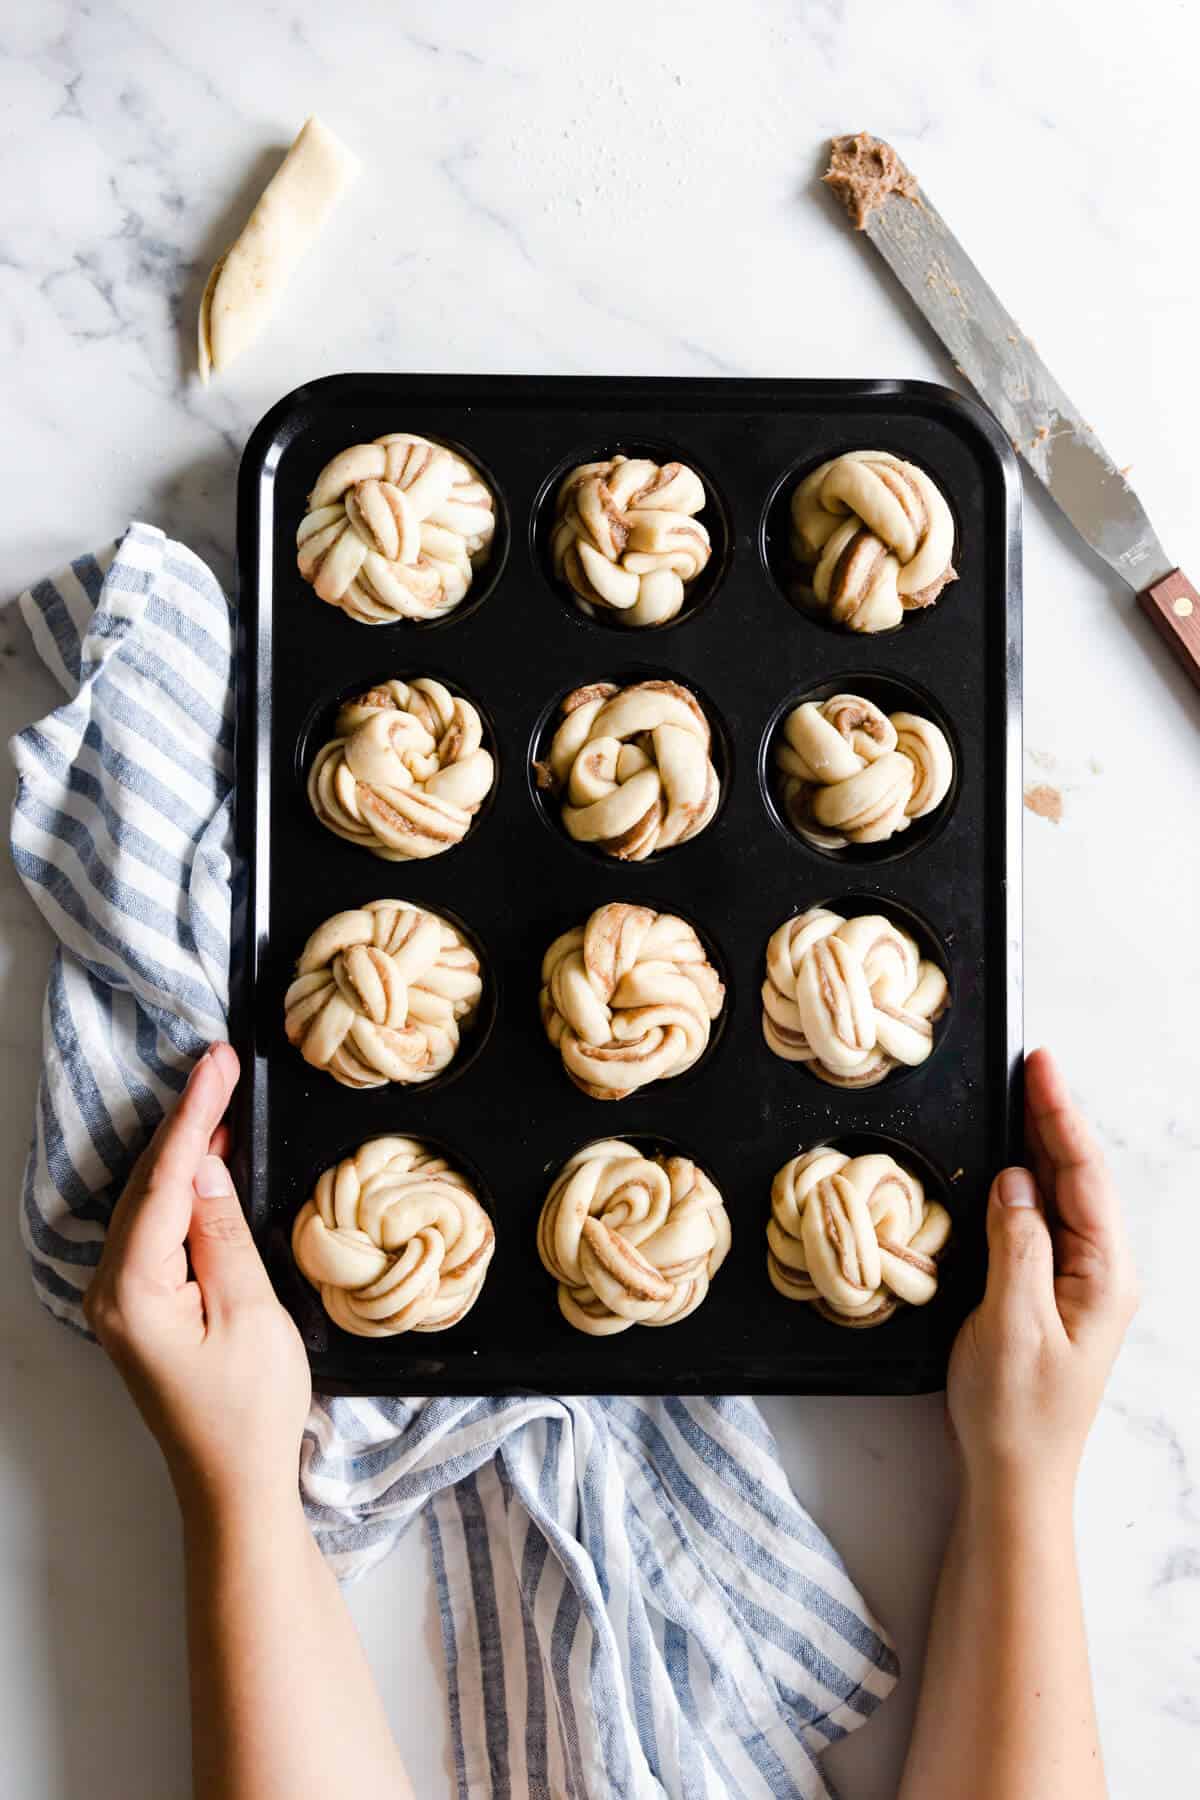
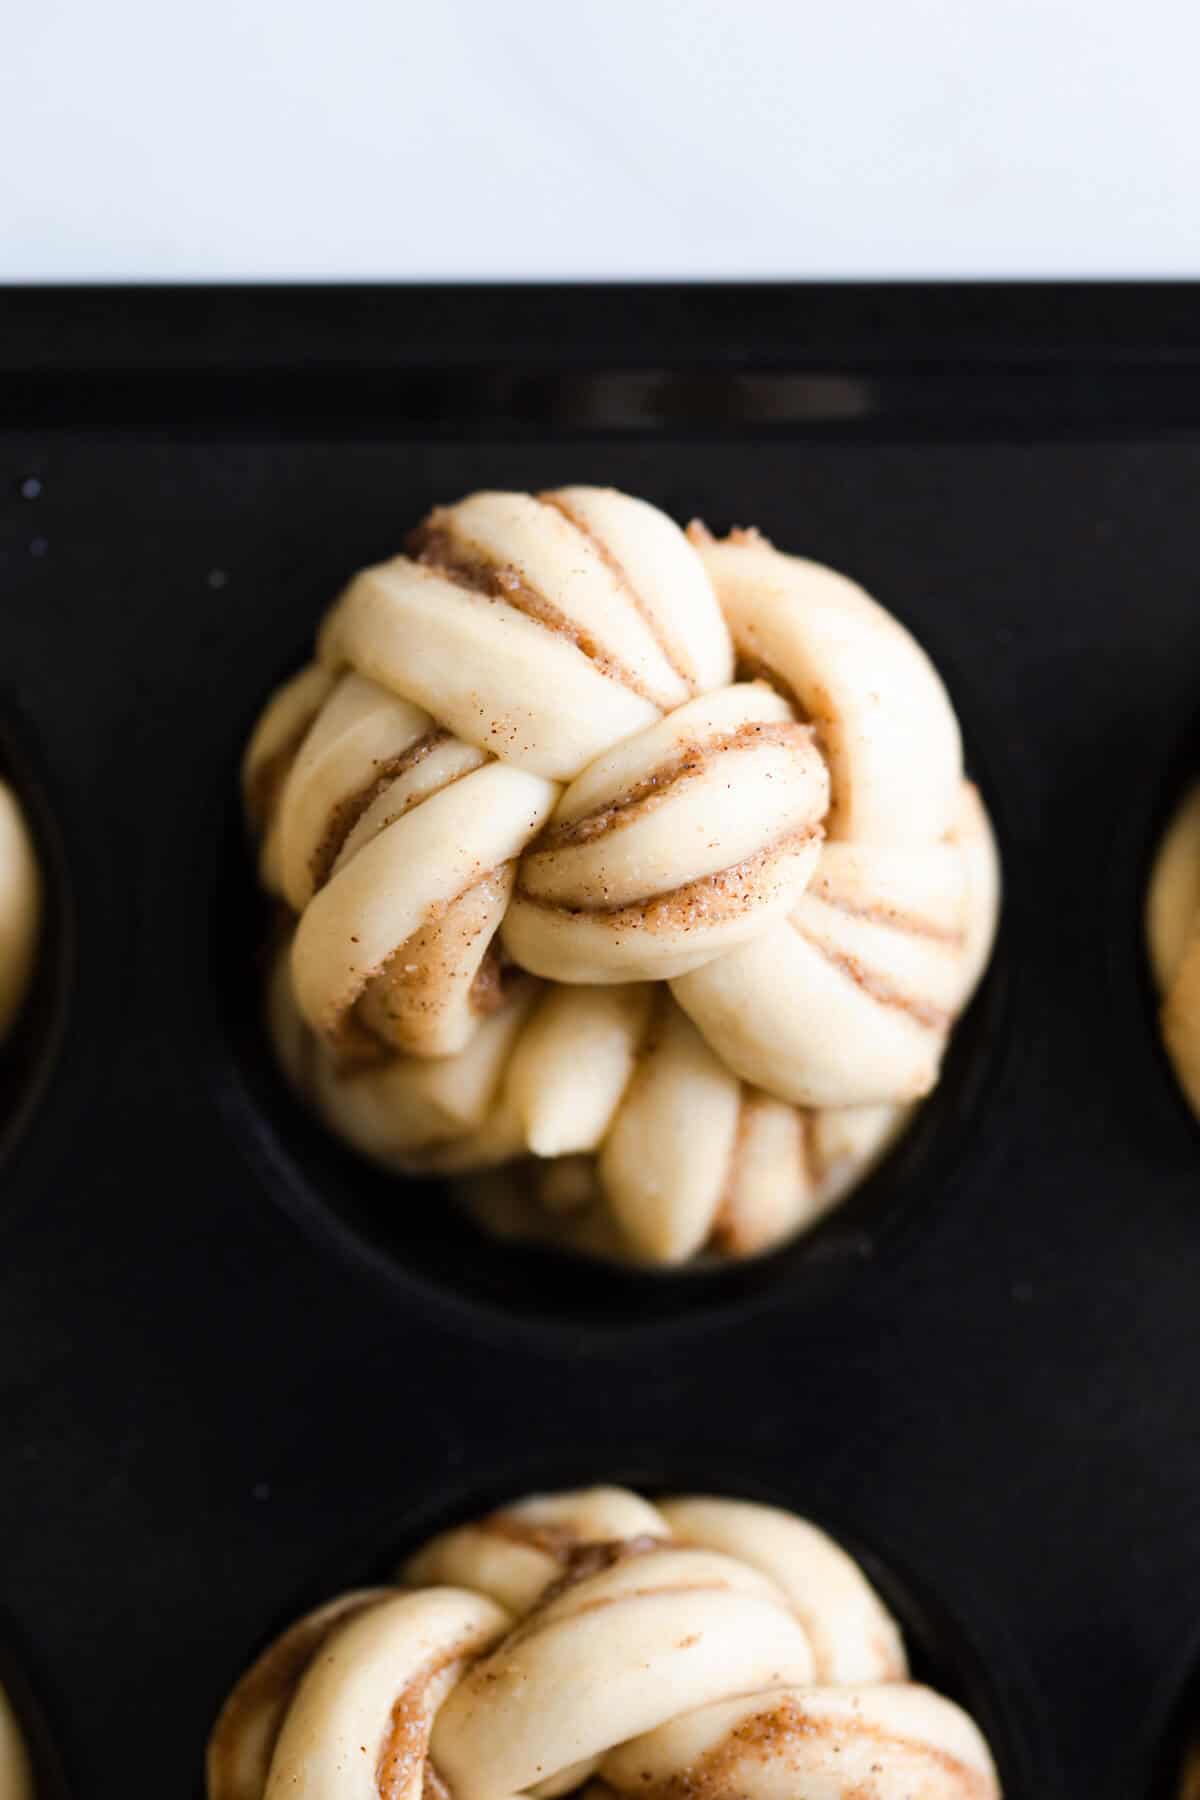
Transfer into lightly greased muffin tin, cover and allow them to prove for 45 minutes- 1 hour.
Make ahead and storing instructions
You can prepare the dough for the buns a day before and store it in the fridge overnight. You can also shape the buns, place them in the greased muffin tin and place them in the fridge overnight. Next day, simply remove from the fridge and allow them to sit at room temperature for about 1-2 hours. Brush with egg wash and bake as per the instructions in the recipe.
These buns are best to be served while fresh and warm, on the same day. If by some miracle, you have any leftovers, simply cover them in plastic wrap and store at room temperature for 1-2 days.
As always, thanks for reading today's post. If you try this, or any other of my recipes, make sure to leave me a comment or a rating below the recipe card! It always makes my day to hear your feedback! Feel free to follow me on my Instagram and Pinterest too!
📖 Recipe
Twisted cinnamon buns
Equipment
- Freestanding mixer
- 12 hole muffin tin
- Pizza Cutter
Ingredients
For the dough:
- 250 ml milk any type
- 60 g unsalted butter cubed
- 500 g strong white bread flour
- 15 g fast-action dried yeast
- 100 g caster sugar
- 1 teaspoon salt
- 1 medium egg
For the filling:
- 150 g unsalted butter softened
- 200 g soft light brown sugar
- 2 teaspoon ground cinnamon
- 1 small egg for eggwash
- 2 tablespoon icing sugar for dusting optional
Instructions
- Read the post tips before you start!
- Place the milk in a small saucepan and heat it up until it is lukewarm. Add cubed butter to the lukewarm milk, swirling the saucepan every now and then to encourage the butter to melt. Remove from the heat and set aside.
- In a bowl of a freestanding mixer fitted with a hook attachment, mix together the flour, sugar, salt and yeast. Add milk and butter mixture followed by the egg. Mix on low speed until dough comes together, about couple of minutes, then increase the speed to medium and and mix for 8-10 minutes until you have a smooth and elastic dough that no longer sticks to the sides of the bowl.
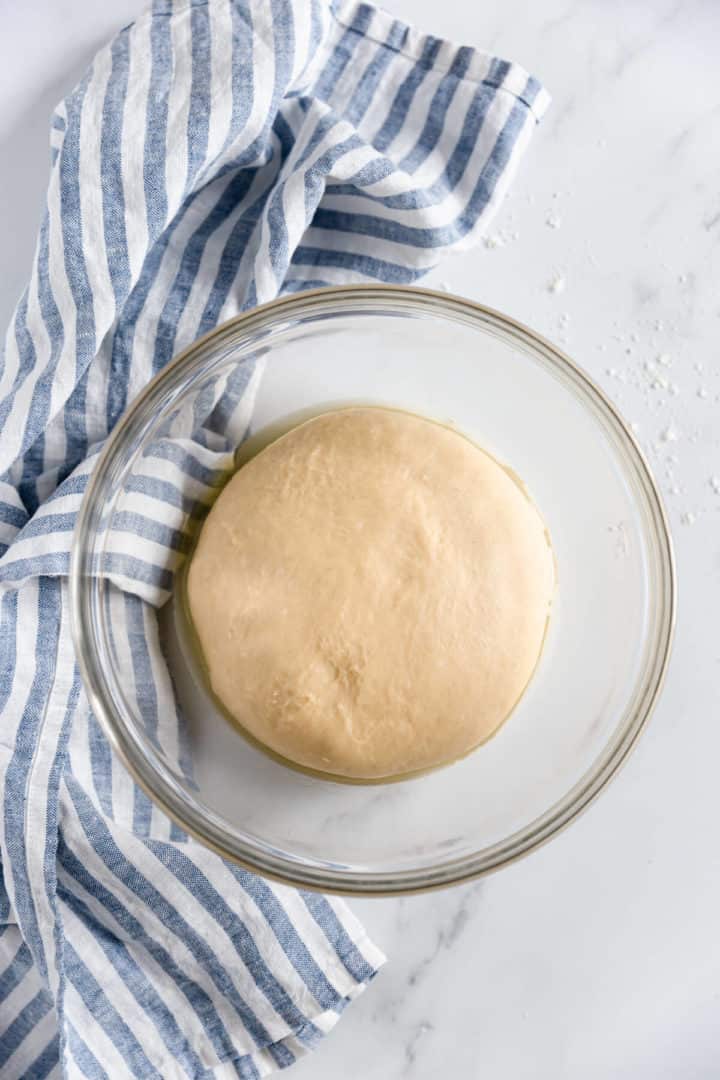
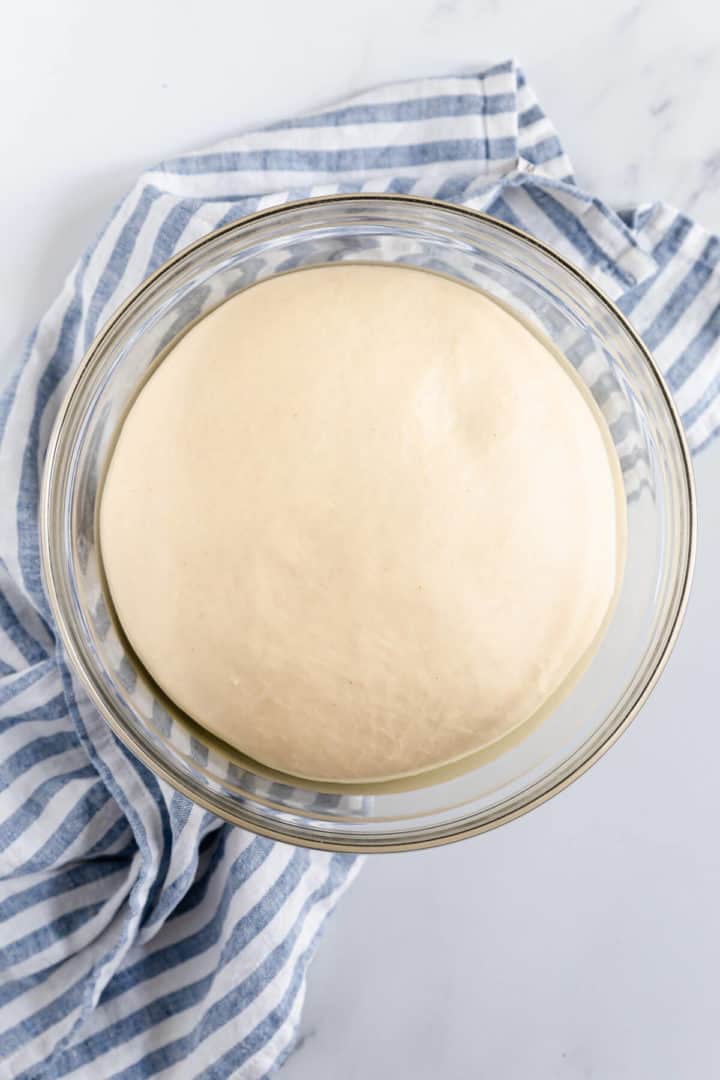
- Transfer the dough to a lightly floured surface and using your hands, roll it into a ball. Place it in a clean, large bowl, lightly greased with some olive oil. Cover the bowl with clingfilm or reusable kitchen wrap (clean shower cup works great here!) and leave somewhere warm for an hour or until it doubled in size (depending on the temperature in your kitchen, this may take more, or less than 1 hour).
- In a meantime, prepare the filling. Place softened butter and brown sugar in a bowl of a freestanding mixer and beat together on medium speed until pale, fluffy and well combined. Reduce speed to low and add ground cinnamon. Mix until combined and set aside.
- Remove the dough from the bowl into a lightly floured surface. Gently knock out the air from it, then stretch it into rough rectangle shape. Using a rolling pin, roll the dough into larger rectangle, roughly about 40 x 50 cm, with the longer edge facing you.
- Spread the filling over ⅔ of the top of the dough, leaving ⅓ of the dough clean. Fold the clean part of the rectangle towards the middle, then fold the other end of the dough on top of that (watch the video to see how easy it is!). Use a rolling pin, roll it over the rectangle to flatten it out and stretch a bit.
- Using a sharp knife or a pizza cutter, trim off the edges of the rectangle. Divide the rectangle into 12 equal pieces, widthways, each strip roughly about 4 cm across. Next, use a knife or pizza cutter to cut twice down the length of each strip to make three strands. Plait the three strands together, then roll it up along its length to create a knot. Repeat with remaining strips.
- Lightly grease 12-hole muffin tin, then transfer the knots into it. Cover and allow to prove for 45 minutes to 1 hour, or until they have doubled in size.
- Preheat the oven to 170 C. Brush the knots with eggwash and bake in the middle shelf of the oven for 15- 18 minutes or until golden brown. Don't worry if some of the filling has leaked. Remove from the oven and allow them to cool only for a minute or so, then transfer the buns onto a cooling rack. Do not leave them to cool in the tin, as it will be hard to remove them later. Dust with some icing sugar (optional) and enjoy them while still a bit warm!
Please note that all my recipes are developed and tested in metric grams. I recommend that you use digital scales for a more accurate results. I have provided a conversion to US customary in the recipe but please note that I haven’t tested using this method.
Video
Notes
- Do not go overboard with the filling! Thin, but even layer is what you are aiming for.
- Don't worry if some of the filling comes out and spill from the sides while the buns bake. This is normal.
- Once baked, allow the buns to cool in the tin for only a minute or so. Transfer them to cooling rack while they are still hot, before the leaked sugar and butter sets and becomes hard.
- Make ahead instructions: Prepare the dough all the way up until step 5. Transfer to the fridge overnight. Next day, remove the dough from the fridge, let it sit at room temperature for 1-2 hours and proceed to step 5 in the recipe card. You can also place shaped buns in the fridge overnight. Cover the buns with plastic wrap or clean tea towel and place in the fridge. Next day, remove the buns from the fridge and allow them to sit at room temperature for at least an hour, then bake as per the instructions in the recipe card.
Nutrition
If you would like to receive any future recipes straight to your inbox, make sure to sign up to my mailing list! I will never send you any spam or share your data with anyone. You can also unsubscribe at any time.

Joel
Very good recipe. Suggestion, put a pan beneath your muffin tins to catch any drippings. My muffin tins must not have been big enough b/c the sugar mixture oozed out and onto the oven floor.
Faith
Please, Can I use regular white sugar or chocolate spread? I don't have brown sugar.
Anna
Hello! Yes, white sugar will work absolutely fine 🙂
piriya
Hi, I made them and they were delicious; however, they didn't look like the picture after they were baked. When I put in the muffin tins, they looked pretty as picture but after they baked, they were knotted on top but on the bottom, they took the shape of the muffin tins. What did I do wrong?
Anna
Hi Piriya, thanks for the feedback. Whenever I bake mine, they too always take a shape of the muffin tin on the bottom part, it's just the way the dough expands and shapes in the baking tin. You could experiment with a shallower tin, but it may cause the butter from the filling to leak outside.
Nene
Delicious ... one question can i freeze them to have them always available, thank you so much you are great
Nene
Anna
Hi Nene, thanks for the feedback. Baked buns can be frozen for up to 2 months. Thaw them in the fridge overnight and warm them up in the oven before enjoying.
Kelly Tan
Hi, i’ve just baked these, my kitchen is filled with cinnamon scent. I have a question on the buns, are they meant to be hard crust on the outside and soft inside? They taste good but i felt like maybe the sugar melted and made the buns having a crunchy crust on the outer layer.
Sebnem
Hi Anna,
I loved the recipe! But my dough becomes dense every time and the texture is not like yours. Could you please tell me what I am doing wrong?
Thank you!
Anna
Hello Sebnem, thanks so much for your feedback! Glad to hear that you like this recipe, and sorry to hear that your dough is on the dense side. There could be few reasons for it, first- overworking the dough, make sure to knead it no longer than required, if using an electric mixer, it should come together in 8-10 minutes, but longer if kneading by hand (about 15-20 minutes). Letting the dough to prove for longer than required could also result in denser dough. As soon as it has doubled in size, it's good to go. It could also be a type of flour you are using, some bread flours can be really strong and make the dough tough and too dense. You may want to try mix of plain/ all purpose flour and strong bread flour (50:50) and see if that will make the dough softer. Hope this helps, happy baking!
Petra
Fantastic looking and soft und yummy 🙂
I used apricot jelly and peanut butter.
Thanks for the instructions and the recipe!
Anna
Hi Petra, pleasure all mine, thanks so much for your feedback! Apricot jelly and peanut butter sounds like an amazing combo! I must try that soon!
Bridget
These were good and not hard. Trust folks when they say use half the cinnamon filling! I would also add more cinnamon, but again, use only half (if that) of the filling.
Anna
Thanks so much for the feedback Bridget, I'm so happy to hear that you enjoyed this recipe!
Rads
I just made these! Omg they are the yummiest cinnamon buns I've ever made and tasted.
I used Oat Milk instead if Cows Milk and I only ended up using 2 thirds of the filling mixture.
Definitely saving this one!
Anna
Hey Rads, I'm so happy to hear that you tried and enjoyed this recipe! Great to hear that it worked with plant-based milk, thanks so much for your feedback!
Cynthia
Hi Anna,
Made them yesterday and they Delicious!! but i find it little hard . Wondered is it supposed ti be hard?
Anna
Hey Cynthia, thanks for your feedback. They shouldn't be hard, it's a soft and squidgy bun, but if the dough was over-proved or kneaded for too long, it could come out a bit tough, resulting in harder texture of the buns.
aeris
i was so worried these wouldn't work for me since i made so many ingredient substitutions just based on what i had in my pantry; i used all-purpose flour instead of bread flour, vegan butter instead of dairy butter, macadamia nut milk instead of dairy, active dry yeast instead of fast-action yeast, and golden sugar instead of light brown LOL
i needed to double the proving time, but other than that, they turned out fine! my butter-cinnamon mixture was a bit more liquid-y than yours and leaked a bit while braiding (but that was just because of the brand of butter i had 🙂
they were so delicious and gorgeous, my family loved them!
Anna
Hi Aeris, thanks so much for this positive feedback and review! I'm so happy to hear that you enjoyed this recipe, and it's great to know that it worked with all the substitutions you've made! Well done!
Beth
A new favorite...It took me 2 tries on these but they were amazing! In your notes it says to activate the yeast, but when I did that the dough was a goopy mess that couldn’t be rescued & went into the trash. I’m just wondering if you know why, because your tips say to be sure to activate the yeast before adding to dry ingredients-but that definitely didn’t work for me. Round 2 I added the dry yeast to the dry ingredients & counted on the warm milk/butter mixture to activate the yeast. They were delicious.
Anna
Hi Beth, so happy to hear these are your new favourite! Depending on the type of the yeast you are using, it may need to be activated first. If you are using instant or fast-action yeast, then it can be added straight to your dry ingredients without need to be activated in liquid first. It's always best to check the instructions on the packet. The type of yeast I was using in this recipe did require dissolving in liquid first. Let me know if you have any other questions!
Adam
Hi Anna,
I've followed everything to the letter but don't seem to have the definition on the strips that you to, they're rising to form something of a ball rather than those delicate knots... Any idea what might be going on? That aside, they smell incredible so that much is good 🙂
Thanks!
Anna
Hey Adam, firstly, thanks for trying the recipe and taking time to leave a comment! Lost of definition could be caused by few different things, type of yeast used, oven temperature, the amount of filling used... If you want, you can shoot me an email and I will be happy to do more troubleshooting with you in more detail?
Dominika
Fantastic! thank you so much! x
Anna
My pleasure, glad I could help!
Rebecca
Hi! Can you explain what you mean by "roll it up along its length to create a knot"?
Anna
Hi Rebecca, all what it means is that once you have shaped the strip into a plait, you then roll it on itself, technically maybe not a knot, but you just roll it into a little bun shape. I recommend watching the video of the recipe itself, perhaps it will be helpful. You can see the exact moment of me rolling it from 1m 18sec to 1m 20 sec on the video. Hope this helps.
Dominika
Hiya, Just wanted to say "thank you " for these! Made them over the weekend and they were simply amazing!
Just one question: would it be advisable to make them in the evening and store in the fridge (as you would a brioche dough) and bake them the following morning? If so, would you just make the dough, put it in straight in the fridge and take it out in the morning and take it out in the morning for the first rise and follow the recipe OR would you rather make the dough, leave it in the warm place to rise, store in the fridge overnight, the it out, make the buns and leave them to rise then?
Uffff, so sorry if confusing you 😉 Many thanks xxx
Anna
Hey Dominika! Thanks so much for trying this recipe, I'm so happy to hear that you enjoyed them! You could make the dough as per the instructions and shape the buns, then place them in the fridge overnight. Next morning, take them out about 1h- 1h 30 min before baking, bring them to room temperature and then bake as per the recipe instructions. Hope this helps, but feel free to ask any questions!
Charlene
Hi Anna
I am going to make these buns tomorrow. I plan on placing them in the fridge overnight and then bake them the following day. I noticed that in the recipe nothing is mentioned about after taking the pan out of fridge you should let them sit for approx an hour at room temp before baking. I just thought you might want to include that in the recipe instructions. I can’t wait to try these. I’m sure they will be delicious. Thanks for the recipe and the instruction.
Anna
Hi Charlene, thanks so much for trying the recipe, and for your valuable feedback, these are some really great points! I have now updated the notes and the instructions in the recipe to reflect that! I hope you enjoyed these buns as much as I did!
ria
you coppied these from richard bertinet
Anna
Hey Ria, I made it very clear in my post that the shaping technique is inspired by Richard's. Sorry to hear that it's not to your liking. Have a great weekend!
Tania
Hi I would like to know if I want to make a batch of 6 instead of 12 would I just half everything? Also what measurements would I have to roll the dough to?
Anna
Hi Tania, yes, you can halve the ingredients to make smaller batch. Roll the rectangle to half the size of original, so 20 x 25 cm. Hope this helps. Happy baking!
Maja
Thank you for the lovely recipe! I saw them also at the Richard Bertinet YouTube video. Love them!
Anna
Hey Maja, pleasure all mine! I just had to re-create them after seeing Richard's video, it was too good not to!
Isabelle
These look stunning! Bookmarked for a snowy day!
Anna
Thanks Isabelle, let me know if you try baking them!
Farrukh Aziz
Oh my gosh! This twisted cinnamon buns were star at the table for our Sunday breakfast - so so soft, ultra delicious! You know what was the best part - I was so happy and content to see my little one's smiling face and happiness she had when she saw this on her plate, it's her most favorite baked good. Thank you for sharing this gorgeous recipe, beautiful photos! 🙂
Anna
Thanks so much for this lovely review Farrukh, I'm so happy to read that you and your family enjoyed these cinnamon buns! They're favourite at our house at the moment, and I love how they look really fancy, but are actaully easy to make. Thanks again, have a great week ahead!
Jo
Those twisted cinnamon buns are work of art. Looks so amazing and absolutely delicious! My mouthis watering looking at them.
Anna
Thank you Jo! Glad to hear you like the look of these buns, I hope you will try the recipe in the near future!
Amanda
Do yourself a favor and make these cinnamon buns! They turned out beyond gorgeous and had the perfect soft, buttery texture. The filling was perfectly spiced too. These would make such a fun holiday breakfast, so I'll definitely have to make them again soon!
Anna
Woooo!!!! Amanda, thanks so much for this positive review! I'm so happy to read that you've made these and enjoyed them! Made my day!
Marisa F. Stewart
I know what I'm making for brunch next Sunday -- the twisted cinnamon buns. Not only are they adorable but with the cinnamon sugar filling I know they'll be a huge hit. There is nothing better smelling than fresh cinnamon rolls. My mouth is watering thinking about them.
Anna
Aww, that's so great to hear Marisa, thank you darling! You are so right, there is nothing better than an aroma of freshly baked cinnamon buns in the house!
Tammy
These are some of the prettiest cinnamon buns I've seen! They look so soft and wonderful...I wish I could reach in and grab one!
Anna
Thank you Tammy! So happy you like the way these look, I hope you will try the recipe and enjoy the taste of these buns soon!
Marta
These were not only delicious but decorated out breakfast plates! The twists made them look like centerpieces.
Anna
Yay! So happy to hear that, thank you so much Martha! They really are great eye-catchers!
Valerie Skinner
What a cute way to serve cinnamon rolls! This is just in time as I have a Christmas AND Thanksgiving brunch. Thank you for the great idea.
Anna
Happy to be of service Valerie! They will make perfect addition to festive baking!
Kathryn Donangelo
This reminds me of a cinnamon roll and croissant, my two favorite indulgences! This was so easy to make and I had leftover yeast I wanted to use up and this recipe was perfect. Will be making again for the holidays! Thank you!
Anna
Hey Kathryn, I'm so happy to hear that you've tried and enjoyed these! I think they look much more complicated than they actually are, and once you've made them, it's super easy! Thanks for this positive review!
dishnthekitchen
These twisted buns look so fancy! I can just imagine them as part of a beautiful brunch spread. What a treat!
Anna
Thanks so much! They never fail to impress friends and family, I'm yet to meet a person who didn't enjoy these!
Colleen
These buns are not only beautiful, but they also look so incredibly tender and soft. Thanks for the step by step instructions. This might be my next baking day project!
Anna
Hey Colleen, thanks so much, I hope you will give them a go, they're definitely worth it! Let me know if you try the recipe!
Carmen
Hello!
Made them yesterday and they were a great success. Delicious!!
Thanks for sharing!
Carmen.
Anna
Hey Carmen, thanks so much for stopping by and leaving the review! I'm so happy to hear that you tried and enjoyed the recipe for these buns! Have a great week ahead! x